|
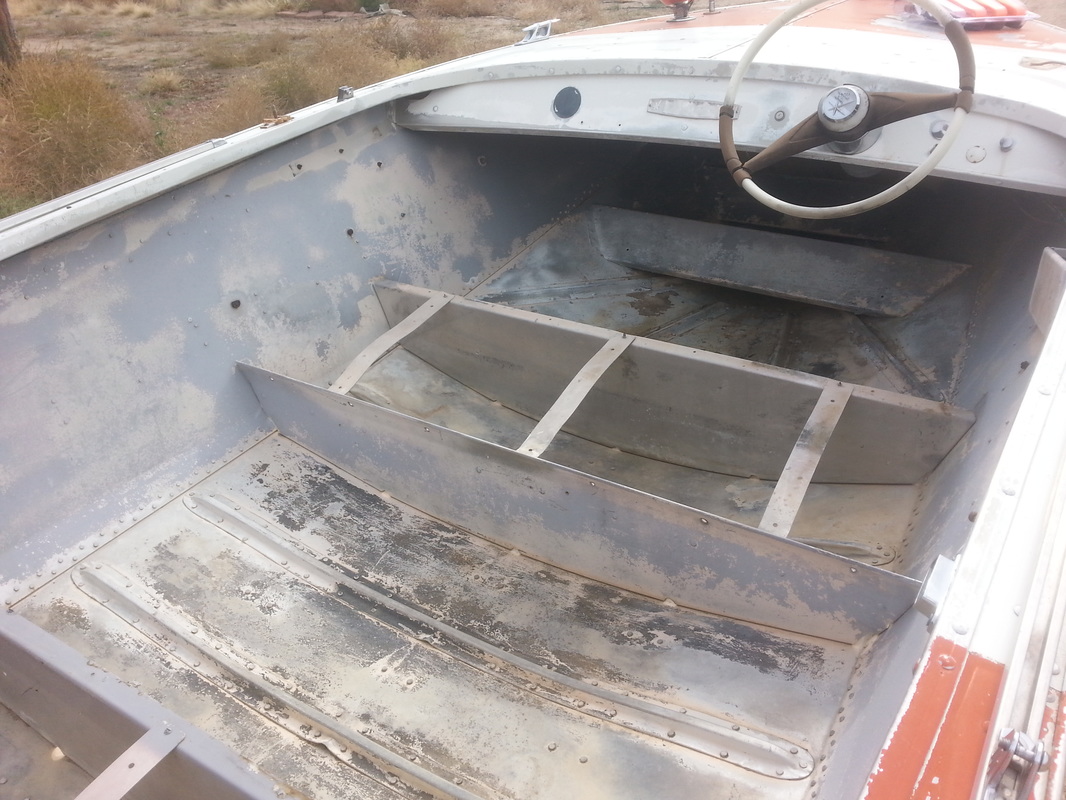
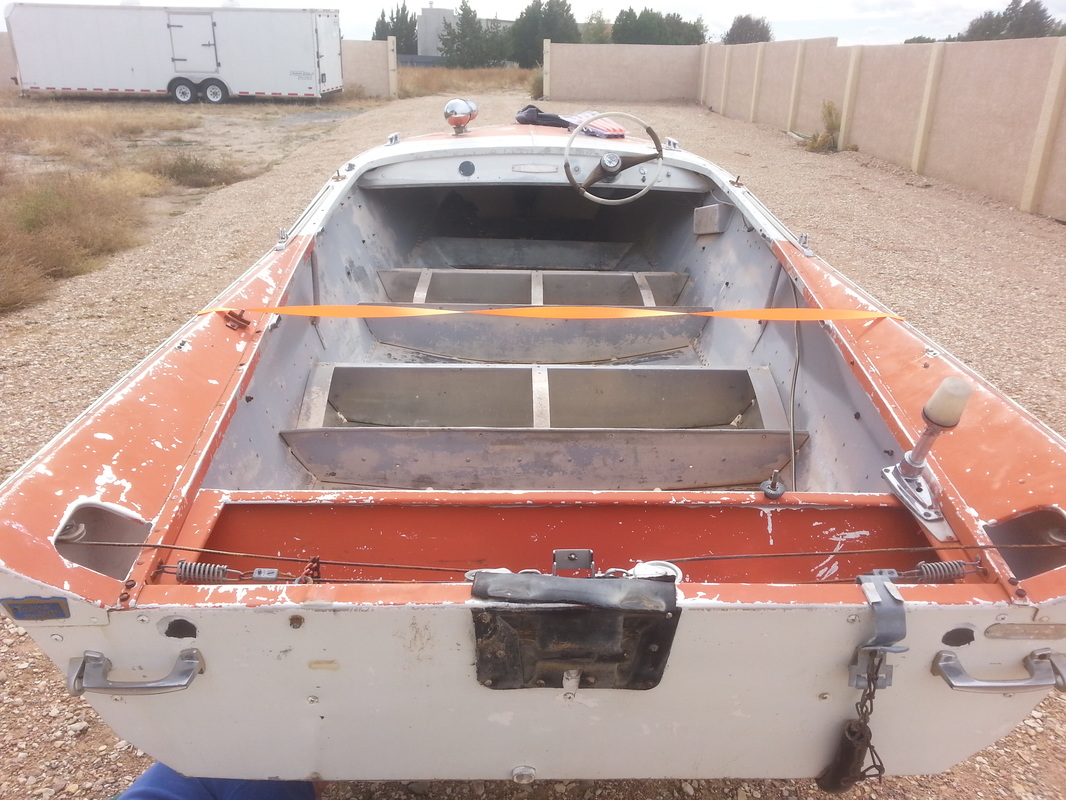
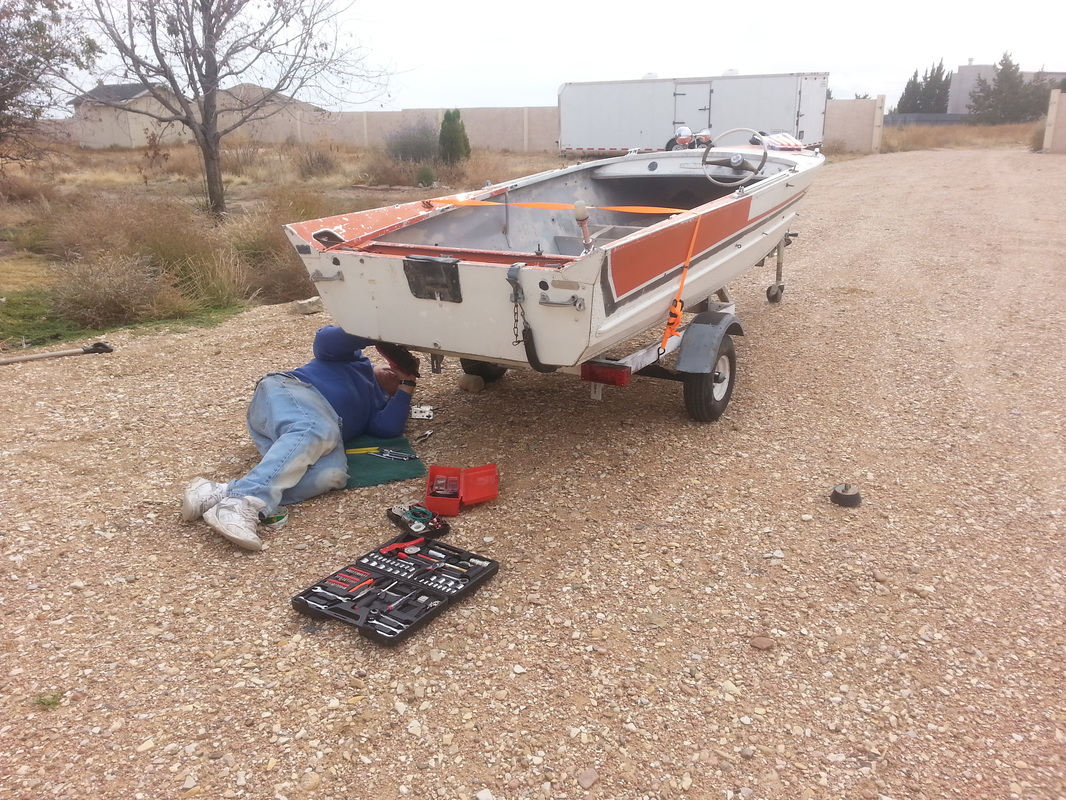
Well, I decided to start this refit out with a bang and tackle the most exciting part of any boat, the trailer…wait, crap, the trailer? Did I just type the trailer…yep, looks like it, and it’s too late to go back now. Just hit the delete key and go back, you say? No can do, in this blog we look forward, not to the past, we must press one…oops, I mean press on, no time to fix typos. So, the trailer… While it may not be the most glamorous part of your boat, it is none the less extremely important and can often be overlooked. I would say that far more than half (68.25%) of the boating accidents I have been a party to have involved a trailer. From launching follies, to blown tires to, running into posts at a gas station, trailering mishaps are certain to liven up your boating experience. Luckily, I have not yet been the responsible party for any of these trailering fiascoes and I attribute that to my regular maintenance on my trailer and in setting it up correctly from the start…though I did have a little bit of an issue with tongue weight and getting whipped around while towing my Yukon Delta…er, I mean never mind, nothing to see here, I never make mistakes. I think my favorite was on a trip back from Lake Powell when my uncle took a corner a little too tight and hit the curb with the right wheel of his 14-ft Elgin boat trailer. No sooner did it land on the other side of the curb, than the opposite wheel popped off and went rolling away into the intersection. As if to say, “not without me,” the right wheel quickly followed suit, rolling after its companion. My uncle was left to drag his trailer into the parking lot and replace the hubs the next day. As near as we can figure, the hubs got so hot that the quenching in the water during launching made them brittle and led to their fracturing. But I digress. The Lone Star’s trailer was a later addition to the boat, as its title clearly indicates that it is a 1967 Montgomery-Ward Sea King. Lone Star offered their own line of trailers for use with their boats in 1960s, what I have decide to call the royalty line as each of their different sizes had a different royal title (Prince, Baron, Duke, King, and Queen). The engine I received with the boat was a 1968 Evinrude Fastwin. That, coupled with the pronounced waterline I discovered on the first layer of paint, leads me to believe that the boat was kept on the water for the first 6-years of its life and was repowered and put on a trailer sometime in 1968 to sell (just call me Nancy Drew…er, I mean Encyclopedia Brown). In any case, our trailer had seen some better days; sitting in a field for 30-years will do that. I was able to pump up the old tires and pull it from my aunt’s over to my parent’s house to do some initial work on it. It was easy to tell there was air in the tires, because I could see it (the air that is), and the lights definitely didn’t work, but taking back roads and at low speeds we made it just fine. Prior to hauling the boat across country to the Pacific Northwest, I decided that I should probably take care of a few items. I first put the boat on a weight loss program and removed everything…even stuff that was nailed down. My dad and I also tackled everything we needed to make the trailer road worthy and not a road hazard. We replaced the wheel bearings and seals, got all new tires (including the spare), and replaced the mismatched taillights with a new set from Harbor Freight. We gave it a good once over and then, after getting some temporary license tags, I set off across the great divide. The trailer made the journey just fine…which is more than I can say for my Subaru, which threw a rod coming down Monarch pass, but that’s another story.
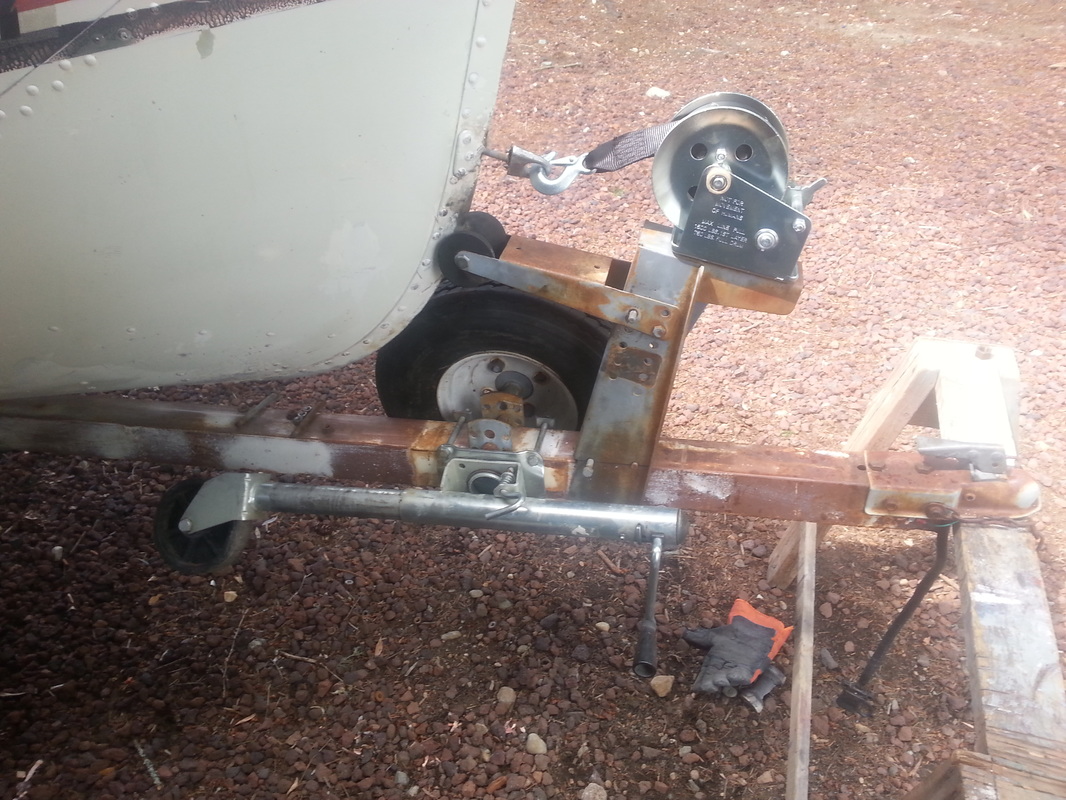
After stripping the paint of the top deck of the boat, I was able to remove it from the trailer and flip it upside down on some sawhorses, which gave me full access to the trailer and allowed me to go ahead and complete its refit. Before I did that though, I took note of the fact that while the trailer fit the boat pretty well, it was clear that the two were not designed for each other and some minor modifications needed to be made. The winch mount and bow stop were too high for the boat. To solve this issue, the previous owner had added a bow eye to the very top of the bow to get a better angle with the winch, but that just didn’t look right to me and I decided to take a cutting wheel to the mounting post and shorten it about 8-inches, which allowed me to line things up with the original bow eye. It took a little finagling to fit the spare tire, new jack, and winch post, but I was also able to move the boat forward almost a foot to improve the tongue weight. Once I had all that cut and mocked up, I disassembled the entire trailer and began restoration in earnest.
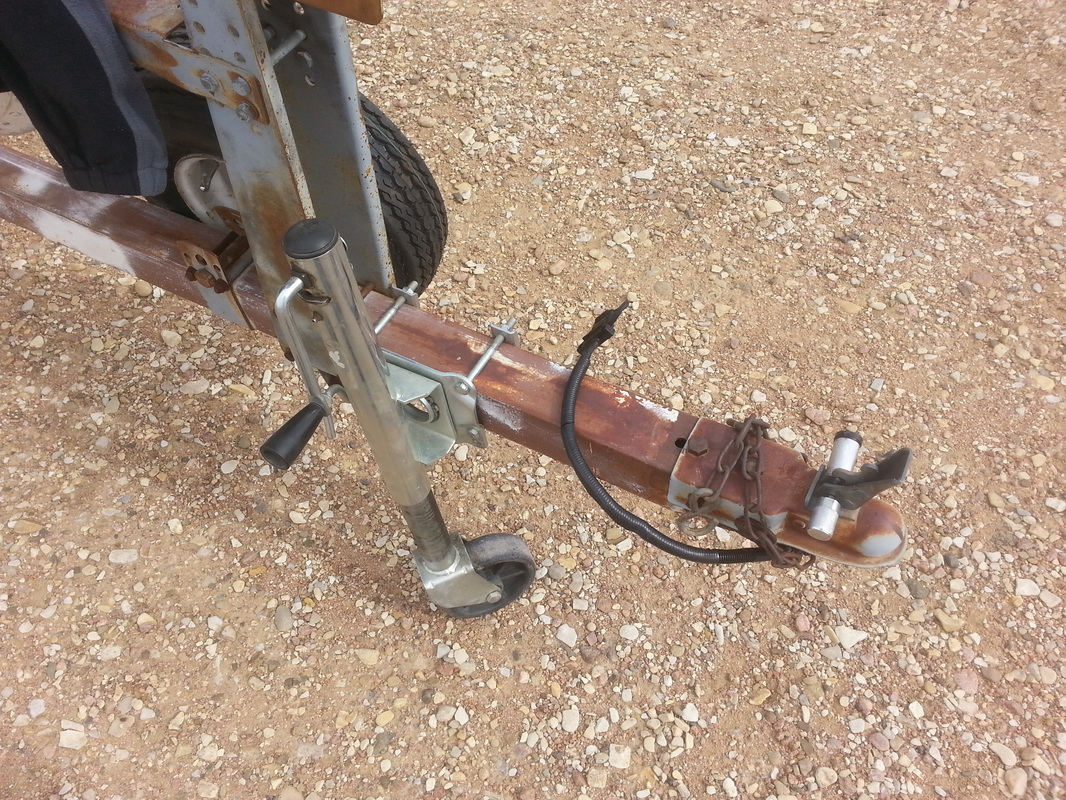
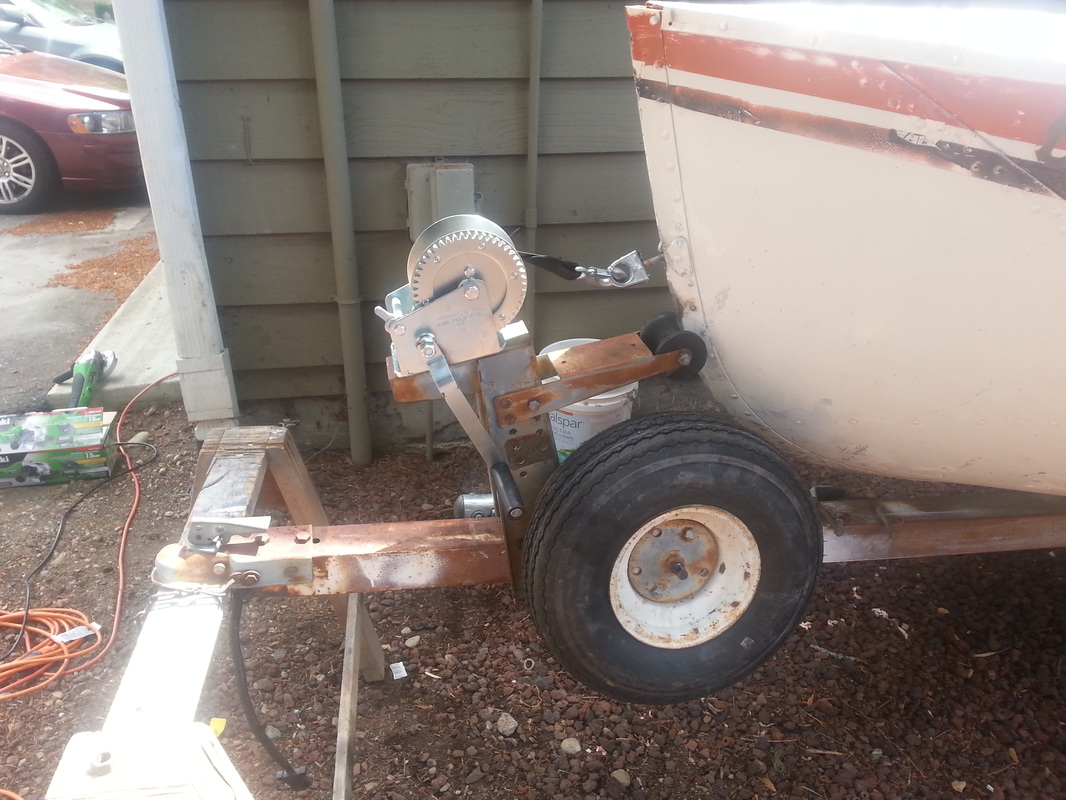
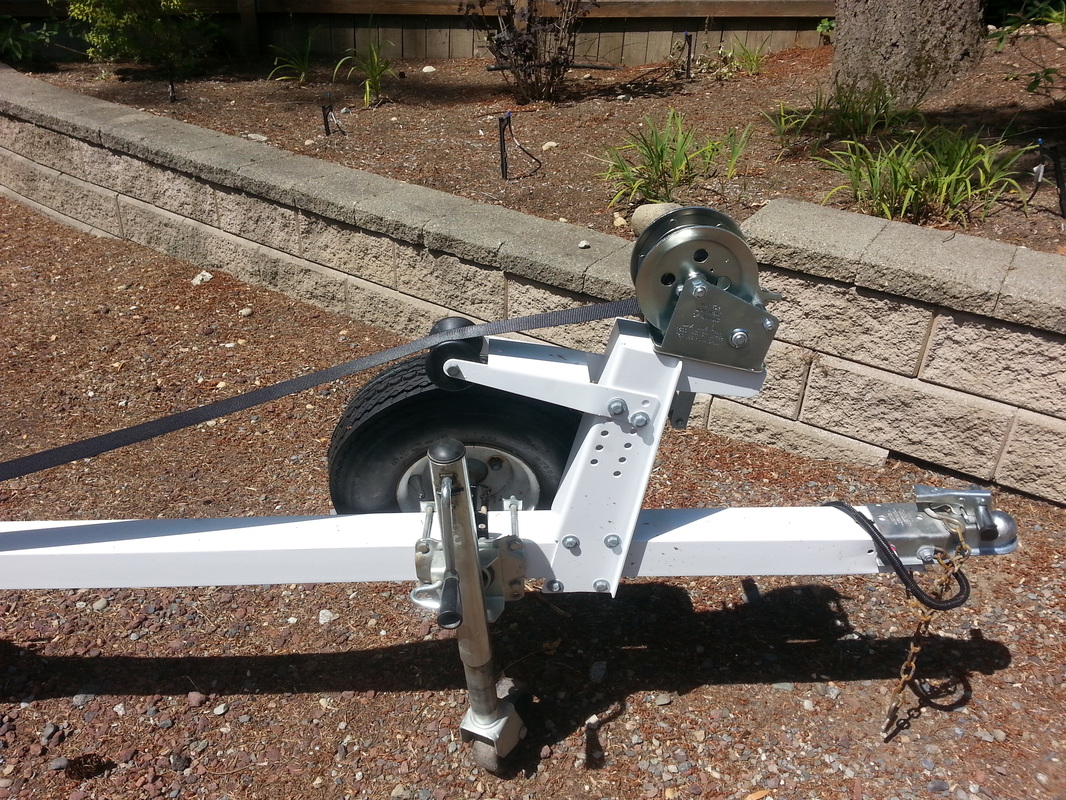
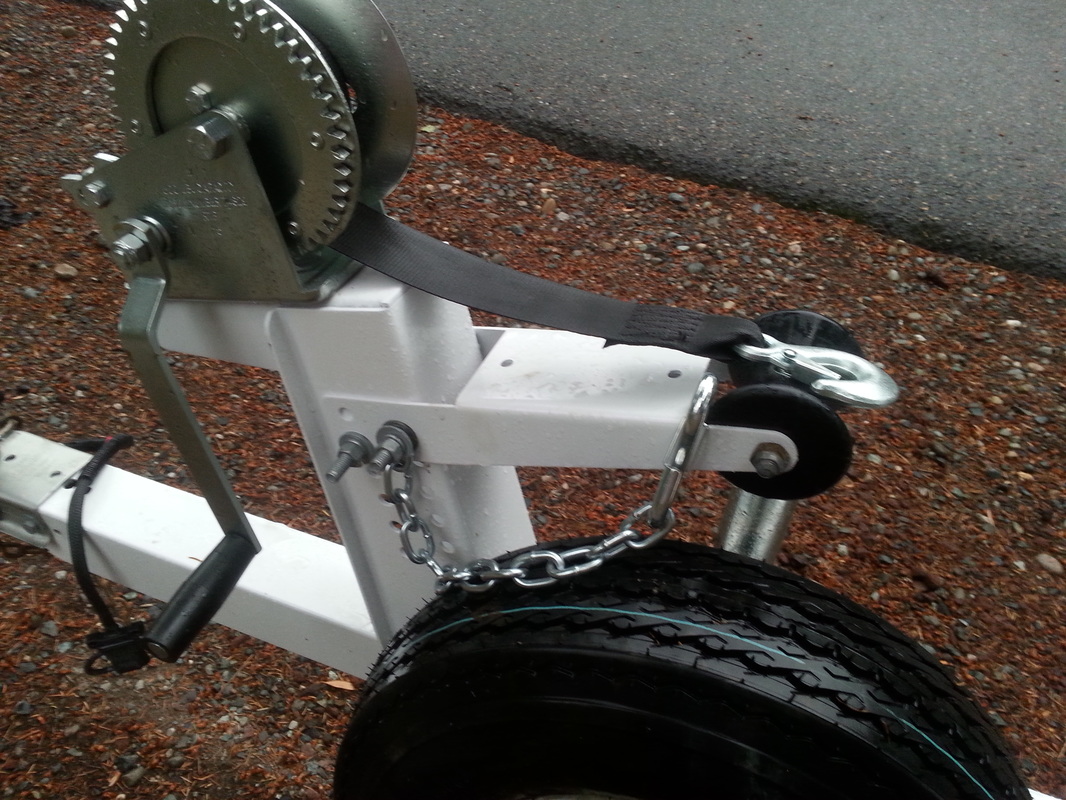
I didn’t completely dismantled the trailer, but took off pretty much everything with the exception of the axle and related components. I pulled the rat’s nest of wires (my grandfather had a more colorful term that I won’t repeat here) that had been cobbled together over the life of the trailer with plans to replace them all. Then it was on to the sanding. I didn’t take the trailer down to bare metal, as what was on there seemed to be adhering pretty well. As a quick test of the stability of your painted surface, you can take a piece of duck-tape (it’s not duct tape, please stop correcting me) and press it firmly onto the painted surface. If it you can remove it without peeling any paint along with it, then the paint is probably stable enough to paint over without needing to be removed. There were a few areas where the paint was scratched or rust was just starting to show through and in those areas I tried to sand down to clean metal and remove as much of the minor surface rust as I could. No matter what, you’re likely not going to be able to get into every crevice and crack to remove the rust with sand paper, so it’s important to use a good quality paint that is compatible with stable rusted surfaces, but you can also attack the rust chemically. I treated the particularly bad patches of rust with Rust-mort before priming; it is phosphoric acid and reacts with iron oxide to form black ferric phosphate, which acts as a protective coating, and water. Now that I had dealt with the rust I could start making the trailer pretty again. I wasn’t going to spend a great deal on the trailer, which despite its importance is kind of utilitarian. I put a couple coats of Rust-Oleum rusty metal primer onto all the parts of the trailer and then coated it twice with Rust-Oleum high gloss enamel, white for the frame and a teal for the fenders. I gave it a quick rub down with a scotch pad in between coats to ensure good adhesion. I also gave the axle and associated components a quick spray with undercoating to protect them before painting the trailer, not worrying too much about the overspray getting onto it. Once all the components were painted, the real hard part came in waiting for everything to cure before reassembling it. In the meantime, I was able to keep myself occupied by working on the bunks and rollers. I decided to replace the bunks with pressure treated 2x4s, which I know is going to get some of you up in arms. Believe it or not, the use of pressure treated lumber with an aluminum boat is a very controversial topic on the internet, second only to ‘chunky versus smooth peanut butter’ (chunky peanut butter is the product of the lazy that can’t be bothered to finish what they started). I would never use pressure treated lumber on the boat itself or in direct contact with aluminum, but in this case I felt like they would be isolated well enough not to be an issue. I covered them with marine carpeting that had a rubberized backing and used good quality marine adhesive, both of which should form a suitable barrier; add that to the fact that the hull will be painted and not bare aluminum and I would be shocked to see corrosion issues. The rollers were, of course, all perished and needed to be replaced. The bow roller was the standard size and was an easy replacement to locate. The keel rollers were a different story. I was forced to look at replacing the entire assemblies as the roller sizes were smaller diameter than any of the replacement rollers I found on the market. Luckily, I was able to find an Atwood roller and bracket that came very close to fitting the existing mounting holes for the back two keel rollers; I just had to ream the mounting holes out slightly to get a perfect fit. Unfortunately, I couldn't find a bracket that would easily replace the forward most of the three keel rollers and I was forced to improvise. I took a replacement roller and shaved it down in order to fit the old bracket. I tightened down a sacrificial bolt through the mounting hole, put the end of the bolt in my drill, and spun it on some heavy grit sandpaper on a flat surface. I kept making black dust until the roller was small enough not to bind in the old bracket. All that was left was to put all the pieces back together. I purchased all new galvanized hardware and went to work; in the span of an hour I had everything back together, which included a new coupler, new winch, and new trailer jack. I installed a new bow safety chain, which can be the difference between your boat ending up on the ramp when your winch fails or staying on your trailer for the trip to the top of the ramp. I then turned my attention to the electrical system.
I purchased a new wiring harness from Harbor Freight and rewired the entire trailer. The wires were easy to pull, just run through the tongue and then run along the frame back to the LED lights that I had previously purchased. After battling incandescent bulbs on trailers for years, LEDs are a welcome relief; with incandescent bulbs, you must unplug the lights prior to launching or retrieving to prevent them from bursting on contact with the water, but even if you did that, I found that often times they would still be hot enough to die upon contacting the cold water. Never mind the fact that I would often forget to plug them back in before heading down the road. My father’s old Dilly trailer had the lights mounted high on trailer loading guides, which was a great solution, but with LEDs you simply don’t have to worry about it and will likely never have to change a trailer light-bulb again. In short, they are definitely worth the minor extra investment up front. Also, while a majority of trailers use the frame to ground the lights, I’ve always found that the ground is the Achilles heel of most wiring setups; inevitably you’ll get a bad ground connection and your lights will start acting funny or not working at all. Instead I ran a dedicated ground wire from the plug all the way back to the lights themselves, which should reduce the possibility of any ground issues rearing their head in the future. The final project for me to complete was to add Bearing Buddies, or a generic imitation of that name brand. It’s a very simple installation, just pop the existing dust covers off your hubs and tap the Bearing Buddy into place. For such a simple installation and a simple product, it adds a great amount of peace of mind. It is simply a spring-loaded plate with a grease-zerk that allows you to keep the grease in your hubs slightly pressurized and prevent water intrusion. When you back your trailer into the water for launching, the hubs are often hot after travel; the sudden cooling of the hubs can contract the air inside and create a vacuum that draws water into the hub. With the spring-loaded Bearing Buddies a positive pressure is maintained and keeps water from intruding. Another great feature that I like to include on my trailers are loading guide posts. I got used to them on my dad’s old Dilly trailer, which had four (2 at the stern and 2 just ahead of the axel), and discovered with my first boat that did not have them on the trailer that I wasn’t nearly as good at putting a boat on a trailer as I thought. They make loading and unloading your boat much faster and easier; I don’t know why everyone wouldn’t put some on their trailer for the $50 or less a set costs. I have purchases a set of guide posts, but I don’t plan to install them until the boat is back on the trailer and I have completed most of the work, since they would definitely be in the way. Again, these are a simple installation that takes less than half an hour and aren’t a complicated piece of equipment. They provide you a reference for where the trailer is when you otherwise wouldn’t be able to see it under the water. To get your boat on the trailer, you just get it between the guide posts and then drive it up onto the trailer. They really make putting the boat on the trailer a breeze. 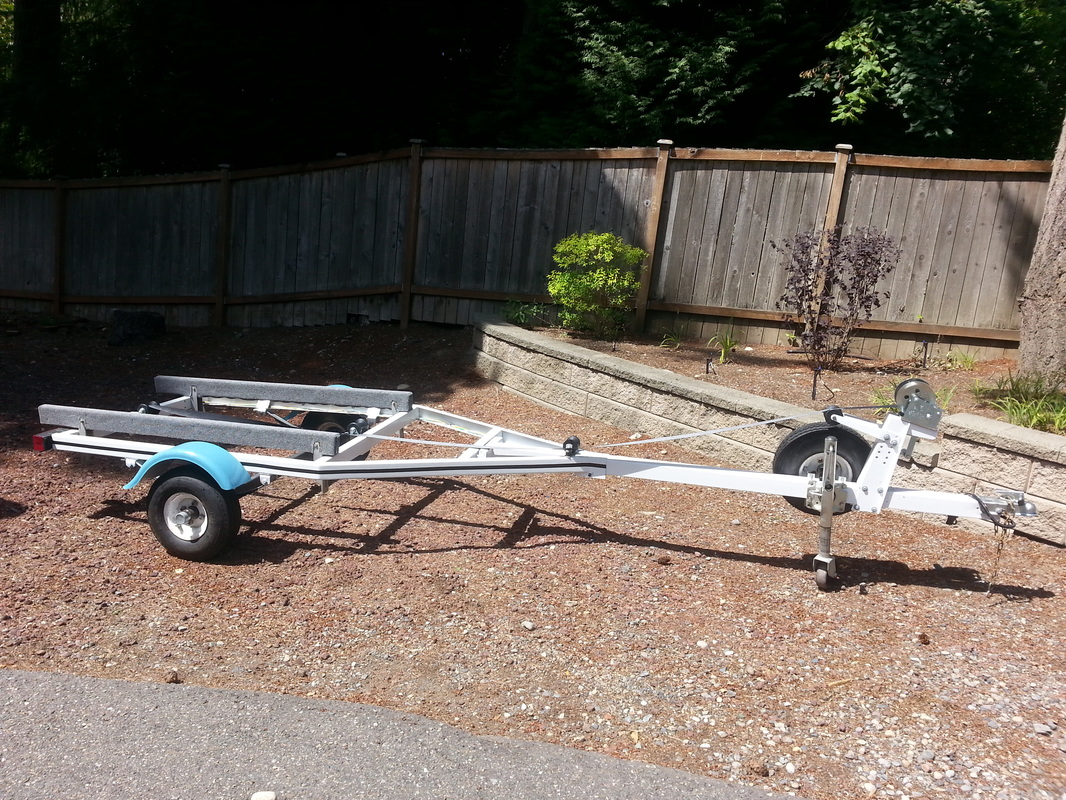 Until next time, here’s wishing you fair winds and following seas.
2 Comments
7/3/2024 23:50:43
Wow, 'Lone Star Restoration - The Trailer' really captures the essence of skilled craftsmanship and restoration expertise! It's impressive to see such dedication to preserving history and bringing new life to vintage treasures. The attention to detail and passion for restoration shine through in every project featured. Looking forward to seeing more of your inspiring work!
jesse
7/10/2024 13:40:52
I can't believe how similar your story is to mine. My 1970? 16' Lonestar was just gifted to me by my AUNT! It came on a 1969 Dilly S-16 trailer and I just was up in Salt Lake repacking Bearings, buying new 4.8x12 tires and planned my escape down I-15 at first light because the lights didn't work! I wanted to do a better assessment and install of submersible ones after I got home. The boat is now off-loaded and I am scraping/sanding the ol Dilly in the garage and going to Pretty it up too! Thanks for the pics and story! Jesse Leave a Reply. |
AuthorBrent Pounds has over a decade of experience in the maritime industry and has been involved in recreations boating since he was a child. See the About section for more detailed information. Archives
October 2016
Categories
All
|
 RSS Feed