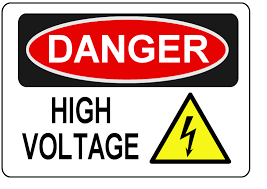
 One note of caution before I begin, in case you don’t remember the song from Louie the Lighting Bug, electricity is dangerous. While the 12-V DC system most likely won’t electrocute you (12-V isn’t high enough to overcome the relatively high contact resistance of the human body…I feel a tangent coming on and I haven’t even started the post yet) it can pose a variety of other dangers (high current can arc and cause fires or burns, and under the right circumstances lead acid batteries can explode). The 120-V/240-V AC system is a very real threat of electrocution (potentially fatal) and also has the risk of being the source of a fire. So, if you’re not comfortable working on your electrical systems, don’t; but you can still enjoy reading about them. I don’t know how I was so deluded that I let my dad convince me that the electronics on Serenity would be fine, but somehow I had this vision of just getting new batteries and having everything fire right up and work like a charm. I mean, nothing was powered when it went under water, it was only under for a couple days, and then it dried out in one of the most arid places in the world; sticking your cell phone in a bag of rice works, and what is the Great Basin Desert, if not a giant bag of rice. Well my giant houseboat shaped cell phone did not come back to life after drying out. As a rule, every piece of electronic equipment that was underwater needed to be replaced.
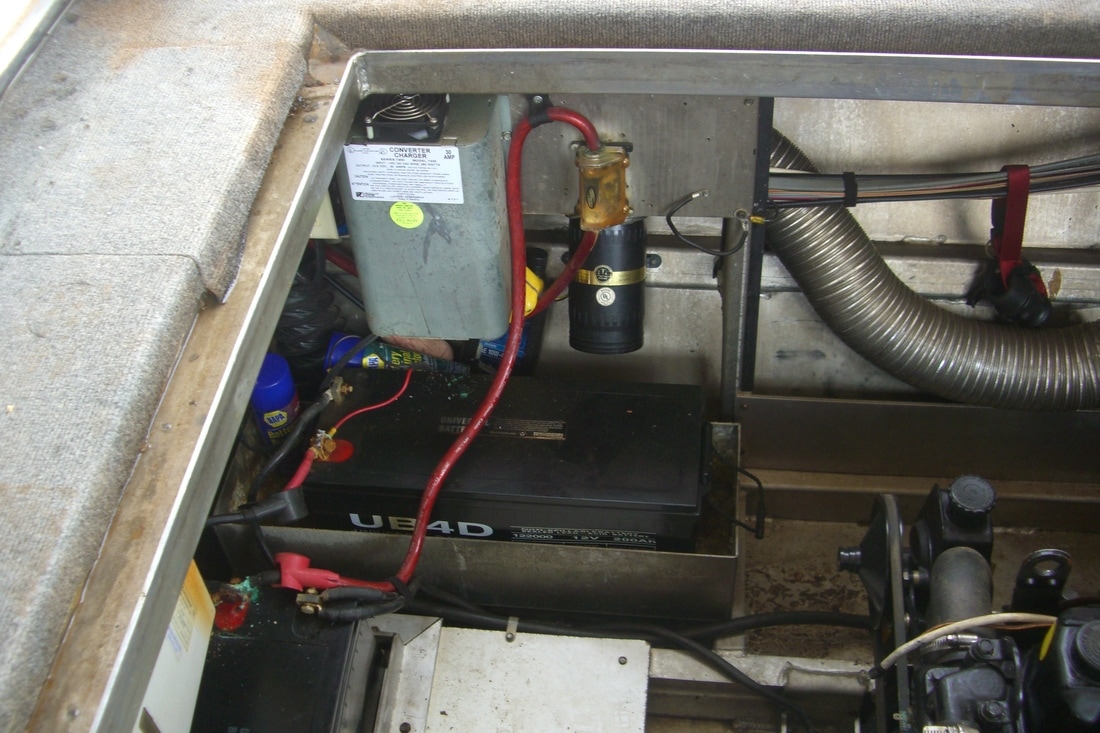
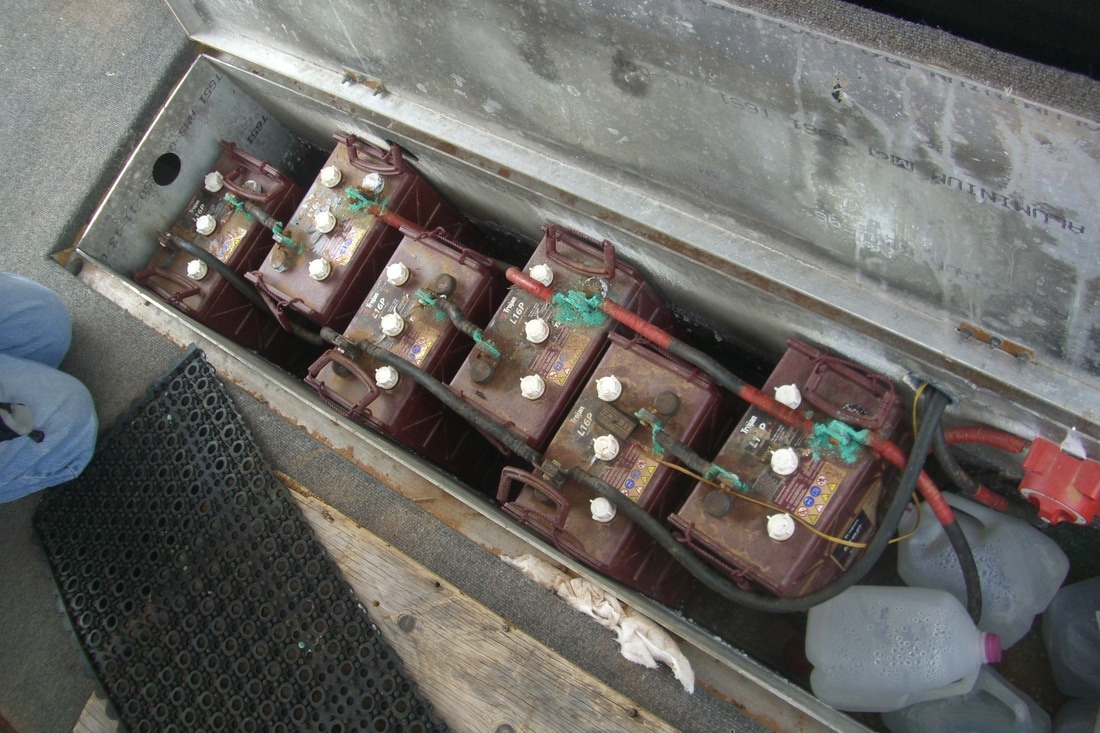
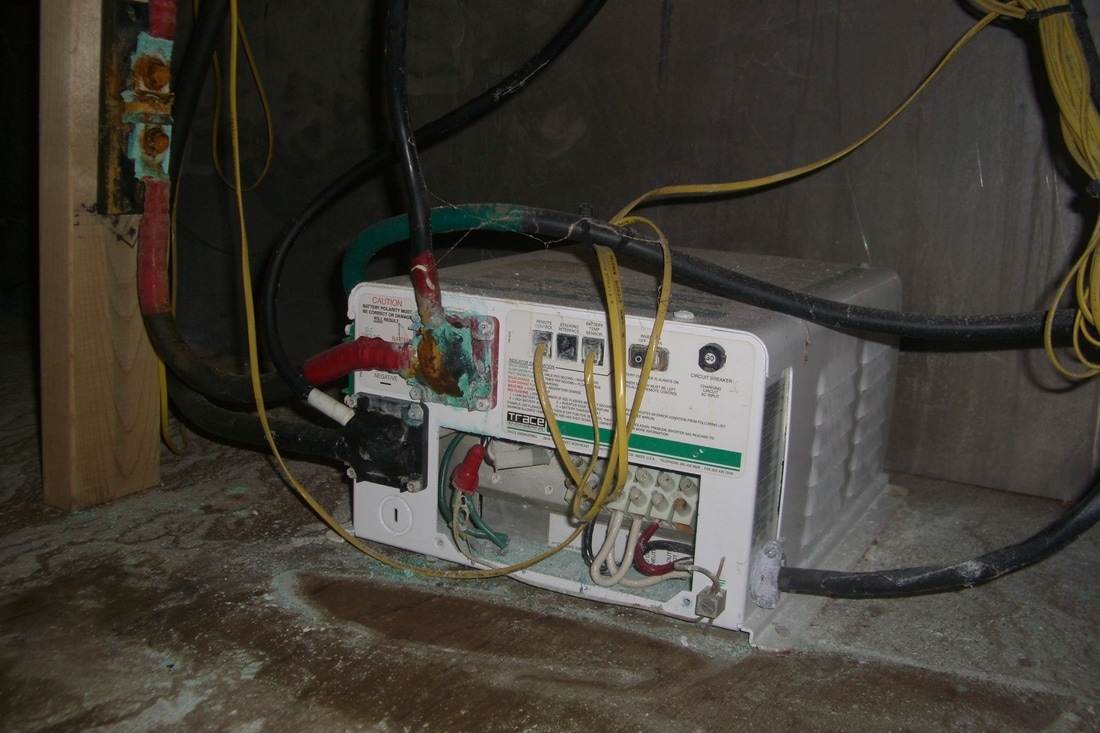
Now, I could go on and list every component that was replaced, but that doesn’t make for a very exciting blog…unless you like lists. Suffice to say that we did end up replacing everything; from the outlets and switches on the 120-V system to the 12-V gauges and switches on the lower helm. There were a couple notable exceptions. The chest freezer on the front deck kicked on and froze my ice packs in a hurry; I kept it and assumed that when it did fail it would only be a couple hundred dollars to replace. The bilge blower worked, but had a new feature in a horrible squalling noise that let you know when it was on; you’d never forget to turn it off, but I eventually decided to replace it with a slightly quieter model. That’s it, literally every other electronic component was replaced with new. 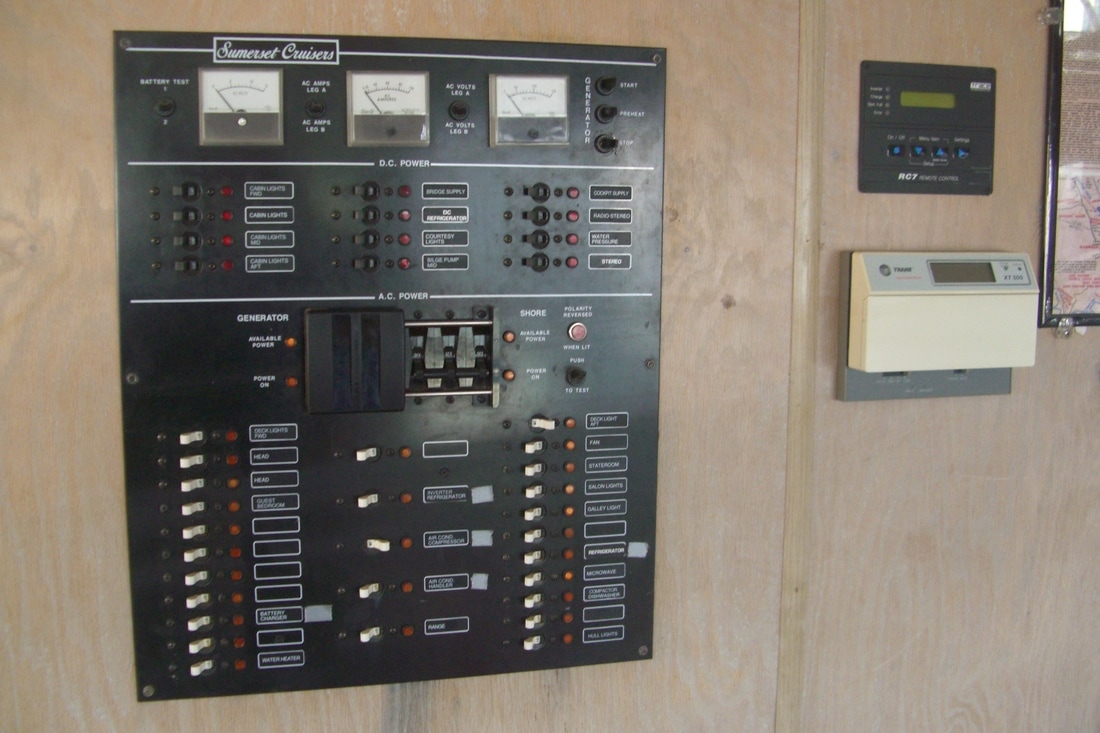 Instead of just listing the trials and tribulations of installing new electronics, I was thinking I would discuss the electrical systems aboard the houseboat in a more general way. Many people approach electrical work with trepidation and view the electrical systems on their houseboats as almost mystical in nature. I’m not going to advocate that a novice take on rewiring their home (see warning above), but I would say that a basic working knowledge of how your electrical systems work and confidence enough to troubleshoot minor problems might be a good place to start; ideally your electrical problem solving will extend beyond cycling the power (that’s a more technical way of saying "turning it off and on again"), though in some cases that does the trick. I had a lot of experience working with “system integration” on NOAA’s survey launches (getting the half million dollar sonar to talk with the quarter million dollar DGPS/Inertial navigation unit). I was up to my eyeballs in wiring diagrams, baud rates, NMEA strings, power requirements, and the like; most of which I have completely forgotten, but the experience was invaluable in tackling this project on the houseboat and keeping things in perspective and organized.  I’ll break the Serenity’s electrical system down into 3 sub-systems; the DC house system, the AC house system, and the engine system. Each of those sub-systems could then be broken down further into more sub-systems, and so on until you got to individual components. Looking at it this way makes what could be a complex and overwhelming project (i.e. rebuilding the entire electrical system) seem far more manageable. You just have to tackle one sub-system at a time until you get the whole working. The three main sub-systems were easily separated and were, for the most part, standalone systems and would function completely independently from one another. The first one that I wanted to get working was the 12-V engine systems, which are the critical systems to run the boat that can be seen as analogous to the systems you have in your car. These are common to a 14-ft runabout or a 65-ft houseboat. The navigation lights, the instrument clusters, the bilge blower, the engine’s electrical controls, etc. Unfortunately, I wasn’t able to address most of these components until the new engines were installed and the wiring harnesses were in place, which seemed to keep getting put off. So, I ended up finishing up the other two systems first. The DC house system, often referred to as the 12-V system, is relatively simple, especially if you break it down to its basic components. I think most of us probably learned about electricity in elementary school by connecting the positive and negative sides of a battery to the appropriate terminals on a light bulb, maybe even throwing in a switch, which demonstrates a basic DC electrical circuit. That is all that the 12-V system is on the boat, a DC circuit that just has a few more parts. You have a bank of 12-V batteries (in our case two sealed lead acid deep cycle 200-Ah batteries) that feed a distribution panel (i.e. the breaker panel) and then power any 12-V components. Primarily on the Serenity, these were the 12-V lights, but also include radios, water pumps, and a few other 12-V components. The two batteries are wired in parallel (i.e. negatives-to-negative and positive to positive) so that they supply 12-V, but output Amperage is doubled. The positive lead is then protected by a circuit breaker (in our case a 100-A breaker). I will note that this could be fused protection, but I prefer to use breakers whenever possible. If you trip a breaker, say by accidentally shorting the positive and negative connections on a 50-A breaker (not that I have ever done this), then it’s only a matter of resetting the breaker; if you blow a fuse, you will quickly discover that nowhere within 50-miles of Bullfrog has a 100-A replacement fuse and the only way to restore power is to bypass the fuse protection or improvise your own “fuse” (say a piece of 12-ga wire). From the 100-A breaker our supply line ran to three 50-A breakers in the engine compartment, which in turn fed the two marine heads (each head was on its own 50-A breaker) and the main DC breaker panel. Power is then run through appropriately sized breakers on the panel to feed those circuits. At each step away from the batteries, we move to a smaller breaker (e.g. 100-A to 50-A to 10-A or 20-A at the panel) and smaller wire size. You just need to be sure that your wire is appropriately sized for the amperage and the length of the run, which can quickly be determined by consulting the chart below (courtesy of Blue Sea Systems, which has a great article on selecting appropriate wire size here). Then you just need to make sure you have breaker (or fuse) protection for that run of wire. The supply line is connected, often through a switch, to your component (light, pump, radio, etc.) and the negative is connected back to the battery, often through a bus bar, to complete the circuit. 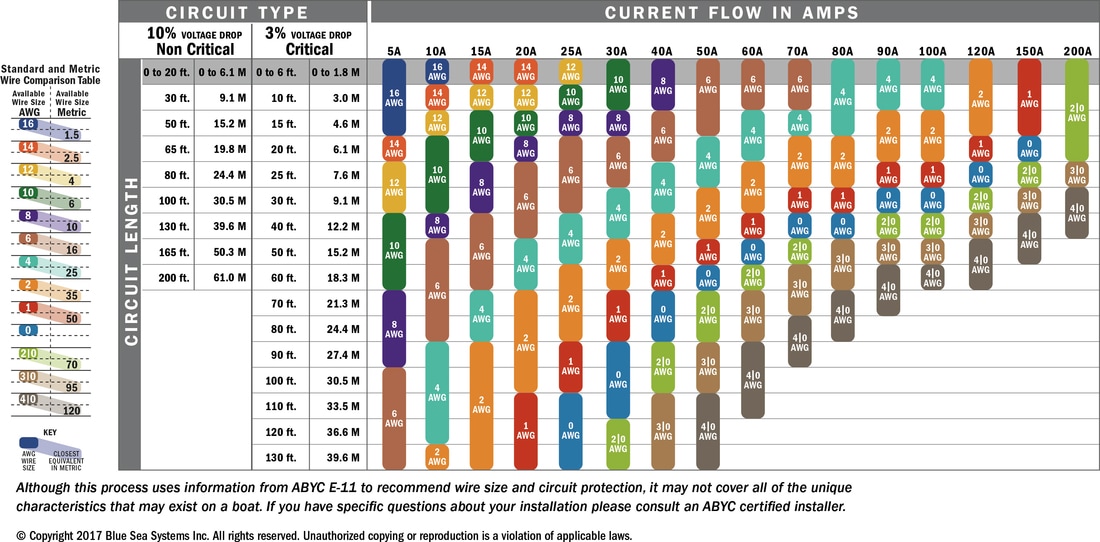 The house DC system is pretty simple, but it was not without its gremlins. The biggest hurdle we had to overcome was an intermittent problem that I initially thought was a dead short on one of the circuits. We spent an entire day trying to isolate the problem, but intermittent problems are the toughest to diagnose. The system was working without an issue right up until we had our marine survey; during his inspection he couldn’t get any of the DC components to operate. We could energize the entire DC panel without issue, but when we would put a load on the system the voltage would intermittently drop to zero. The reason is obvious now, but I was ready to bribe a friend that was an electrician to come down and figure it out for me. As anyone who has struggled with trailer wiring probably knows, the first thing you check is always the ground, which is where I should have started in this case. One of the ground wires in the engine compartment was loose and, I'm guessing, the marine surveyor disturbed it when he was crawling around and it resulted in an intermittent connection problem. Tightening the cable solved the problem. With that done and the engines still not installed, I moved on to the AC system. I will often refer to this as the 110-V system, though that is not really accurate. On the houseboat, as in your home, we have a two phase AC system, with two legs of 120-V alternating current that are 180-degrees out of phase with each other. The power at your receptacles should be 120-V, but due to resistance in the system that voltage can often drop to 115- or even 110-V. Many appliances will be rated at 110-V, which only indicates that they can safely operate at these reduced voltages, but they are actually made to run on the 120-V circuit. So, at least in this blog post, I will be referring to them as 120-V and 240-V, but know that if you see references to 110/220 or 115/230 they are referring to the same AC power supply. I don’t want to get too mired in theory (maybe I do), but it’s important to understand that your AC power is being delivered on two 120-V legs and that you can feed 120-V circuits by drawing from one leg to neutral or you can feed 240-V circuits (ranges, microwaves, HVAC systems, etc.) by using both legs. 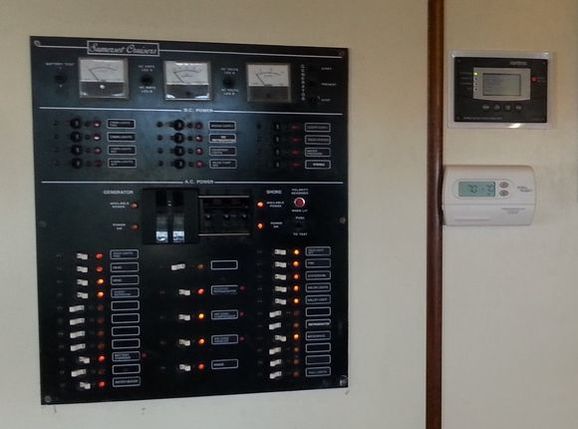 Aside from the above, the AC system is wired much the same as the DC system, running from the main distribution system (i.e. breaker panel) to all the individual circuits, just like your home electrical system. On the panel of Serenity you have three banks of breakers; the two outer columns are 120-V breakers and the center column are all the 240-V breakers. The obvious difference between your average house and the houseboat is that the houseboat has three options for the power supply. The entire panel can be run by either connecting to shore power (e.g. the power grid) or the onboard 12.5-KW genset; or, a subset of specific systems can be run by the inverter. The inverter and its dedicated bank of six 6-V 370-Ah batteries, of course, needed to be replaced. The batteries are in a separate compartment at the bow of the boat and are wired in series to create a 12-V bank (i.e. two 6-V are wired in series to provide 12-V and then each set is wired together in parallel to triple the amperage rating). The inverter is set up to provide power to the refrigerator and the entertainment center, as well as a few other minor items on those circuits. It is also supplied through the power panel to act as a 150-A charger when there is shore or generator power to recharge the batteries. I have a control panel for the inverter mounted by the main electrical panel, but it operates automatically in most situations. If the breaker is on and there is power available, it will automatically go into a charging cycle and, when the batteries are fully charge, will then shift to a maintenance charge. When power is lost, it will automatically shift to inverting after a few minutes. The one thing that has been necessary to fiddle with on the control panel is adjusting the charge rate, especially if you want to operate another heavy load like the range, microwave, or HVAC systems. I found 70% seems to work pretty well, but haven’t tried operating another big load and the 150-A charger at the same time on generator yet; it might mean lowering that charge rate even more so as not to put too much load on the generator. 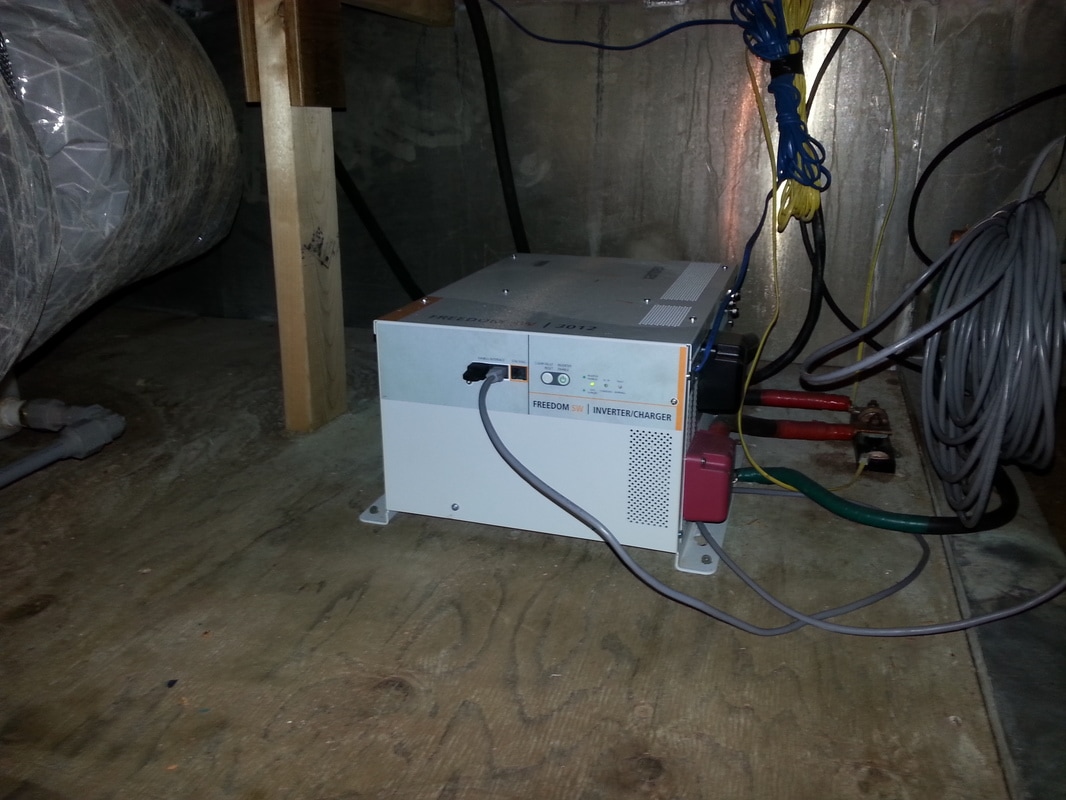 Finally, we come to the engine electrical systems…but, just like me, I think you’re going to have to wait. As I said above, these systems are largely the same from a 14-ft runabout to a 65-ft houseboat and I think I would do them more justice by devoting a full blog post to them in my series on the refit of my Lone Star Malibu.
Until next time, here’s wishing you fair winds and following seas.
0 Comments
Leave a Reply. |
AuthorBrent Pounds has over a decade of experience in the maritime industry and has been involved in recreations boating since he was a child. See the About section for more detailed information. Archives
October 2016
Categories
All
|

 RSS Feed