|
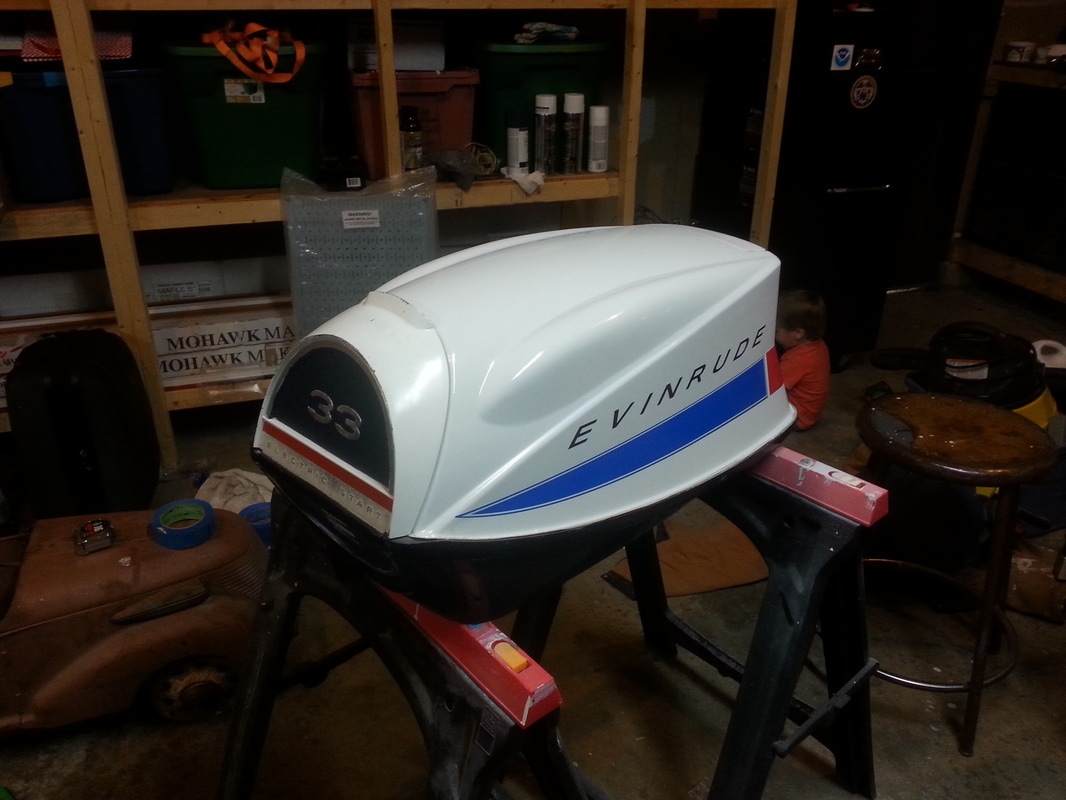
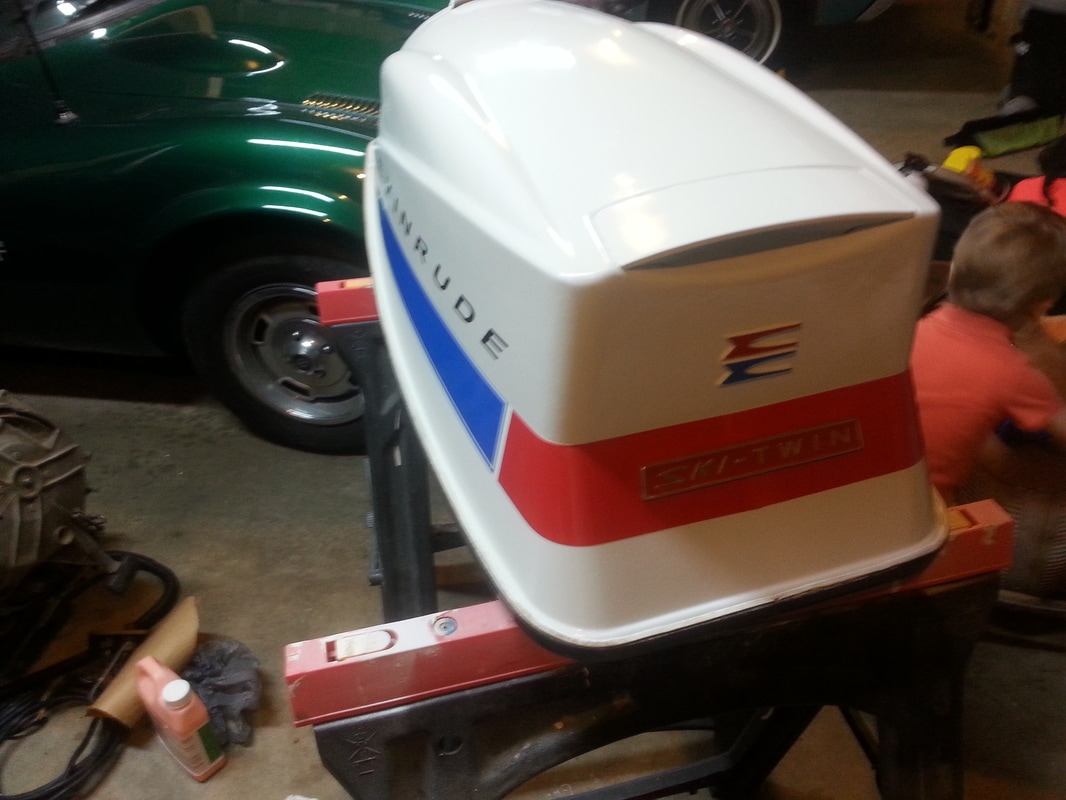
In this post, I will be taking you through the odyssey that was painting the hull on the Lone Star. It was a long and sometimes arduous journey, but the end result turned out pretty well for a novice painter. In case that introduction didn’t make it obvious, I am not a professional painter and I don’t even play one on TV. This was my first foray into a project this size and I made a few tactical errors, but with some help from the internet and just following product guidelines, it was more than doable. Still I would say this isn’t really a “how to” as much as it is a “how I should have” guide. As a friend of mine, who is a professional painter, is fond of saying, “Always be sure to read, understand, and follow the instructions with all the materials that you work with.” As long as you do that, you should have a pretty good luck. I started off with a test project of sorts and repainted the cowling to the 1968 33-HP Evinrude Ski-twin that I bought off Craigslist. The engine ran well and everything seems to be in order, but a previous owner had decided to customize it by painting it out white and sticking some Boston Whaler stickers onto it. I was looking for something a little more stock and so I stripped it down to bare fiberglass with Citristrip, which surprisingly only took one application to strip off at least three layers of paint. I then primed it with one layer of self-etching primer, one coat of bonding primer, and then three coats of gloss white. After the paint fully cured, I was able to apply the replacement Evinrude stickers that I bought off eBay. I repainted the front cover plates that had flaked off with flat blue (after self-etching priming), and hand painted the blue and red "E" on the back of the engine with acrylic paint. It turned out well, so I felt confident enough to move on to the bigger project.
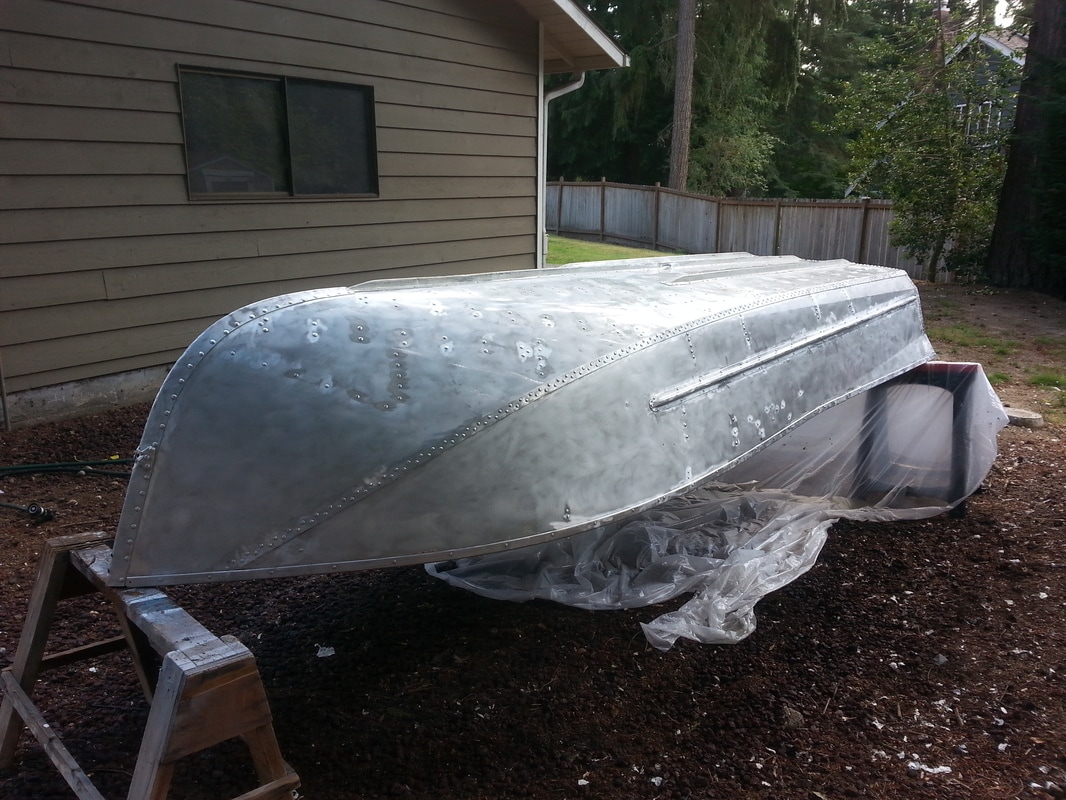
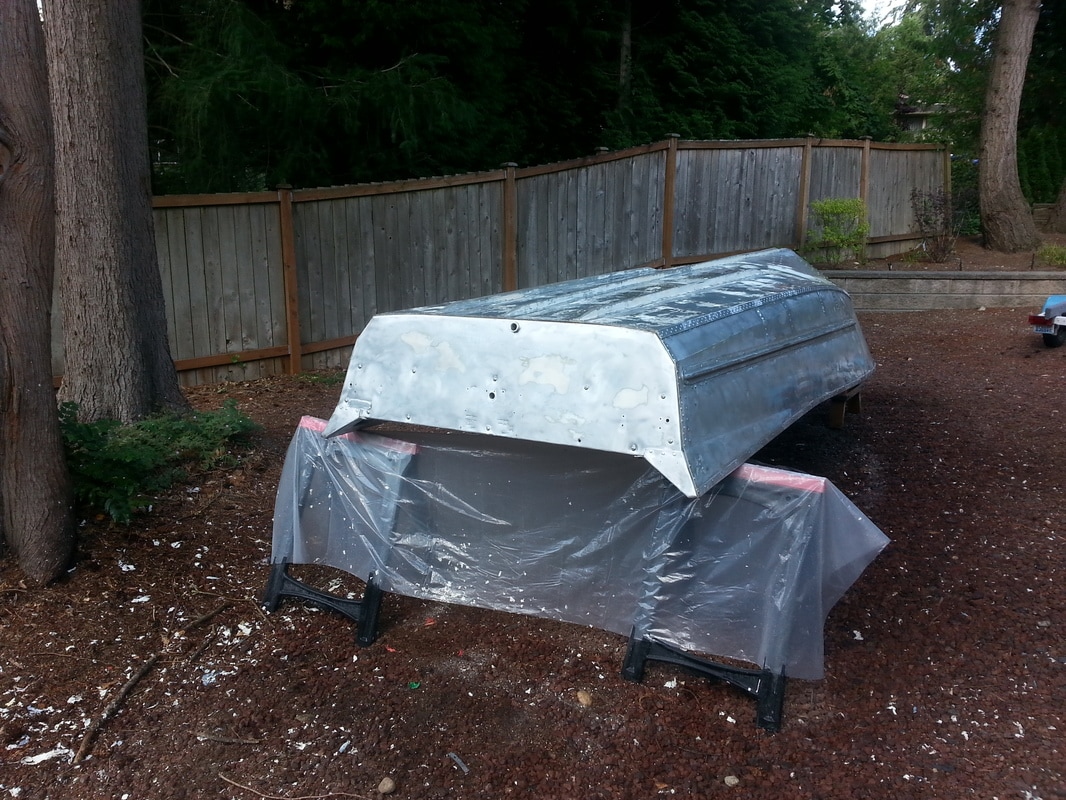
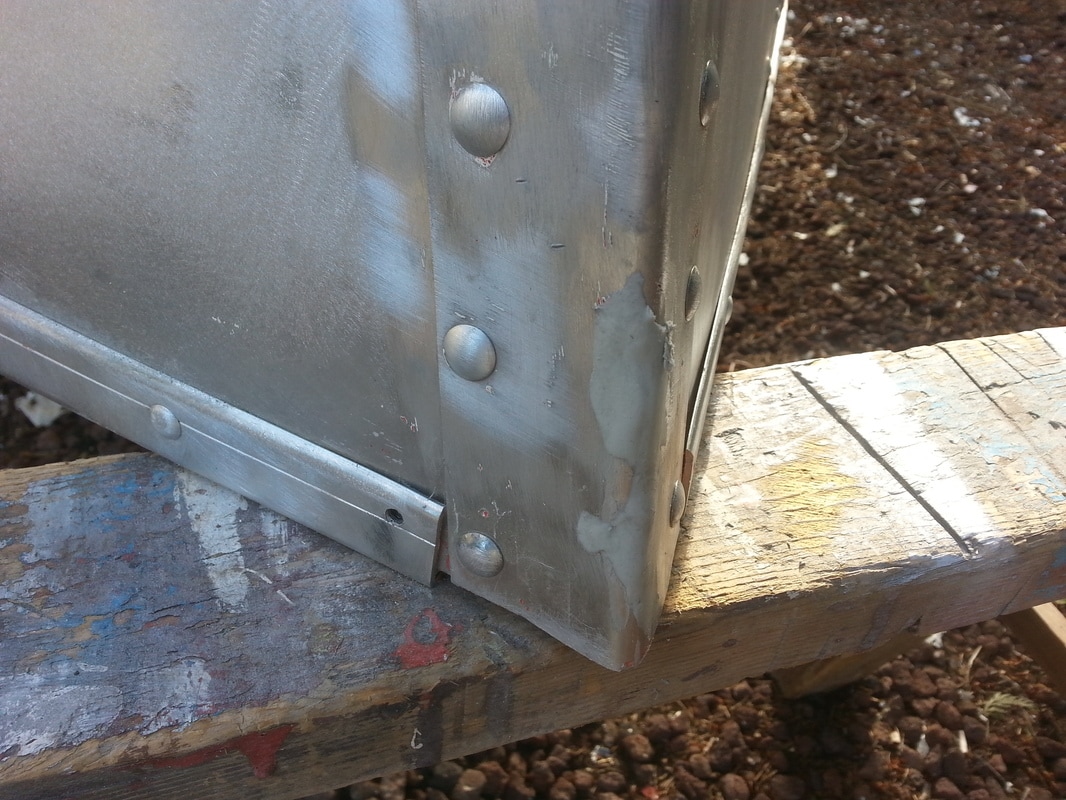
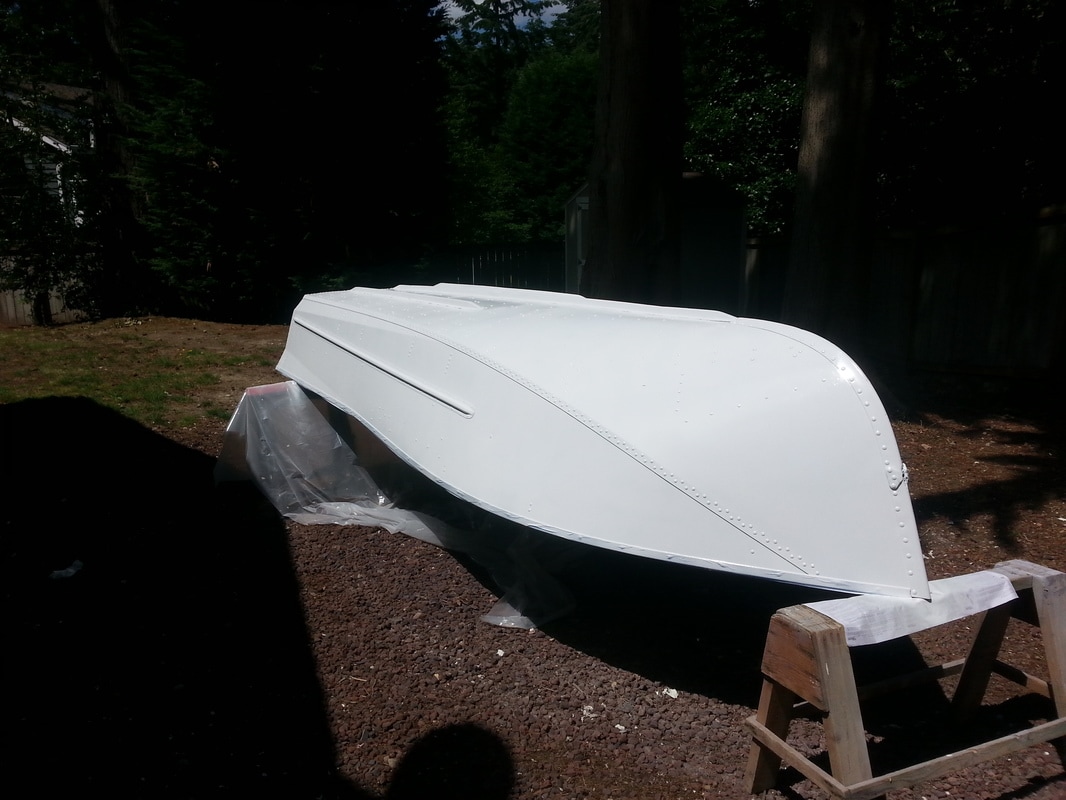
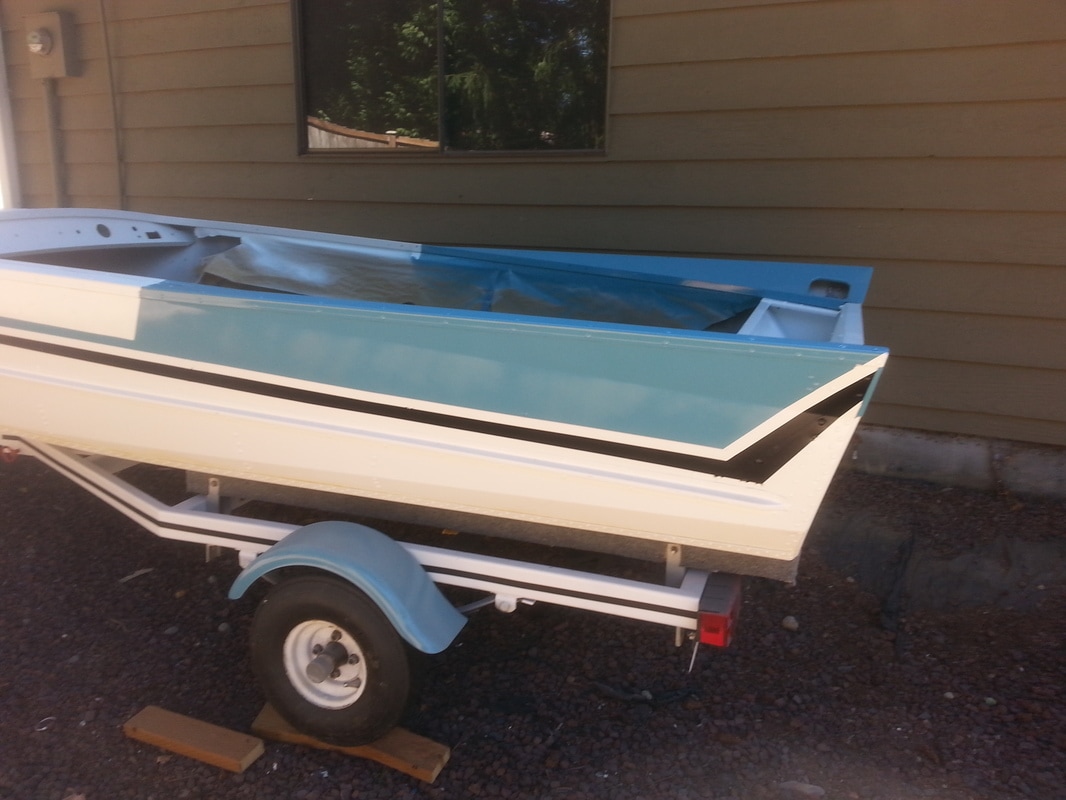
To begin with, I needed to remove the old paint from the hull. I mentioned in the trailer post about testing how solid your old painted surface was with a piece of duct tape, but in the case of the hull it was obvious that the paint had failed (it was sunbaked and peeling off all on its own) and the boat needed to be stripped down to bare metal. So I removed all the various chrome bits that were still attached to the boat and set to work. There are a few options available to you to remove your old paint, but being that I was doing this on a tight budget, having it professionally done by either media blasting or dipping wasn't really an option. So that left me with two basic options; mechanical removal (sand paper and wire wheels) or better living through chemistry (chemical paint stripper). I had trouble deciding which would be more fun, so I did both. Primarily, I planned to use aircraft stripper, which is truly nasty stuff. With its extremely caustic nature, I figured it would make quick work of the already peeling paint work. The claimed 10-minute strip time was a little optimistic, I found that it needed to set for at least 20-minutes before you could start peeling paint, but it worked fairly well at removing the two layers of paint that were on the boat. However, after doing most of the boat I decided to try another more environmentally friendly stripper called Citristrip and was very impressed with its performance. It seemed to be easily as effective at removing the paint from the boat and had far less odor. As with any caustic chemicals it’s important to utilize proper PPE (personal protective equipment), so I geared up with a chemical respirator, elbow length rubber gloves, and eye protection…I still managed to get some stripper on my upper arm while leaning over the boat and had a mad dash to the sink to rinse it off. Luckily, I was working outside, so a well ventilated area wasn’t a problem; I just had to contend with the alternating 90-degree days and cold rainy standard Seattle weather. It was a fairly straight forward process. Just pour on some of the stripper and spread it out evenly using a chip brush, then come back over it with a plastic scraper and stiff bristled brush to remove the toxic goo that resulted. Using a plastic scraper is advisable since aluminum is a very soft metal and going at it with too much vigor with a steel scraper can result in nasty gouges. Once I had made the pass with the stripper and my scraper I decided I needed to resort to brute force to finish the process. There were lots of crevices and areas around rivets that I just couldn’t get at with the scraper and that didn’t come clean, so I attacked those with a wire wheel on my drill. Be sure to use a stainless steel wire wheel, otherwise you might find that bits of the ferrous wire get embedded in the aluminum and can cause rust in the future. After that I ended up going over the entire hull with a palm sander and heavy grit paper to get all the last remnants of paint off and get a good key on the surface. 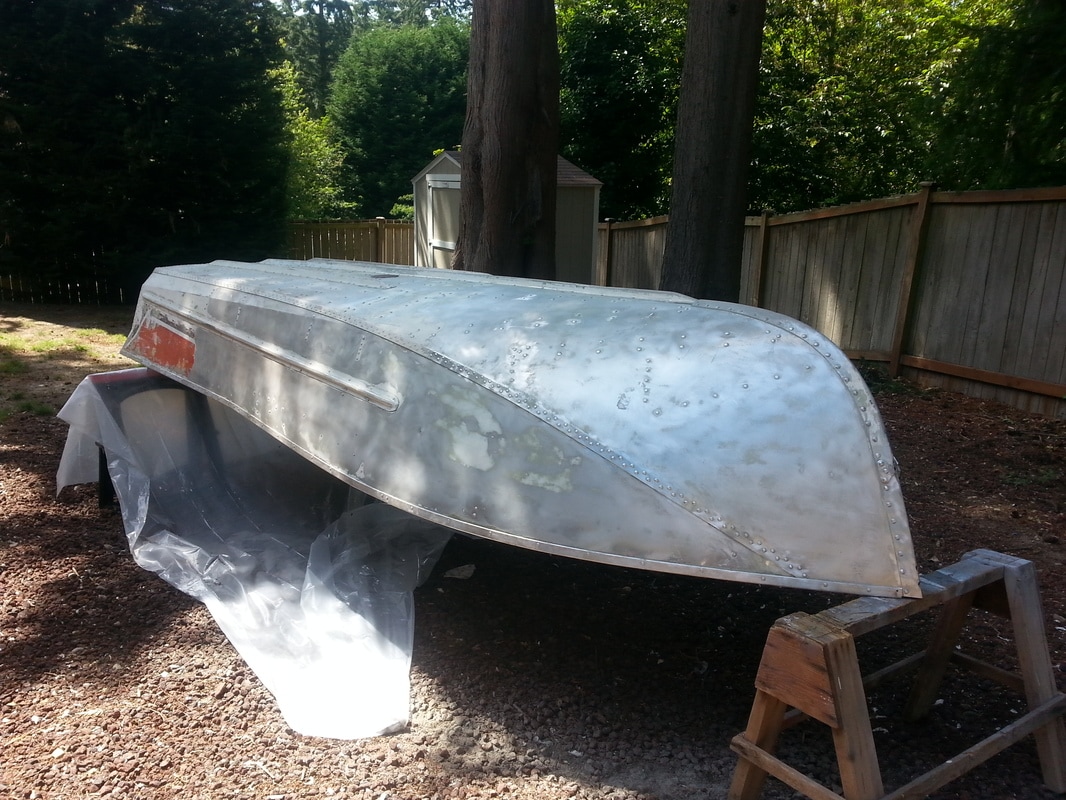 After weeks of work, I finally got the boat stripped down to bare aluminum. I did this all in two stages, working first on the top cap/deck and then flipping the boat over onto sawhorses to do the lower hull. Luckily, these aluminum runabouts are incredibly light and I was able to get it off the trailer and on the sawhorses by myself. I was pleasantly surprised to find that the hull was very straight with only one or two minor dings
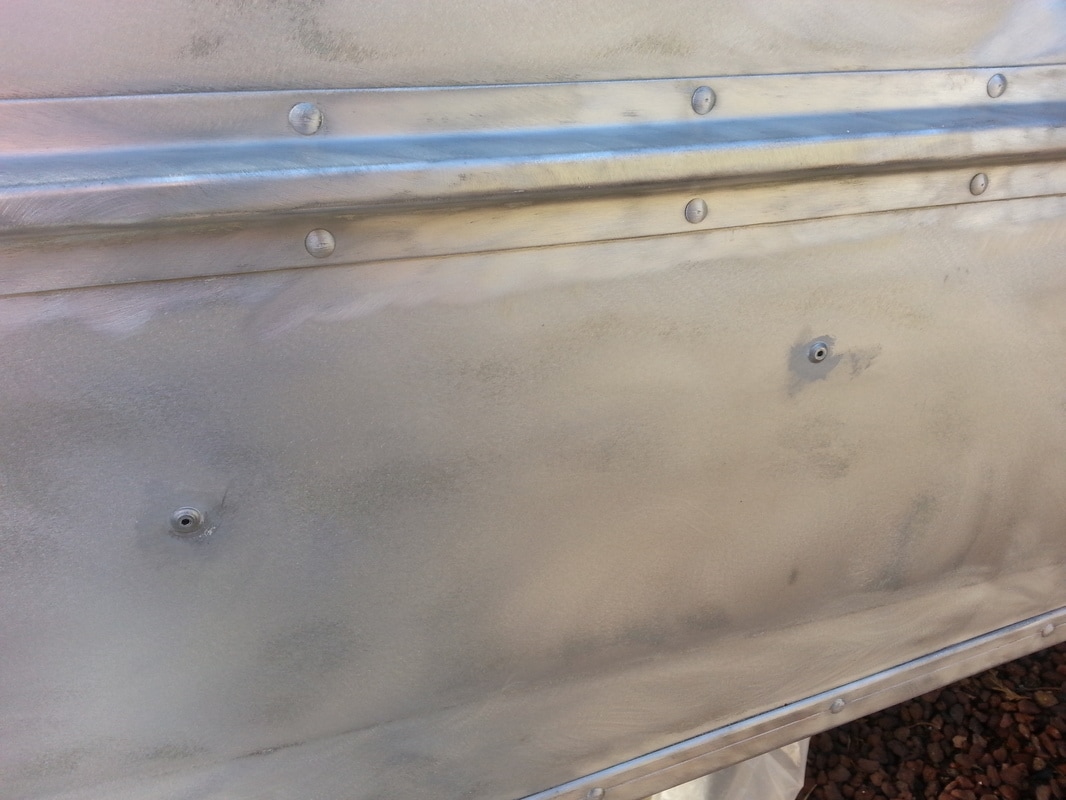
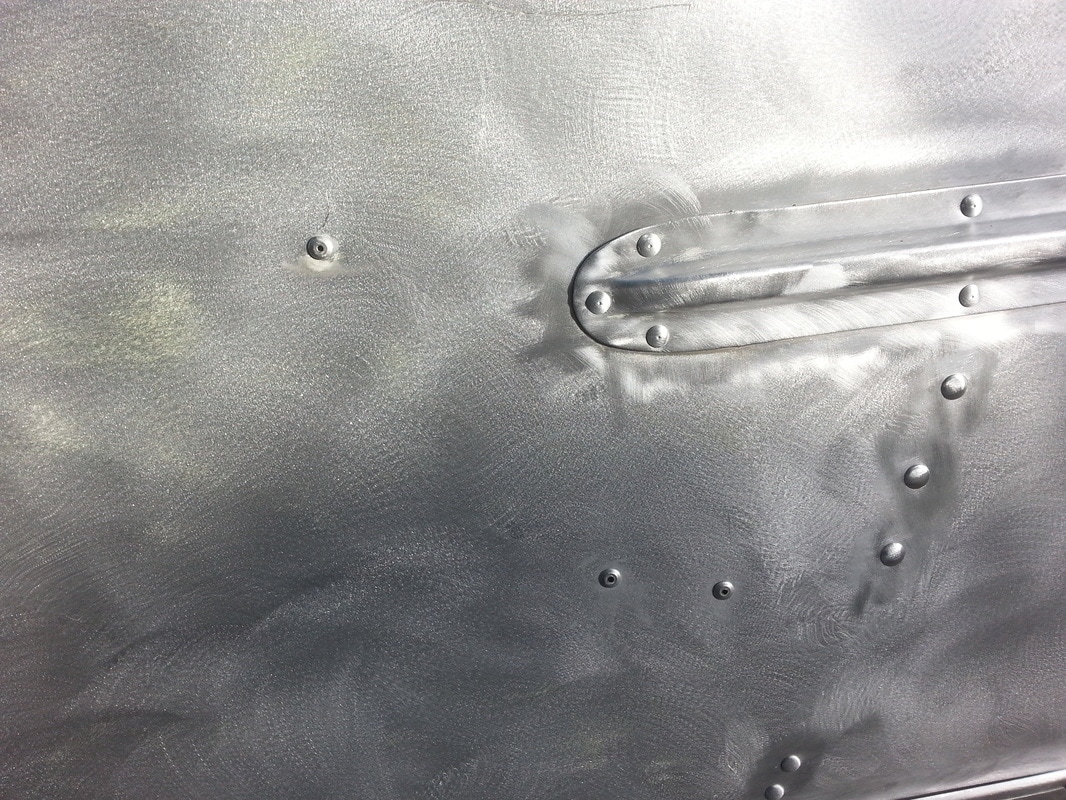
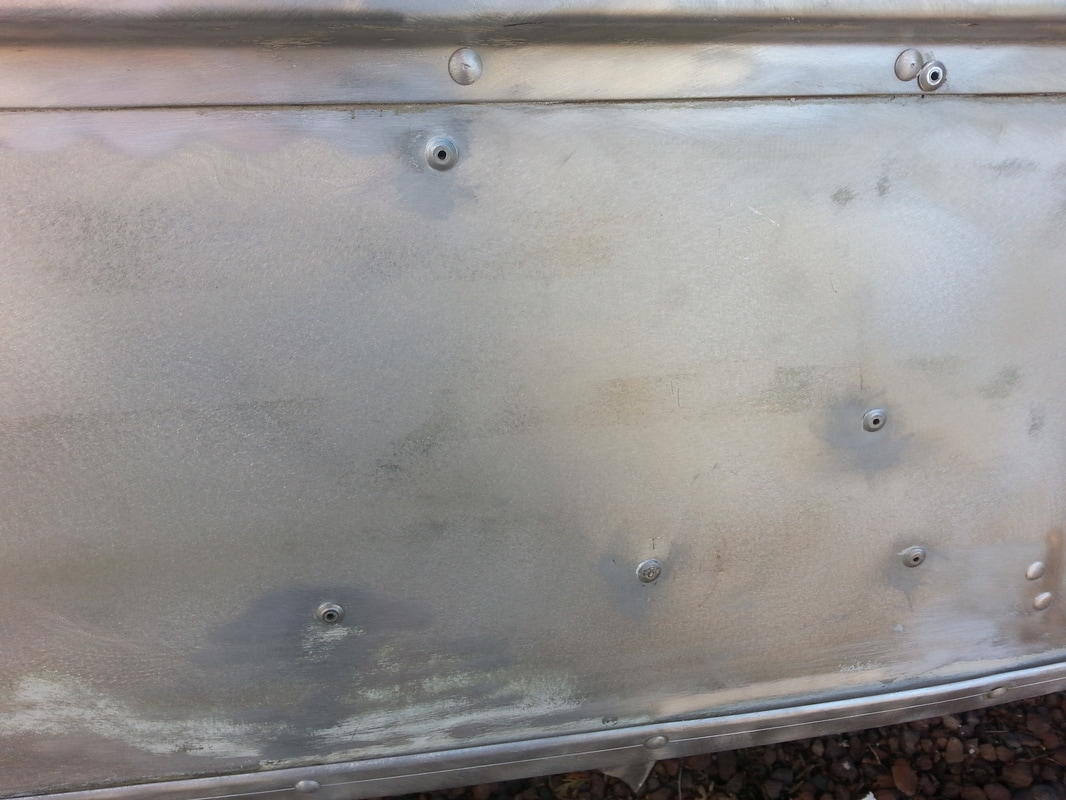
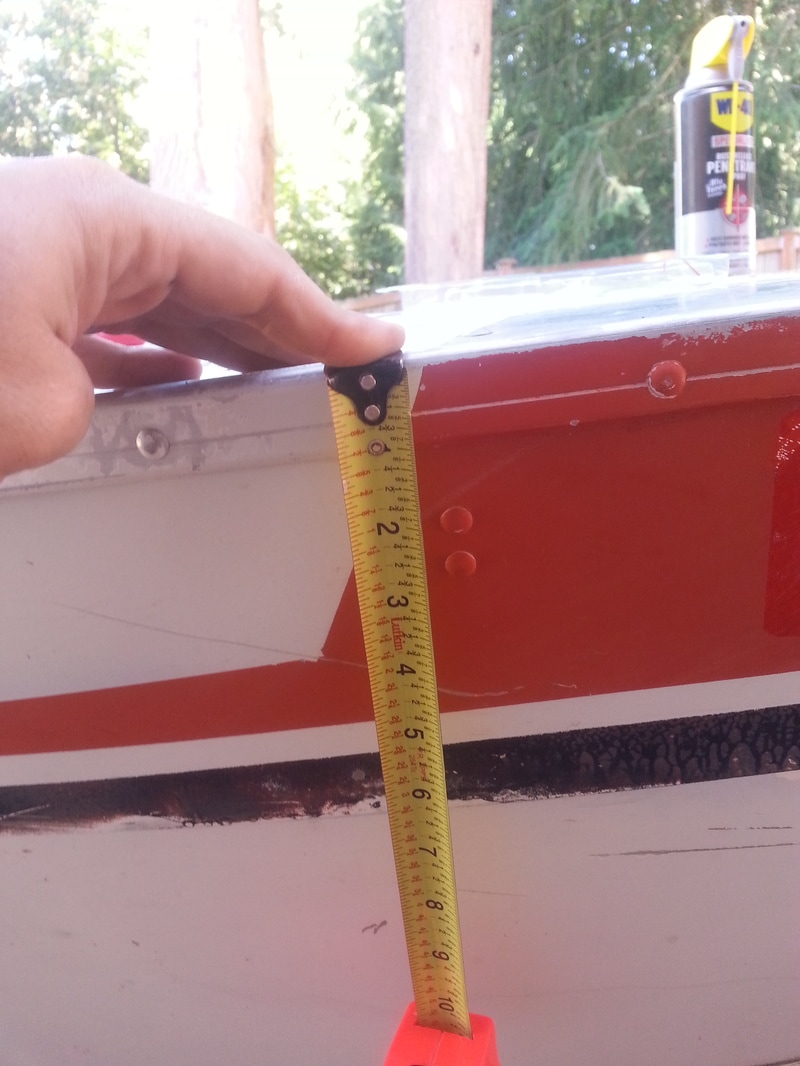
At some point, a previous owner decided to drill holes in the side of the boat and mount rusty steel eye bolts (to be fair they probably weren’t rusty when he installed them) to tie down a boat cover. I had removed the eye-bolts, but prior to beginning the painting process I needed to deal with those holes. I purchased some all-aluminum closed end pop rivets (don’t use the rivets with the steel shank, as the remaining portion of the shank will rust) and coated them liberally with 5200 marine sealant/adhesive before inserting them and popping them into place. I also patched up the redundant upper bow eye holes with an epoxy putty, that I treated much like bondo and formed and sanded to blend seamlessly into the hull. 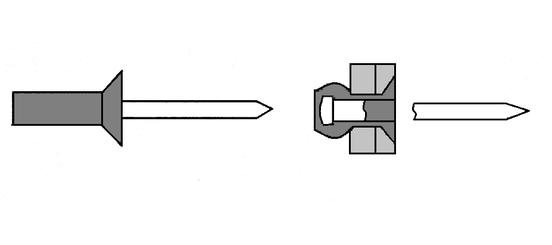
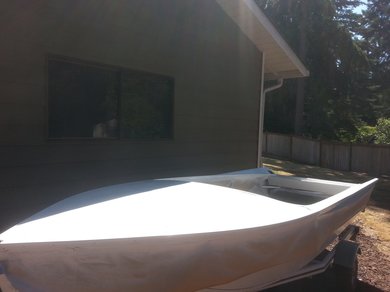
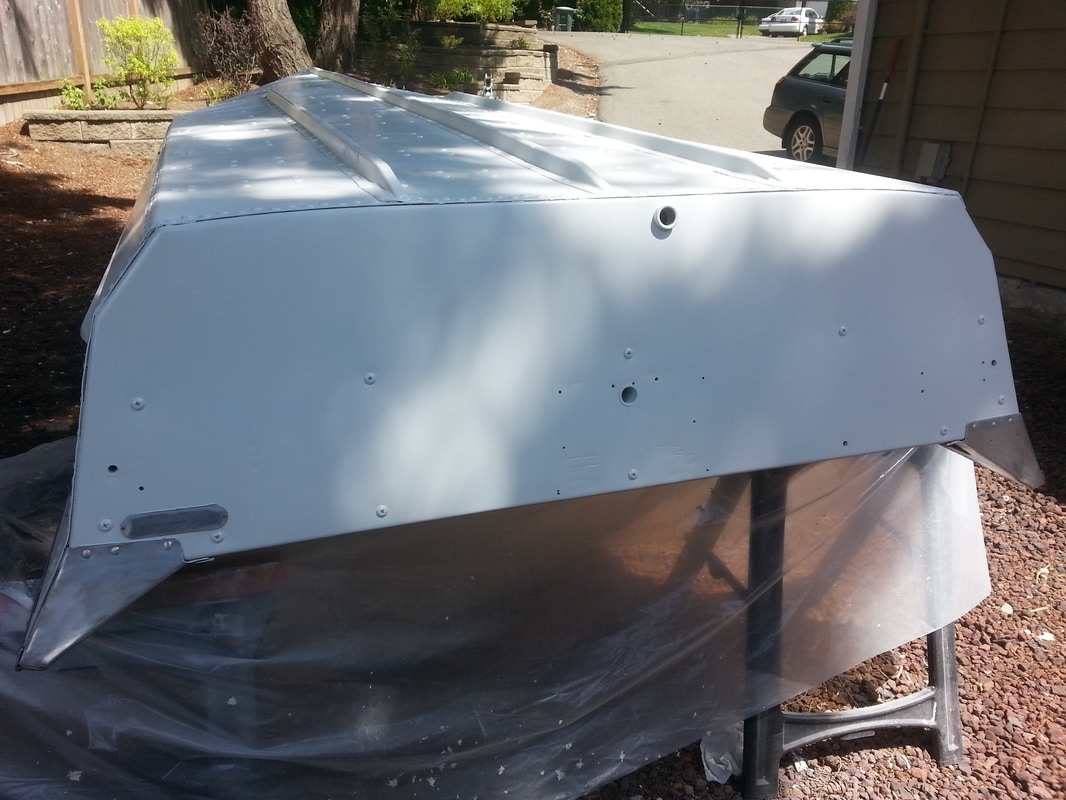
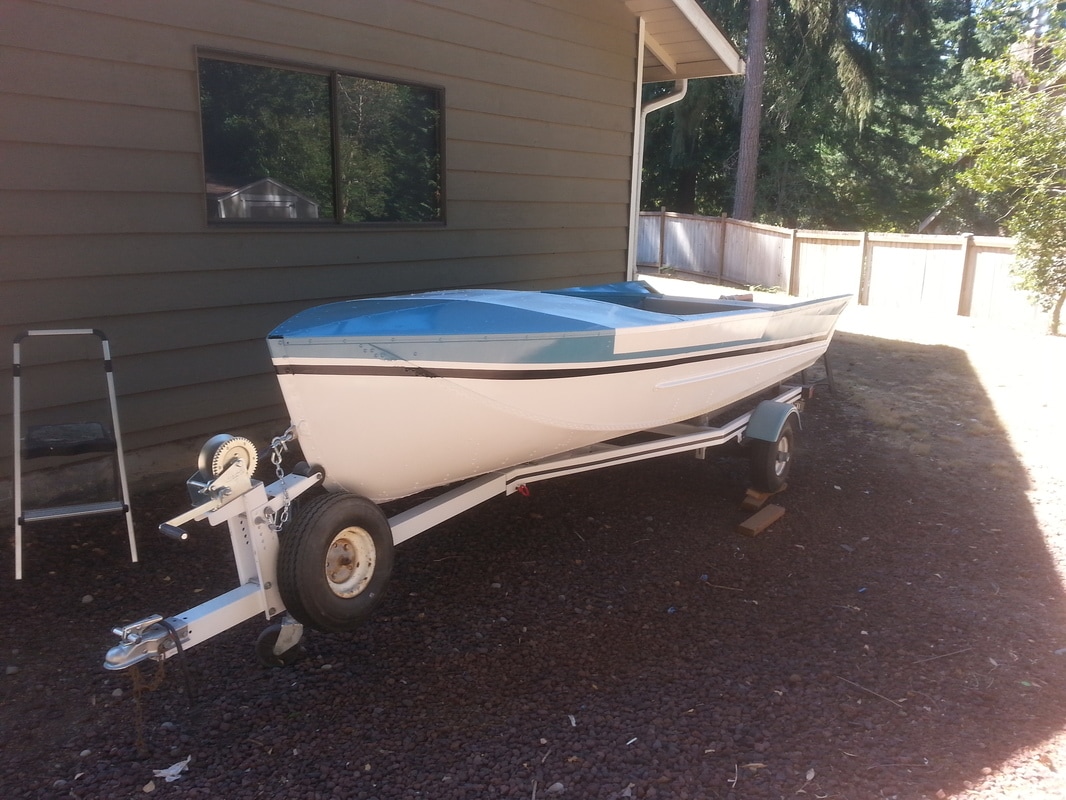
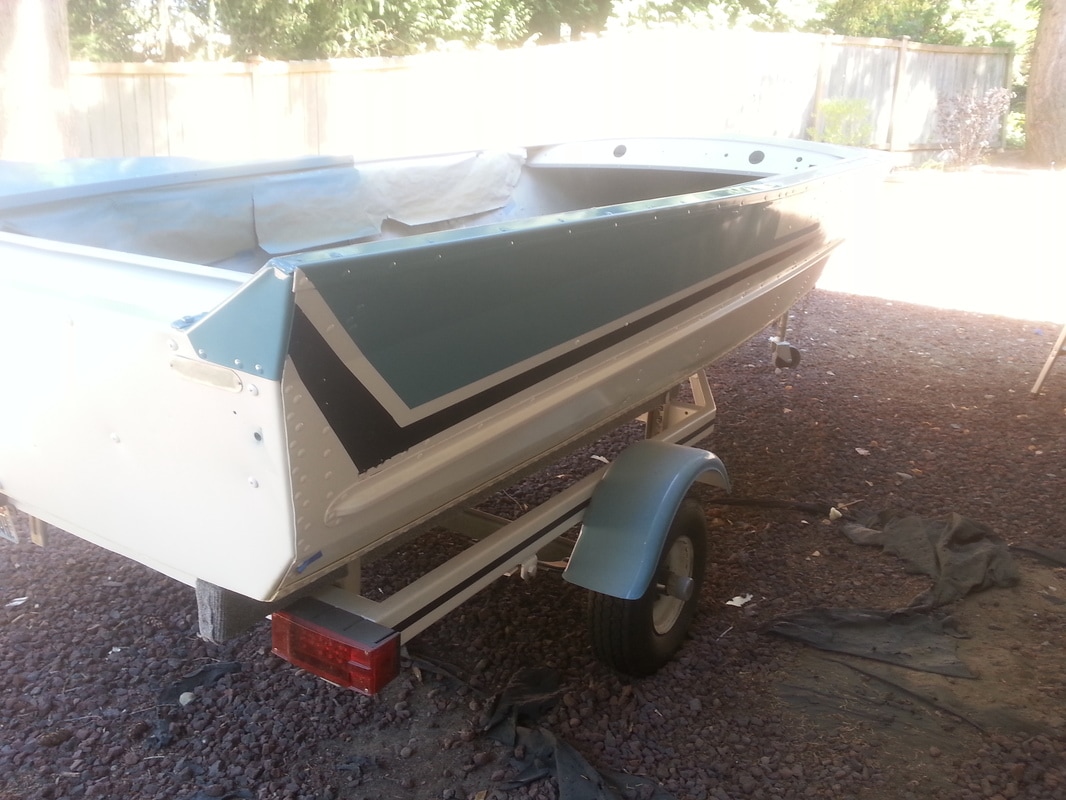
With that I was ready to break out the spray cans and get to making it look pretty again. Now, here is where I would have diverged from my plan if I had to do it over again. Assuming that like me you were trying to save money and not going to pay a professional to paint the boat, you have essentially three options. You could buy a spray gun and get some paint mixed up, you could buy some paint and roll and tip it, or you could buy an indeterminate number of spray paint cans. Those are listed in order of preference, best to worst options…of course I picked the spray paint cans. Can’t change it now, so nothing but to move on. Any method you choose will require some specialized preparation and treatment for aluminum. The first concern is making sure your primer and paint will stick to the surface; to do this, you must etch the surface. You can get self-etching primer and I used a specialized Aluminum Primer that did not require etching, but I decided to go the extra mile and etch the hull before applying it anyway (better safe than sorry). To do this, you simply mix up a 50/50 ratio of white vinegar (a mild acid) and water, apply it with a spray bottle and maintain a wet surface, spraying as needed, until the surface gets slightly darker and dull. Once that is done, wash it off with soapy water and dry thoroughly prior to applying your first coat of aluminum primer. 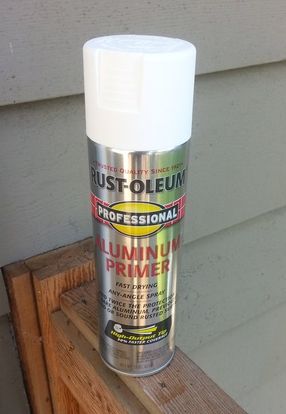 I did one good coat of Rust-Oleum Aluminum Primer and then followed that with two coats of Rust-Oleum bonding primer. Then did four coats of Rust-Oleum Gloss White Enamel. This is where reading and understanding the directions is very important; make sure you know the appropriate dry times and recoat times for the paint you are using, otherwise you’re going to run into problems. I want to be clear that I’m not shilling for Rust-Oleum (although I would if they wanted floated me an endorsement deal); however, it is a good idea to utilize one paint system from base coat to top coat, as it is less likely that you will run into issues with the paints interacting unfavorably. In my case, the Rust-Oleum enamel was dry in 2-4 hours, but does not fully cure until 24-hours. However, don't confuse these with the recoat times, which state that you may apply an additional coat within 1-hour of the previous coat or must wait 48-hours to recoat. I opted to apply subsequent coats within 1-hour of finishing the previous coat. If you apply another coat in the window between 1-hour and 48-hours after you last coat, the paint is still off-gassing and it will result in an alligator-skin or wrinkling appearance. Your only choice then is to wait for it to dry, sand it down, and then wait the 48-hour dry time again before recoating. These times are different for different brands of paint, just be sure that you read the label and know when your recoating window is. I worked in four phases; masking off the top deck to paint just the lower hull when it was upside down on the sawhorses, masking it off to paint just the top deck after flipping it back over onto the trailer, masking off and painting the graphics, and painting the interior. The hull and the top deck were both coated in gloss white. Once I finished the lower hull, I let it cure for a full week prior to flipping it back onto the trailer and working on the top cap. Then I moved on to the graphics.
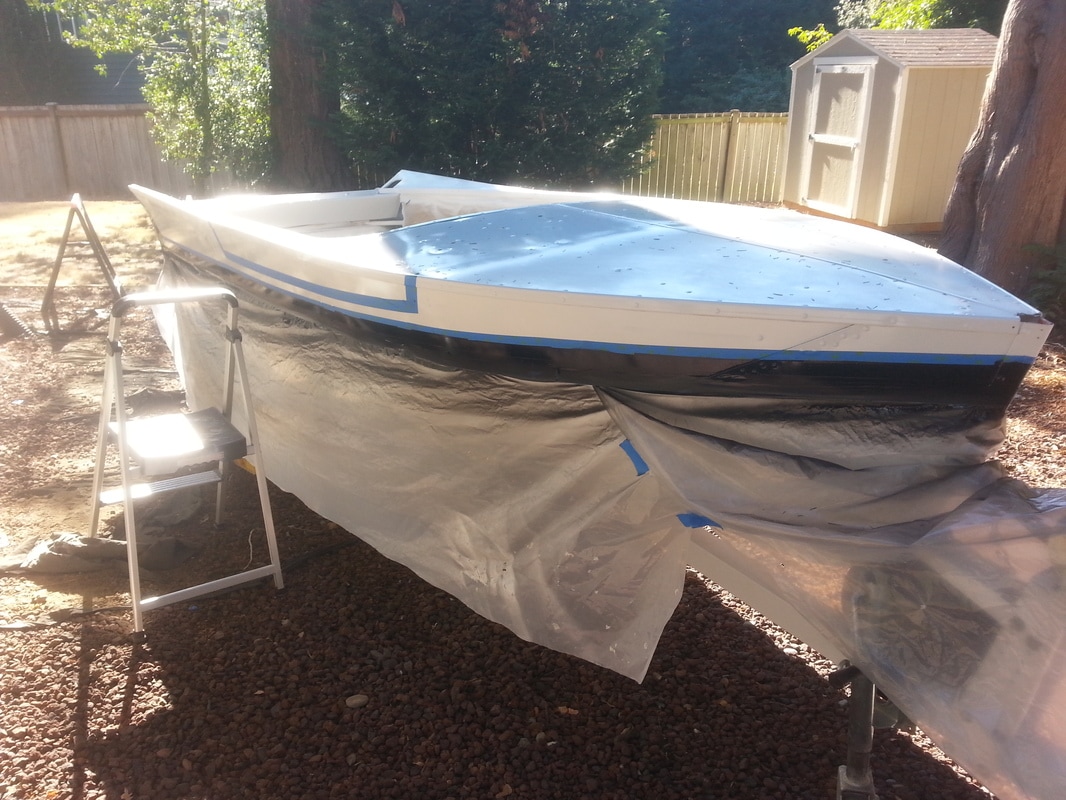
 I had taken detailed pictures prior to stripping the hull with measurements and reference points, so that I could recreate them. I decided to go with a teal instead of the original red (at least I keep calling it teal, but my wife insists on referring to it as “Tiffany Blue”…I think she might be hinting at something, I’m just not sure what?).
Here is where I ran into a few problems. Remember that wrinkled finish, well turns out that not only refers to additional coats of paint, but also masking over your yet un-cured paint. I’m impatient and I masked off the teal graphics before the 48-hours was up; I didn’t paint until after the required time had passed. Alas, the damage was done, with the paint under and around the tape wrinkling up. It was frustrating, but there was nothing for it except to sand it down, back mask the teak and repaint. There are still traces of the wrinkled paint and various other minor imperfections; hopefully I will be the only one that notices them though.
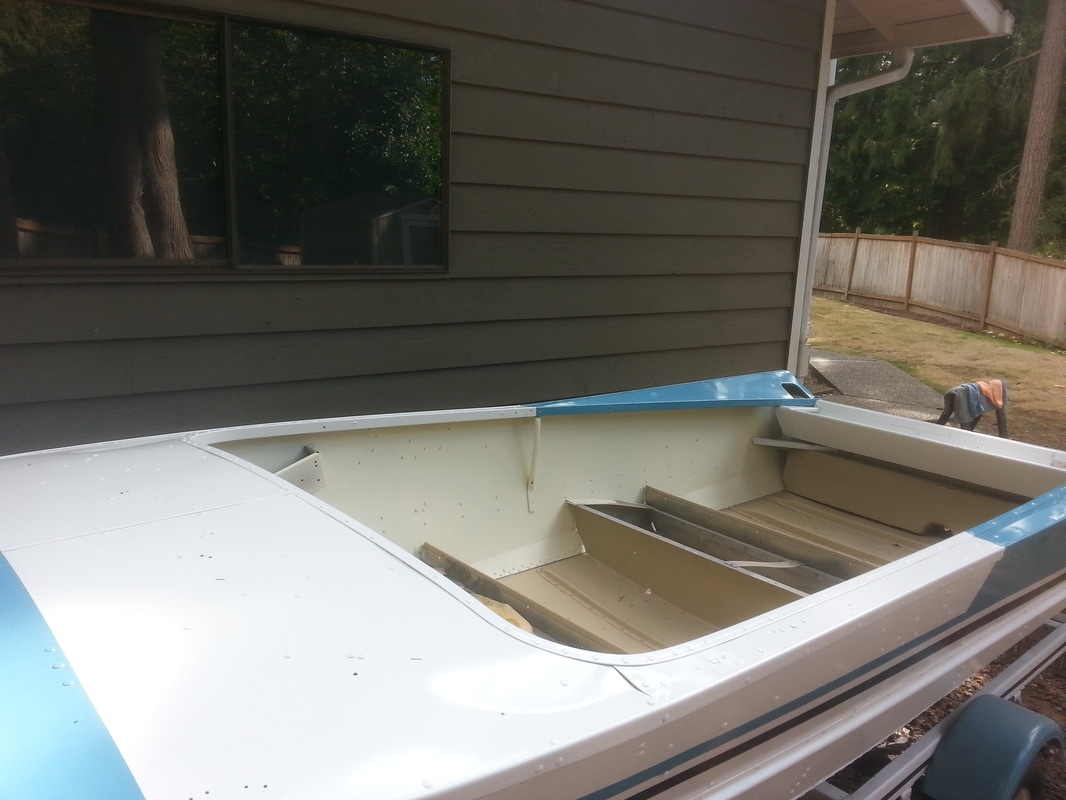
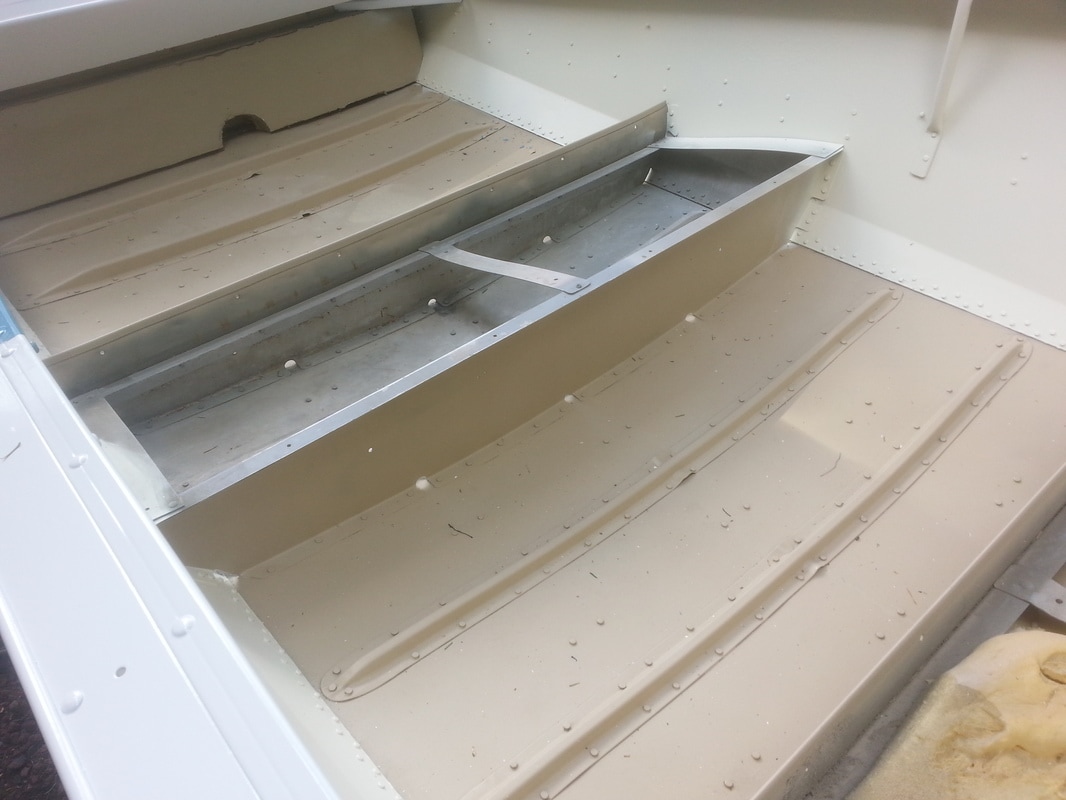
With the outside looking sharp, it was time to tackle the interior. I’m going to do a separate blog post on the total interior rebuild, but the painting went pretty much the same as the exterior. Strip, etch, aluminum primer, bonding primer, and top coat. I went with a light tan on the sides and a darker tan Rust-Oleum spray on bed-liner on the bottom. The Rust-Oleum bed-liner I used is best equated to just a thick paint and doesn’t have the texture that one would normally associate with a truck bed-liner. It did however, provide a nice grippy surface and will hopefully be a durable coating that holds up well under hard use. Prior to painting the interior, I did have to make sure that it was water tight. I leak tested the boat before I started working on it. I simply put a plug in it and filled it well above the waterline. After a few hours no major leaks were evident, just a slight drip from the seam between the transom and the bottom of the boat. Never the less, I played it safe a sealed all the seams with Gluvit, which is a two part waterproofing epoxy. Application is simple, just add the catalyst to the tin of epoxy and then spread on with a chip brush. The consistency is about that of honey and it has a long work time so that it can flow into all the cracks, crevices, and pin-holes. It dries flexible and is supposed to move with the aluminum, which of course can flex. I applied it from the inside only on the transom seam with a good heavy coat, but did both the inside and outside of the side seams in lighter coats. As with most epoxies, it is not UV stable and must be over coated with something, like paint and bed-liner, necessitating mechanical abrasion to ensure adhesion of the over coat.
For a paint job that was done by a complete novice, outside under a pine tree that seemingly never stopped shedding needles, I think it turned out pretty well.
Until next time, here’s wishing you fair winds and following seas.
0 Comments
Leave a Reply. |
AuthorBrent Pounds has over a decade of experience in the maritime industry and has been involved in recreations boating since he was a child. See the About section for more detailed information. Archives
October 2016
Categories
All
|

 RSS Feed