|
Well, I decided to start this refit out with a bang and tackle the most exciting part of any boat, the trailer…wait, crap, the trailer? Did I just type the trailer…yep, looks like it, and it’s too late to go back now. Just hit the delete key and go back, you say? No can do, in this blog we look forward, not to the past, we must press one…oops, I mean press on, no time to fix typos. So, the trailer… While it may not be the most glamorous part of your boat, it is none the less extremely important and can often be overlooked. I would say that far more than half (68.25%) of the boating accidents I have been a party to have involved a trailer. From launching follies, to blown tires to, running into posts at a gas station, trailering mishaps are certain to liven up your boating experience. Luckily, I have not yet been the responsible party for any of these trailering fiascoes and I attribute that to my regular maintenance on my trailer and in setting it up correctly from the start…though I did have a little bit of an issue with tongue weight and getting whipped around while towing my Yukon Delta…er, I mean never mind, nothing to see here, I never make mistakes. I think my favorite was on a trip back from Lake Powell when my uncle took a corner a little too tight and hit the curb with the right wheel of his 14-ft Elgin boat trailer. No sooner did it land on the other side of the curb, than the opposite wheel popped off and went rolling away into the intersection. As if to say, “not without me,” the right wheel quickly followed suit, rolling after its companion. My uncle was left to drag his trailer into the parking lot and replace the hubs the next day. As near as we can figure, the hubs got so hot that the quenching in the water during launching made them brittle and led to their fracturing. But I digress. The Lone Star’s trailer was a later addition to the boat, as its title clearly indicates that it is a 1967 Montgomery-Ward Sea King. Lone Star offered their own line of trailers for use with their boats in 1960s, what I have decide to call the royalty line as each of their different sizes had a different royal title (Prince, Baron, Duke, King, and Queen). The engine I received with the boat was a 1968 Evinrude Fastwin. That, coupled with the pronounced waterline I discovered on the first layer of paint, leads me to believe that the boat was kept on the water for the first 6-years of its life and was repowered and put on a trailer sometime in 1968 to sell (just call me Nancy Drew…er, I mean Encyclopedia Brown). In any case, our trailer had seen some better days; sitting in a field for 30-years will do that. I was able to pump up the old tires and pull it from my aunt’s over to my parent’s house to do some initial work on it. It was easy to tell there was air in the tires, because I could see it (the air that is), and the lights definitely didn’t work, but taking back roads and at low speeds we made it just fine. Prior to hauling the boat across country to the Pacific Northwest, I decided that I should probably take care of a few items. I first put the boat on a weight loss program and removed everything…even stuff that was nailed down. My dad and I also tackled everything we needed to make the trailer road worthy and not a road hazard. We replaced the wheel bearings and seals, got all new tires (including the spare), and replaced the mismatched taillights with a new set from Harbor Freight. We gave it a good once over and then, after getting some temporary license tags, I set off across the great divide. The trailer made the journey just fine…which is more than I can say for my Subaru, which threw a rod coming down Monarch pass, but that’s another story.
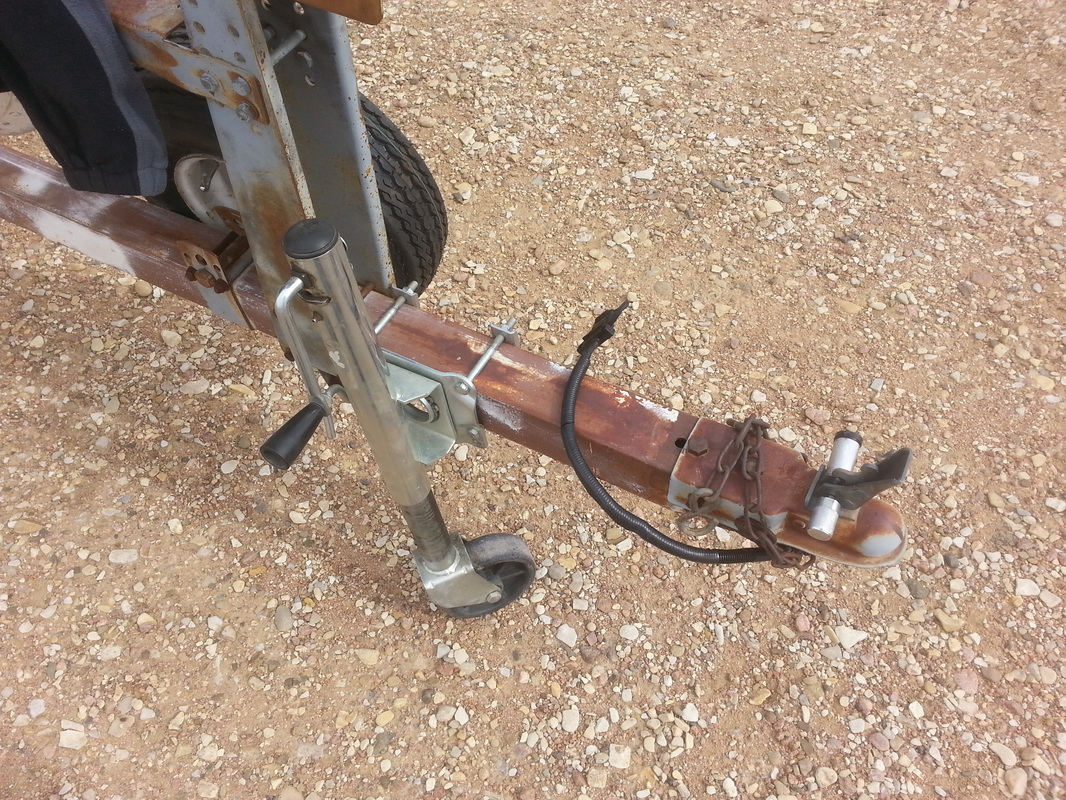
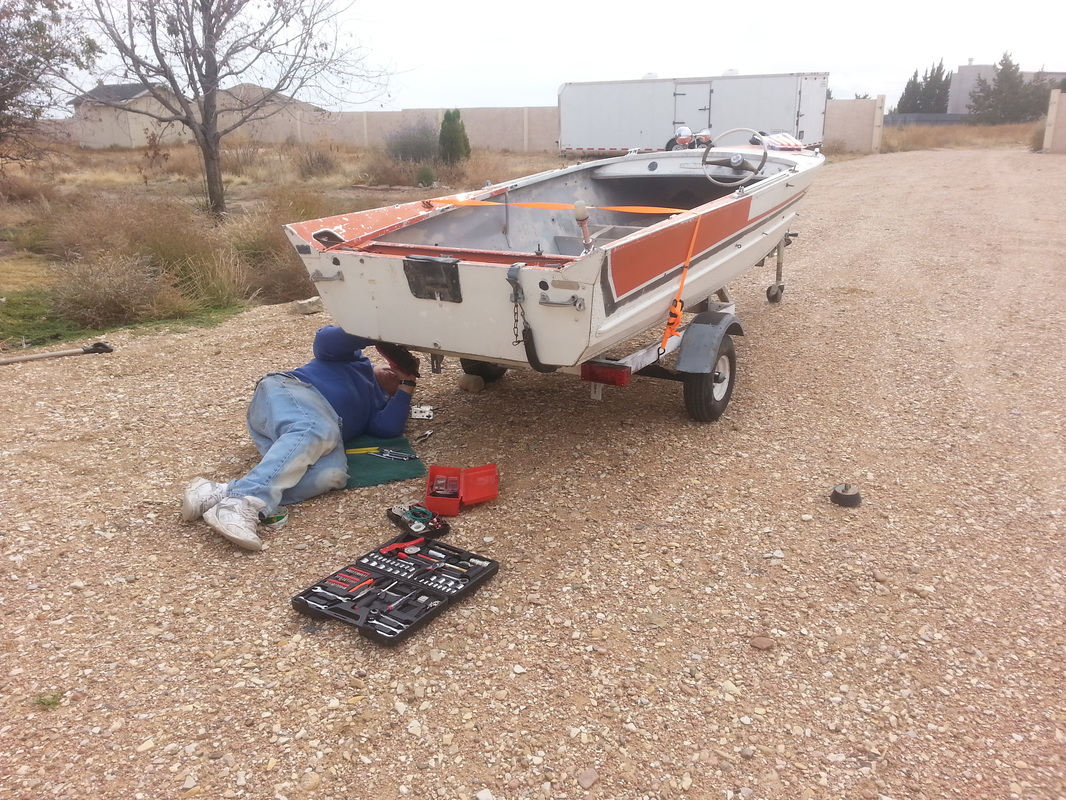
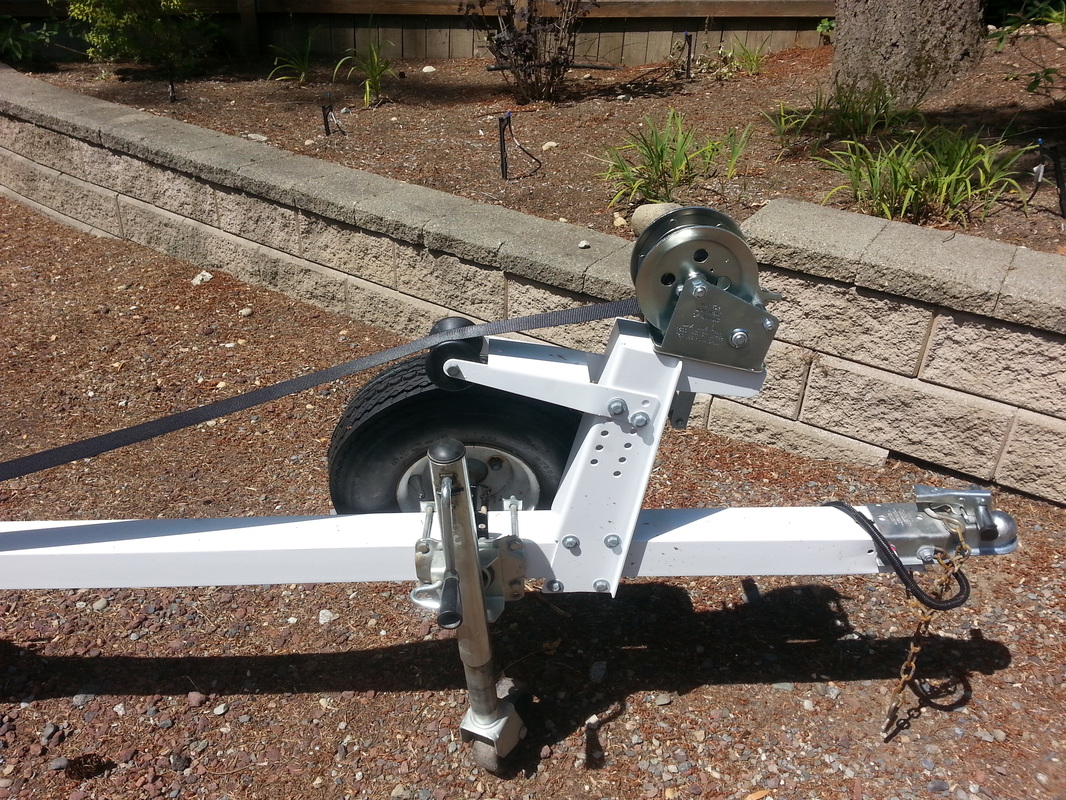
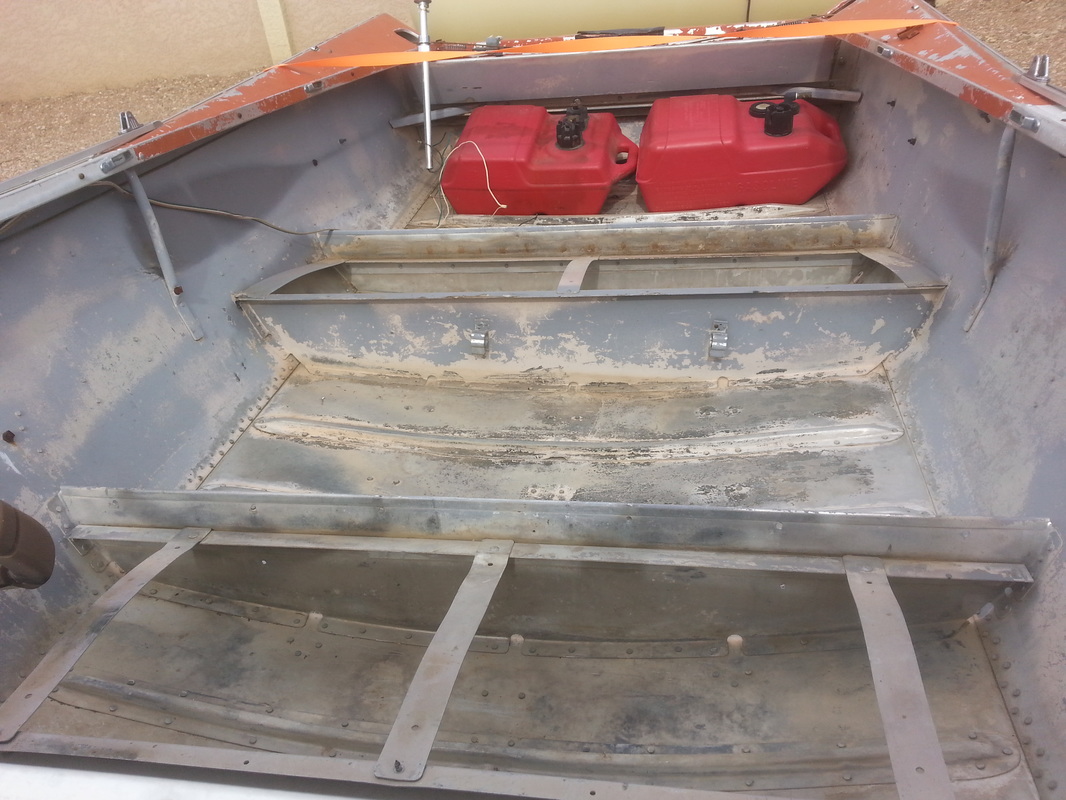
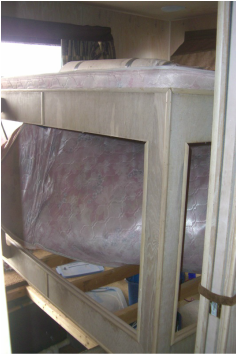
After stripping the paint of the top deck of the boat, I was able to remove it from the trailer and flip it upside down on some sawhorses, which gave me full access to the trailer and allowed me to go ahead and complete its refit. Before I did that though, I took note of the fact that while the trailer fit the boat pretty well, it was clear that the two were not designed for each other and some minor modifications needed to be made. The winch mount and bow stop were too high for the boat. To solve this issue, the previous owner had added a bow eye to the very top of the bow to get a better angle with the winch, but that just didn’t look right to me and I decided to take a cutting wheel to the mounting post and shorten it about 8-inches, which allowed me to line things up with the original bow eye. It took a little finagling to fit the spare tire, new jack, and winch post, but I was also able to move the boat forward almost a foot to improve the tongue weight. Once I had all that cut and mocked up, I disassembled the entire trailer and began restoration in earnest.
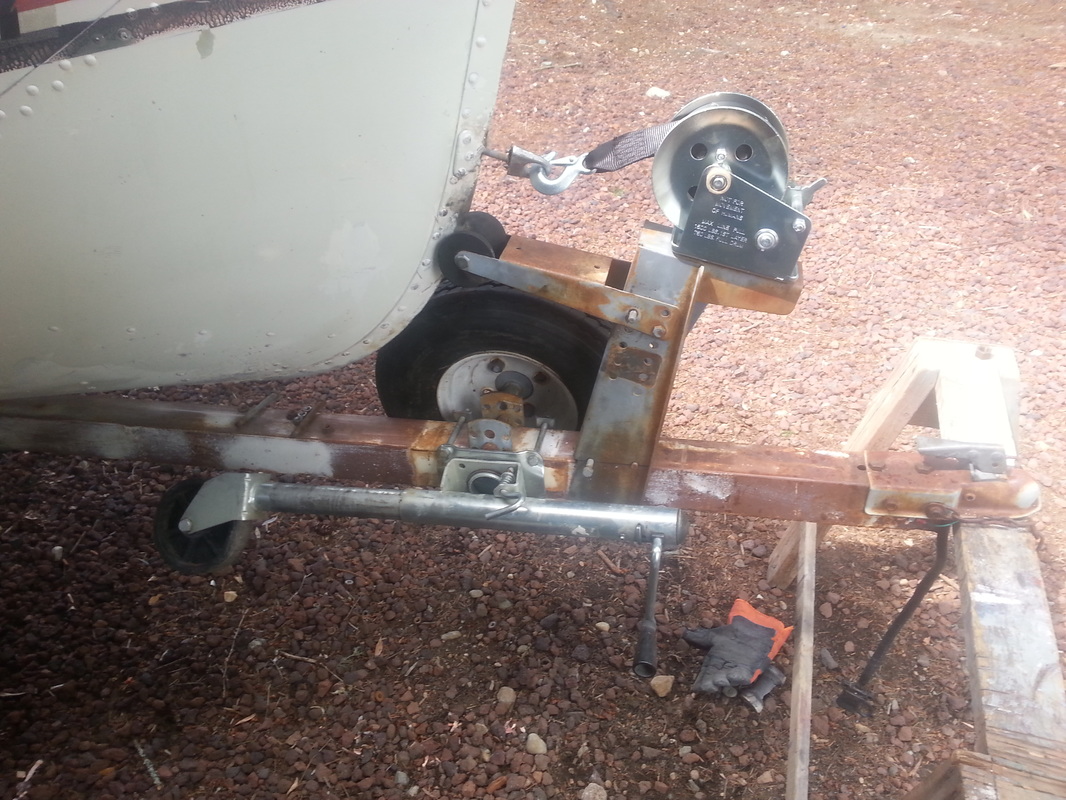
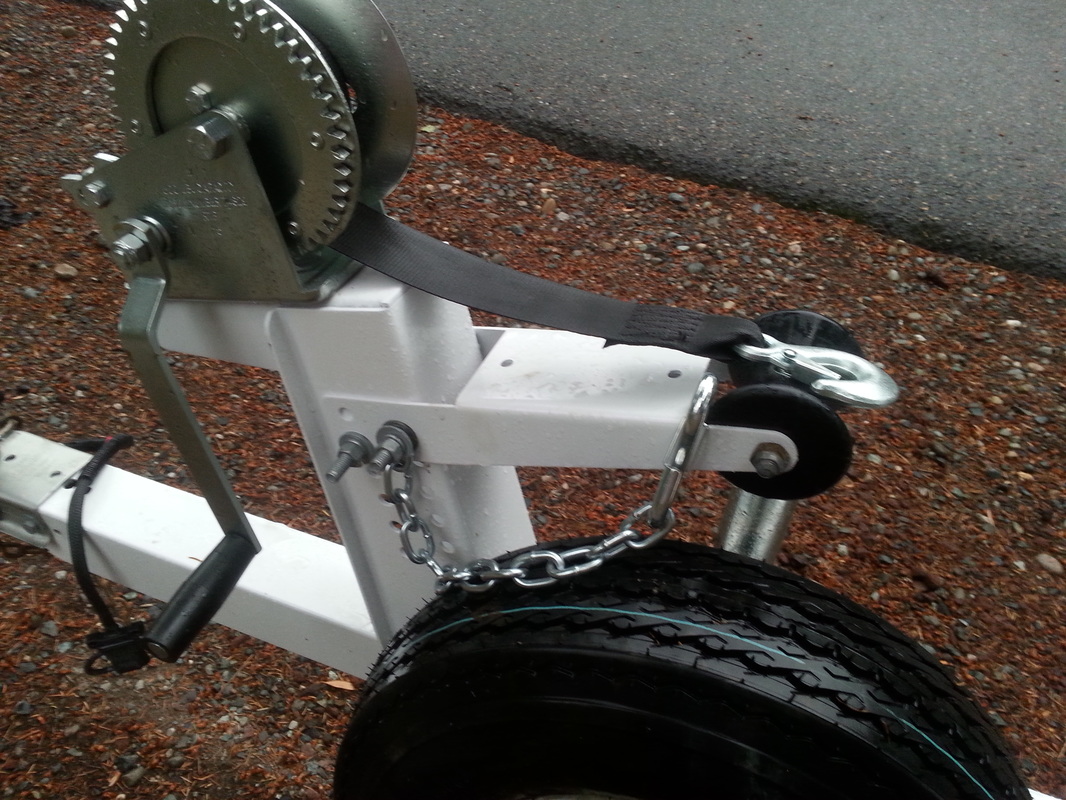
I didn’t completely dismantled the trailer, but took off pretty much everything with the exception of the axle and related components. I pulled the rat’s nest of wires (my grandfather had a more colorful term that I won’t repeat here) that had been cobbled together over the life of the trailer with plans to replace them all. Then it was on to the sanding. I didn’t take the trailer down to bare metal, as what was on there seemed to be adhering pretty well. As a quick test of the stability of your painted surface, you can take a piece of duck-tape (it’s not duct tape, please stop correcting me) and press it firmly onto the painted surface. If it you can remove it without peeling any paint along with it, then the paint is probably stable enough to paint over without needing to be removed. There were a few areas where the paint was scratched or rust was just starting to show through and in those areas I tried to sand down to clean metal and remove as much of the minor surface rust as I could. No matter what, you’re likely not going to be able to get into every crevice and crack to remove the rust with sand paper, so it’s important to use a good quality paint that is compatible with stable rusted surfaces, but you can also attack the rust chemically. I treated the particularly bad patches of rust with Rust-mort before priming; it is phosphoric acid and reacts with iron oxide to form black ferric phosphate, which acts as a protective coating, and water. Now that I had dealt with the rust I could start making the trailer pretty again. I wasn’t going to spend a great deal on the trailer, which despite its importance is kind of utilitarian. I put a couple coats of Rust-Oleum rusty metal primer onto all the parts of the trailer and then coated it twice with Rust-Oleum high gloss enamel, white for the frame and a teal for the fenders. I gave it a quick rub down with a scotch pad in between coats to ensure good adhesion. I also gave the axle and associated components a quick spray with undercoating to protect them before painting the trailer, not worrying too much about the overspray getting onto it. Once all the components were painted, the real hard part came in waiting for everything to cure before reassembling it. In the meantime, I was able to keep myself occupied by working on the bunks and rollers. I decided to replace the bunks with pressure treated 2x4s, which I know is going to get some of you up in arms. Believe it or not, the use of pressure treated lumber with an aluminum boat is a very controversial topic on the internet, second only to ‘chunky versus smooth peanut butter’ (chunky peanut butter is the product of the lazy that can’t be bothered to finish what they started). I would never use pressure treated lumber on the boat itself or in direct contact with aluminum, but in this case I felt like they would be isolated well enough not to be an issue. I covered them with marine carpeting that had a rubberized backing and used good quality marine adhesive, both of which should form a suitable barrier; add that to the fact that the hull will be painted and not bare aluminum and I would be shocked to see corrosion issues. The rollers were, of course, all perished and needed to be replaced. The bow roller was the standard size and was an easy replacement to locate. The keel rollers were a different story. I was forced to look at replacing the entire assemblies as the roller sizes were smaller diameter than any of the replacement rollers I found on the market. Luckily, I was able to find an Atwood roller and bracket that came very close to fitting the existing mounting holes for the back two keel rollers; I just had to ream the mounting holes out slightly to get a perfect fit. Unfortunately, I couldn't find a bracket that would easily replace the forward most of the three keel rollers and I was forced to improvise. I took a replacement roller and shaved it down in order to fit the old bracket. I tightened down a sacrificial bolt through the mounting hole, put the end of the bolt in my drill, and spun it on some heavy grit sandpaper on a flat surface. I kept making black dust until the roller was small enough not to bind in the old bracket. All that was left was to put all the pieces back together. I purchased all new galvanized hardware and went to work; in the span of an hour I had everything back together, which included a new coupler, new winch, and new trailer jack. I installed a new bow safety chain, which can be the difference between your boat ending up on the ramp when your winch fails or staying on your trailer for the trip to the top of the ramp. I then turned my attention to the electrical system.
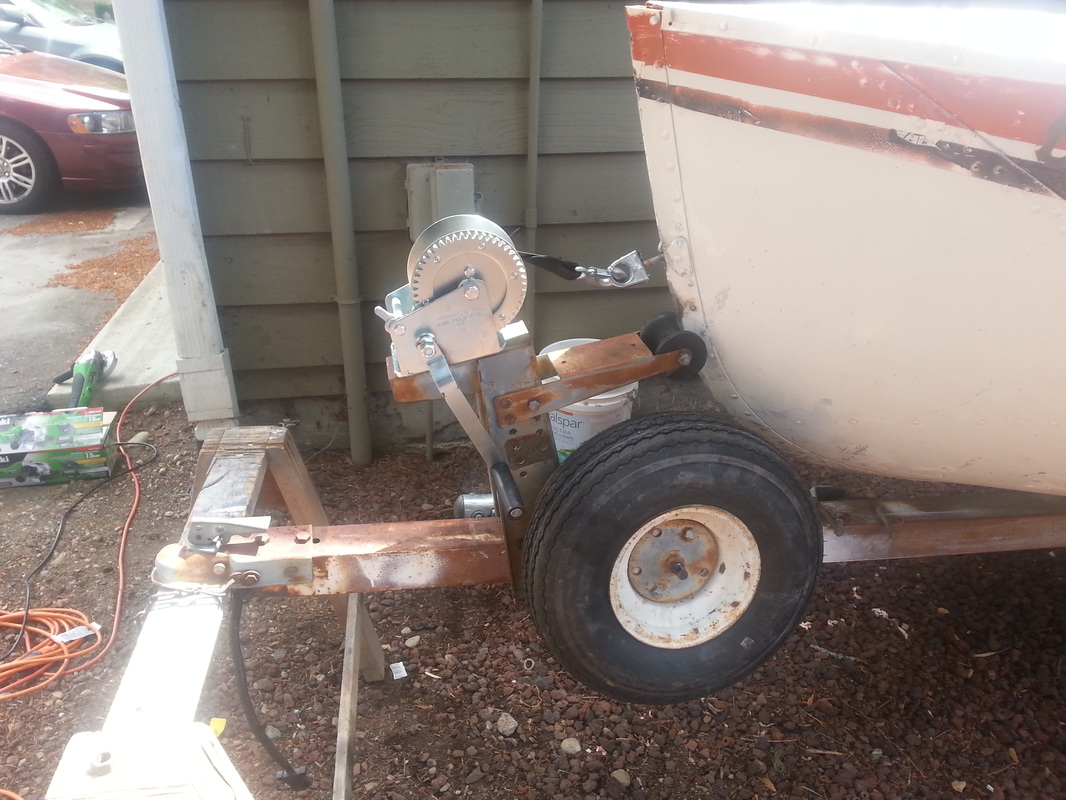
I purchased a new wiring harness from Harbor Freight and rewired the entire trailer. The wires were easy to pull, just run through the tongue and then run along the frame back to the LED lights that I had previously purchased. After battling incandescent bulbs on trailers for years, LEDs are a welcome relief; with incandescent bulbs, you must unplug the lights prior to launching or retrieving to prevent them from bursting on contact with the water, but even if you did that, I found that often times they would still be hot enough to die upon contacting the cold water. Never mind the fact that I would often forget to plug them back in before heading down the road. My father’s old Dilly trailer had the lights mounted high on trailer loading guides, which was a great solution, but with LEDs you simply don’t have to worry about it and will likely never have to change a trailer light-bulb again. In short, they are definitely worth the minor extra investment up front. Also, while a majority of trailers use the frame to ground the lights, I’ve always found that the ground is the Achilles heel of most wiring setups; inevitably you’ll get a bad ground connection and your lights will start acting funny or not working at all. Instead I ran a dedicated ground wire from the plug all the way back to the lights themselves, which should reduce the possibility of any ground issues rearing their head in the future. The final project for me to complete was to add Bearing Buddies, or a generic imitation of that name brand. It’s a very simple installation, just pop the existing dust covers off your hubs and tap the Bearing Buddy into place. For such a simple installation and a simple product, it adds a great amount of peace of mind. It is simply a spring-loaded plate with a grease-zerk that allows you to keep the grease in your hubs slightly pressurized and prevent water intrusion. When you back your trailer into the water for launching, the hubs are often hot after travel; the sudden cooling of the hubs can contract the air inside and create a vacuum that draws water into the hub. With the spring-loaded Bearing Buddies a positive pressure is maintained and keeps water from intruding. Another great feature that I like to include on my trailers are loading guide posts. I got used to them on my dad’s old Dilly trailer, which had four (2 at the stern and 2 just ahead of the axel), and discovered with my first boat that did not have them on the trailer that I wasn’t nearly as good at putting a boat on a trailer as I thought. They make loading and unloading your boat much faster and easier; I don’t know why everyone wouldn’t put some on their trailer for the $50 or less a set costs. I have purchases a set of guide posts, but I don’t plan to install them until the boat is back on the trailer and I have completed most of the work, since they would definitely be in the way. Again, these are a simple installation that takes less than half an hour and aren’t a complicated piece of equipment. They provide you a reference for where the trailer is when you otherwise wouldn’t be able to see it under the water. To get your boat on the trailer, you just get it between the guide posts and then drive it up onto the trailer. They really make putting the boat on the trailer a breeze. 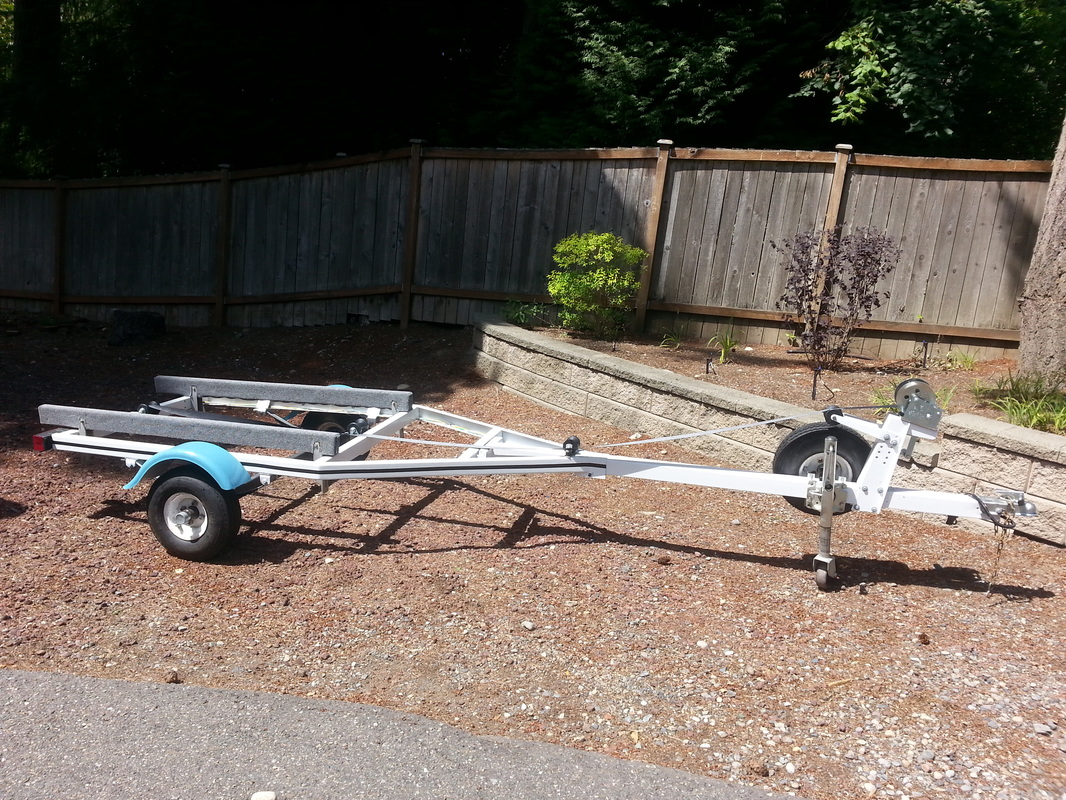 Until next time, here’s wishing you fair winds and following seas.
0 Comments
The engine room, or compartment in this case, is the heart of a vessel; the literal motive force that moves the vessel through the water and provides power for necessities like Air Conditioning and Satellite TV (at least my wife insists these items are necessities, if she’s going to join me on a Powell vacation). The Serenity was in desperate need of a heart transplant. The engines and generator had, of course, been completely submerged, but we had been told that they had been pickled after the vessel was refloated. However, there was no indication of how well they had been pickled and I got varying accounts from the guys at Dry Storage, the Insurance Company, and Executive Services. If your engine goes under, there are several differently levels of pickling that can occur, and they range from completely ineffective window dressing to an ideal pickling that ensures the engine is turn-key ready. Ideally, you would drain the oil, remove the water from the cylinders, fill it with oil, and fire it up to get the engine up to temperature; then you change the oil and fog the cylinders. That engine should be none the worse off. While they didn’t fire up the Serenity’s engines, it does seem like they did a decent job of pickling them, having at least fogged the cylinders, and the engines did turn freely. However, I discovered that they had over 2500-hours on them and would need a fair bit of work to get running again. While you can usually expect to get around 4000-hours out of these engines, I was a little worried about the reliability of these engines without knowing the service history and knowing the latter half of their life is likely more prone to mechanical failures. After going back and forth on whether to replace them or try to eke out their final 1500-hours, I finally decided to just bite the bullet and buy new engines. My logic was, if I was looking to sell shares after getting the boat finished, it would be a much easier sell with brand new engines. The Serenity was powered by twin 4-cylinder 3.0-L Mercruisers and I was able to purchase new GM Marine long blocks, along with new starts and alternators, from Michigan Motorz. I had Offshore Marina pull the old engines out and drop the new long blocks into place, replacing the power couplers and boots along the way, but finished the dressing of the engines myself. After a lot of fiddling by a bunch of part time mechanics (my dad, some friends, and me), we got both engines running smoothly…even if we did have to change the carburetors a couple times. I’d decided to rebuild the carburetors, and let’s say I might have needed a little more practice (which I got) to hone my carb rebuilding skills. I had contemplated going with EFI engines, but Michigan Motorz didn’t recommend it as they thought the carbureted engines were less prone to issues, easier to work on if there was a problem, and fuel savings would be minimal in the 3.0-L engines. 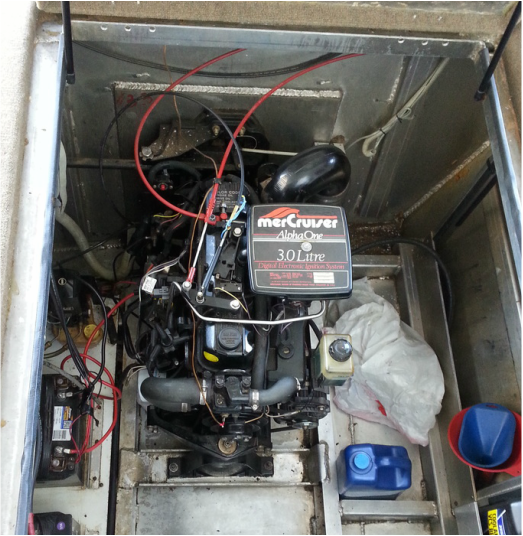 Some would think that with only 3.0-L engines the Serenity would be underpowered, but on a boat this size I see very little benefit in adding a ton of horsepower; you’re only going to burn fuel faster. Let’s face it, you’re in a houseboat, you’re not going anywhere fast. The mono-hull aluminum boats, as full displacement hulls, are more restricted by their hull speed than by any lack of horsepower. Calculating the hull speed for the Serenity, I come up with 9-knots, going faster than that comes at a very high cost (e.g. doubling your RPMs might only gain you a knot or two of speed, but comes at a tremendous loss of fuel efficiency). These little 4-cylinders will cruise at 2400-rpm, moving the boat along at a reasonable 8.5-knots. With the current props, increasing the throttle to full open gets you up to about 3200-rpm and ekes out an addition 1.5-knots. With big V8s I’d guess that you could plow enough water to get up to maybe 12-knots, but doubt you’d ever do much better, and cruising at the same 8.5-knots would be less economical than with the 4-cylinders. I left the 17-pith propellers on the boat, but they seem to be too much prop for the engines. The pitch of propellers is expressed as the distance the propeller would travel through a solid (i.e. with no slippage) in one revolution. Correctly sizing the propellers to your engine is important to ensure that you get peak performance. An over propped engine, as we seem to have in this case, will bog the engine down and, among other issues, will reduce your fuel efficiency. If the engine is under propped, you will be able to rev the engine beyond redline and, as a result, you will lose top speed throttling back. You can either change pitch or diameter to fine tune the performance of your engine, but ideally you’d be able to get max RPM at wide open throttle. I will be reducing them to 13-pitch, which were stored in the hull and were likely the original props from the builder, when I pull the boat out of the water this winter and hopefully this will get maximum RPMs up to closer to redline. 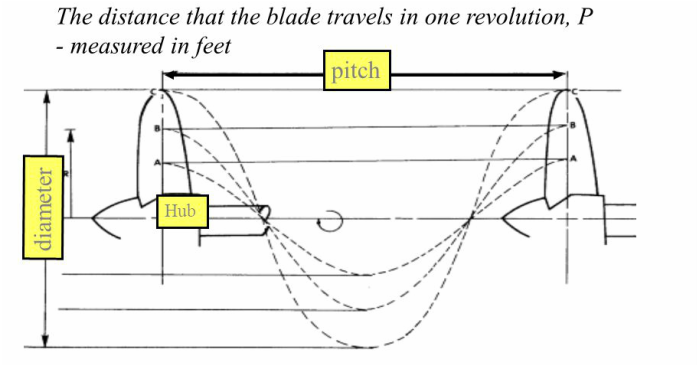 Having new main engines isn’t much good unless you can control them. Luckily, the relatively simple hydraulic steering system seemed to suffer no ill effects; after refilling it, both the upper and lower helm responded to commands. Unluckily, what I anachronistically refer to as the EOT, or engine order telegraph, was not salvageable. After discovering the cost of replacing the electronic throttle and shift controls, I briefly considered a return to an EOT and making someone just sit in the engine compartment and manually operate the throttles and shift linkages when I yelled at them, but couldn’t figure out how to sell that as a feature. The Serenity was originally outfitted with Mathers MicroCommander 585 electronic controls, but at some point the starboard control box had failed and been upgraded to a 91100. I was hopeful that I might be able to salvage the controls, but when I cracked open the control boxes I found that they were still completely full of water after almost 6-months. The boxes were designed to be water tight, but at 10-ft or more down the water pressure was too great and they suffered water intrusion. Once they were out of the water though, the pressure was much lower and their waterproofing proved effective at retaining that water. Both control heads (the levers that you operate at the helms) were still operational and I only needed to replace the control boxes. I say only, but I suffered sticker shock when I started looking for replacements. Mathers was purchased many years ago by an Italian company, ZF Marine, but they still produced the 9000 Series MicroCommanders, which are backwards compatible to the old 585 systems. That meant that I could install the new control boxes and would be able to reuse the existing wiring and control heads, with a few minor modifications. Installation actually went very smoothly, I just had to consult the 300-page manual (alright, it was only 259-pages) to rewire the control heads and then calibrate the controls. They worked perfectly…except we couldn’t get the engines to start. ZF Marine’s support was great and they walked me through a lot of trouble shooting. Eventually, I tracked the issue down to the new ignition switches that I bought on Amazon. I had replaced all the instruments and switches on the lower helm, since they had been underwater, but apparently Amazon wasn’t a great source for starter switches. I’m not sure what these switches were intended for, but they definitely wouldn’t work as standard starter switches. They would cut power to the terminal powering the instruments and the MicroCommanders when you went to the start position, which triggered the MicroCommanders’ ignition cut off switch and prevented the engines from starting. Replacing the starters solved the issue and the engines fired right up. 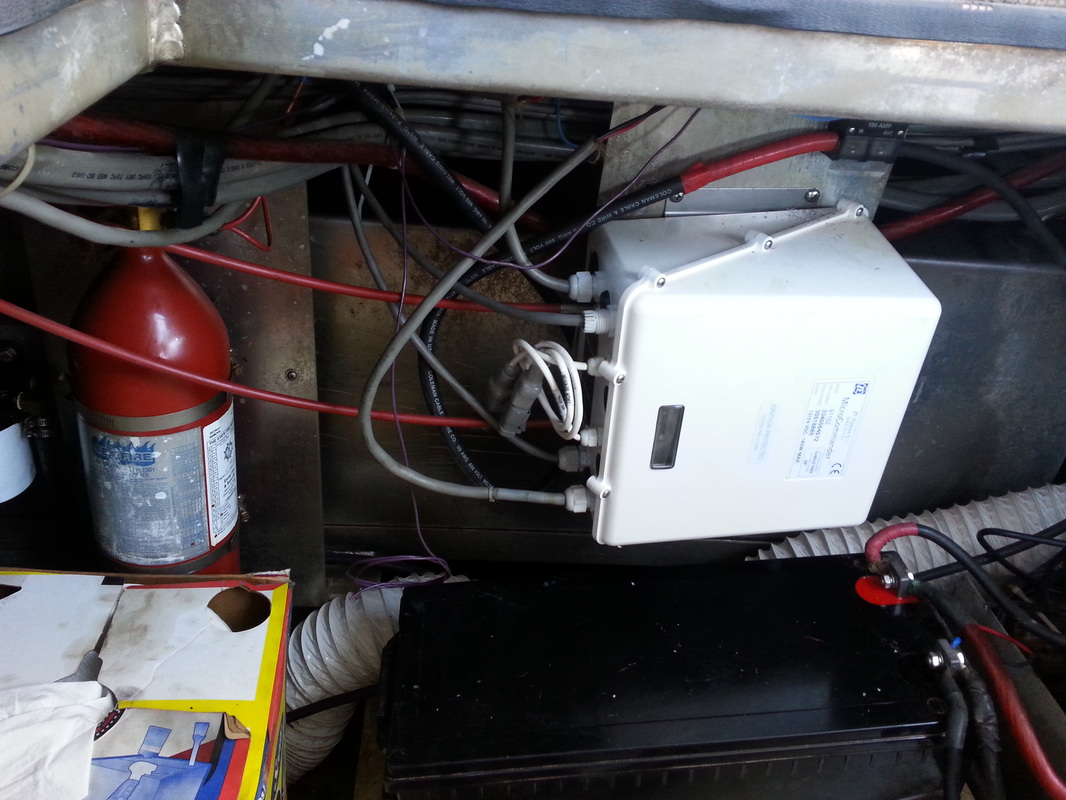 With the main engines sorted out, I could turn my attention to the generator. The pickling of the generator was more halfhearted than the main engines, but the engine did turn freely. That being said, the actual generator portion was likely shot and the only solution was a replacement. I was able to source a rebuilt 12.5-kW Westerbeke Generator for about three quarters of what a new unit would have run (in case you haven’t shopped for one, generators are expensive) and got it delivered to Offshore. Since it was a direct swap, we were able to get it installed, with the help of Offshore’s forklift, in just a couple hours and it runs like a kitten…or is that purrs like a race horse? Either way, it starts right up and is surprisingly quiet. 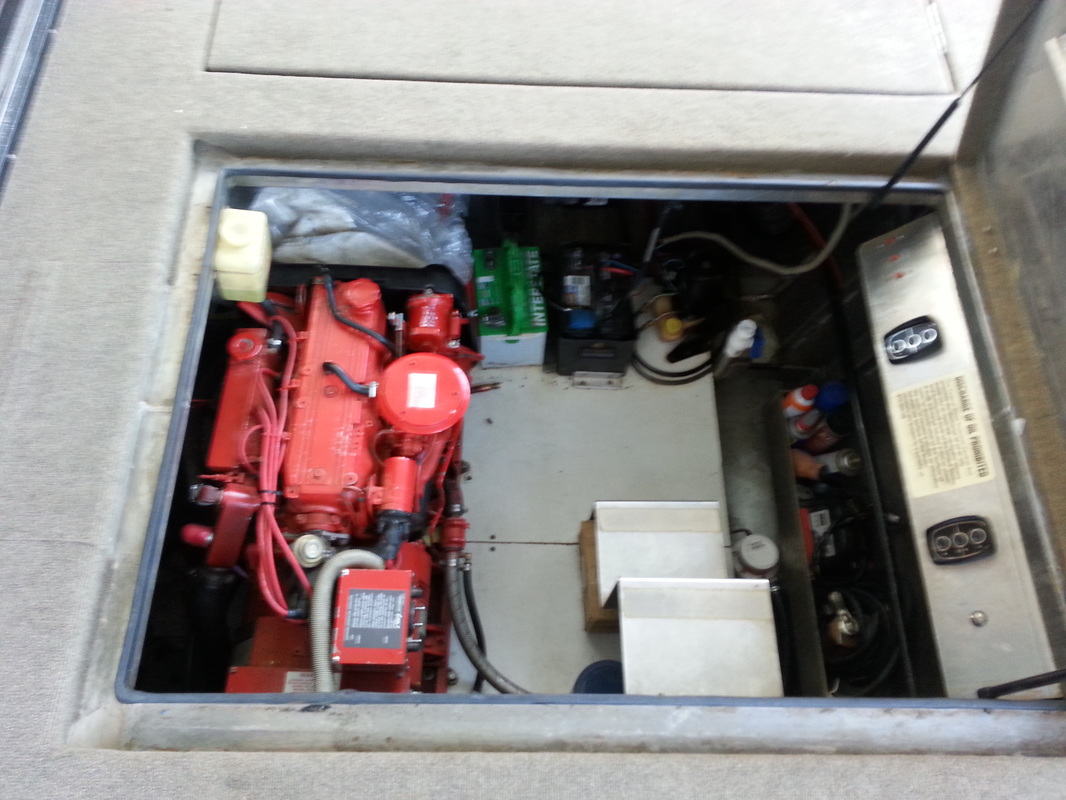 In choosing a generator, if relatively quiet performance is a factor (When isn’t it?) you want to look at gensets that operate at a lower RPM. Most Westerbekes, for example, operate at 1800-rpm, but they do offer gensets that operate at 3600-rpm, which is the same at most Kohler gas gensets. I’ve not had much experience with one brand of genset over another, but regardless of brand, lower RPMs will yield a much quieter operation. The final major project in the engine compartment had been to address the fuel tanks, which of course now contained a cocktail of gasoline and water that engines don’t particularly like. I purchase a 300-gallon tank and borrowed a 12-V fuel pump from my uncle, who was unable to pump his diesel for a few days, and headed down to suck out the contaminated fuel. Transferring fuel is a dangerous operation, as was illustrated by the recent fire that destroyed three houseboats in the Offshore storage lot. Fueling our cars at the gas station can make us complacent, but gasoline is far more dangerous than most people realize; proper precautions should always be taken when you are transferring fuel. Firstly, always use approved fuel transfer pumps, in our case a borrowed Fil-rite Fuel pump that would run with the trailer wiring harness on the truck. Secondly, we made sure that all power and other potential ignition sources were secured and remained so throughout the operation. Thirdly, we had a larger fire extinguisher at the ready, should there be an issue. We pumped both tanks dry and then cycled through a few gallons of ethanol, which acts much like dry gas and will bond with water. Pumping the tanks dry again, we then filled them with 75-gallons each from two of the auxiliary tanks that we removed from the upper deck. The auxiliary tanks had never been submerged and we found no signs of water in that fuel. We added stabilizer and a few gallons of ethanol to get any remaining water into suspension and allow it to be burned in the engines. Even with 75-gallons added to each tanks, I ended up spending $450 in filling the main tanks to capacity. 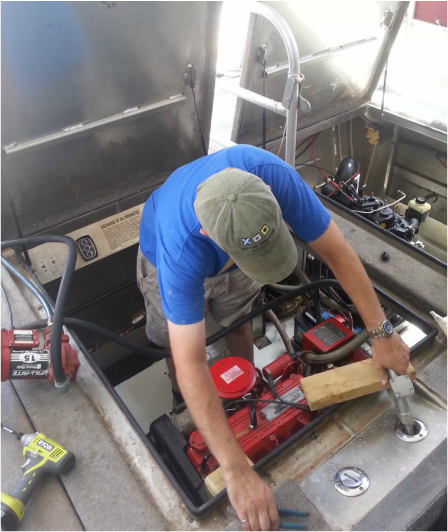 The bilge pumps were the Achilles heel of Serenity once before and I definitely didn’t want a repeat performance. The old bilge pumps were both Atwood Sahara 750-gph (gallons per minute) bilge pumps, which I thought were rather small, with integrated float switches. Neither was firmly installed in the bilge, but were just left loosely sitting in the bottom of the bilge, which would have likely prevented the float switches from operating correctly. Also, neither was wired correctly and would not have been operational in any respect at the time of sinking. The mid-compartment bilge pump was wired through the switch on the breaker panel, which supplied power to both the float switch and the manual override. That switch had to be off to keep the pump from running continuously, and thus the float switch would not have actuated during the sinking. The engine compartment bilge pump had the float switch power wired through the manual override switch on the aft control panel, thus only being powered when the switch was turned on. The manual override power wire was connected directly to ground via a hull fitting. This meant that the manual override switch did not operate the pump and that, if the switch were in the off position, as it likely was, the float switch would not have operated. Even if the float switch did operate, it would have shorted to ground through the incorrectly connected manual override power switch. In short, none of the vessel's float switches were operating at the time of the sinking. The Serenity’s hull is divided into three watertight compartments; the forepeak, a main compartment, and the engine compartment. The engine compartment and the main compartment both have a bilge pump for flooding protection, but the majority of the forepeak is above the water line and thus does not have any flooding protection. The majority of sinking incidents actually results from water intrusion from above deck. Whether the bilge pump malfunctions, or a heavy storm hits, boats take on more water than they can handle and submerge, as was the case when Serenity went down. The only way to combat this form of sinking is to conduct preventative maintenance and ensure that your bilge pumps are up to the task. I wanted to make sure that the pumps were capable of keeping up with major water intrusion, so I purchased the largest bilge pumps I could source, 3700-gph SeaFlo pumps (just five times larger than the ones they replaced). I went with external float switches, which I prefer to the integrated switches, as they allows you to easily test the operation of the float switch and visually inspect it. Both pumps are wired with override switches, so that you can manually engage them. The float switches are powered directly from engine room batteries with inline fuses. Those batteries are maintained by a trickle charger; this set up ensures that when the boat is left unattended in the slip, the bilge pumps should never lose power. This is the most robust bilge pump system that I could devise and should provide protection from all but worst case scenarios. 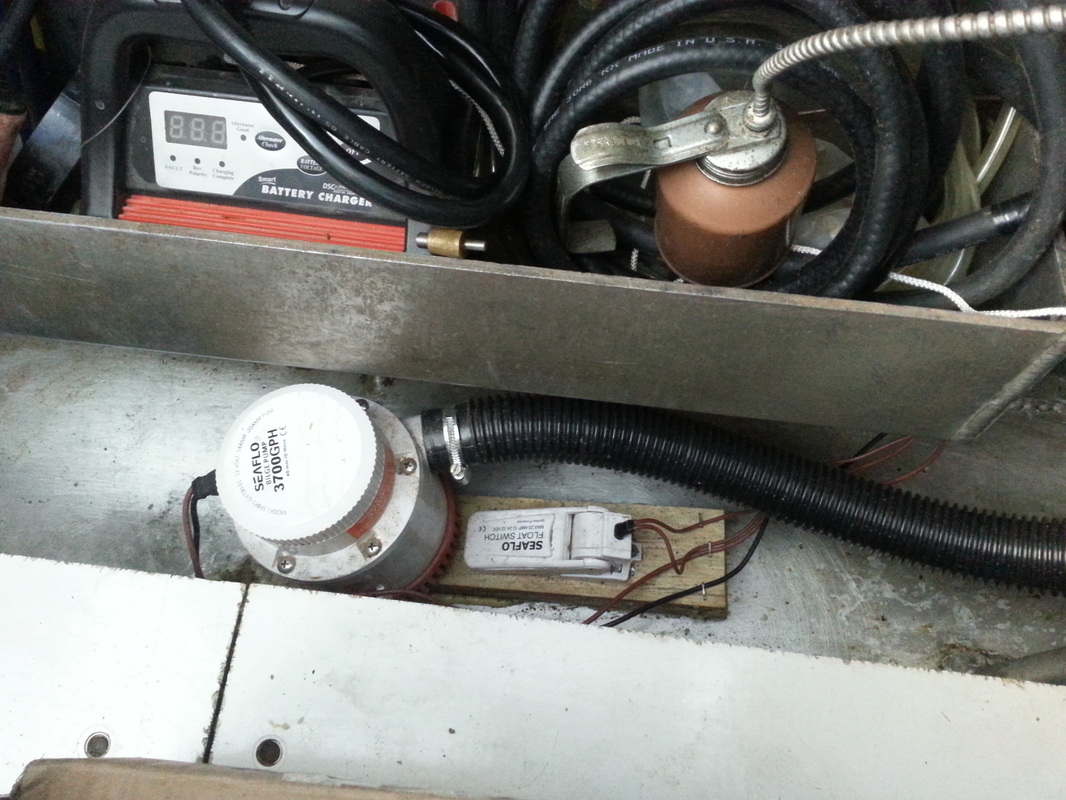 Sinking is a scary proposition, but the number one fear of most seafarers is fire. I was happy to see that the engine compartment was protected by a HALON system, which was in fine shape and only needed inspection/re-certification. The system is a HALON 1301 Flooding System that is automatically actuated when temperatures in the Engine Compartment reach 175-deg F. While HALON production ceased in 1994 due to EPA regulations on CFCs, it is one of the safest firefighting agents that you could employ in confined spaces. HALON is a firefighting agent that attacks the fire by inhibiting the chemical reaction itself and is incredibly effective at almost instantly knocking down a fire, even in low concentrations.
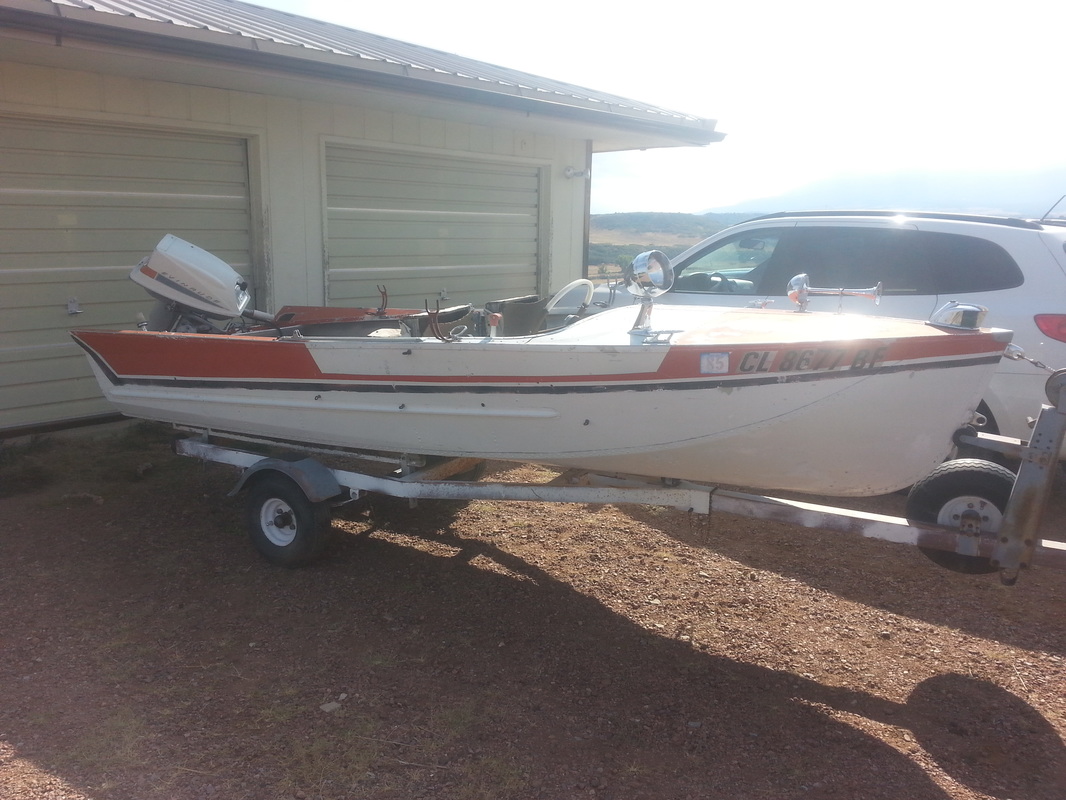
With the safety features in place, the engine room was finally finished and we could move on to some of the creatures comforts (like interior finishes, electrical systems, and indoor plumbing). Until next time, here’s wishing you fair winds and following seas. I came into possession of what I’ve deduced is a 1962 Lone Star Malibu about a year ago. The serial number is 23410061, which the internet tells me (Would the internet lie to me?) indicates the following. The leading digit is supposedly the last digit of the year, hence a 2 indicates 1962 since the Malibu was only in production from 1958 to 1963. The 341 is common to Malibues (How exactly does one write the plural of Malibu?), but there is no documentation on exactly what those numbers represented. The remaining five digits are the production number for the boat, hence 0061 means my Malibu is the 61st Malibu built in 1962. Another tipoff, I can also barely make out the name Malibu on the name plate on the dash and looking at paint schemes in old brochures seems to point to 1962. The trailer title said 1967 and the 18HP Evinrude Fastwin outboard is a 1968. Unfortunately, Colorado doesn’t title boats, so I don’t have any documentation on the boat itself. My guess would be that someone repowered it in 1968 and got it fixed up, either to sell or after buying it. Whatever it's history, I now find myself in possession of yet another project boat.
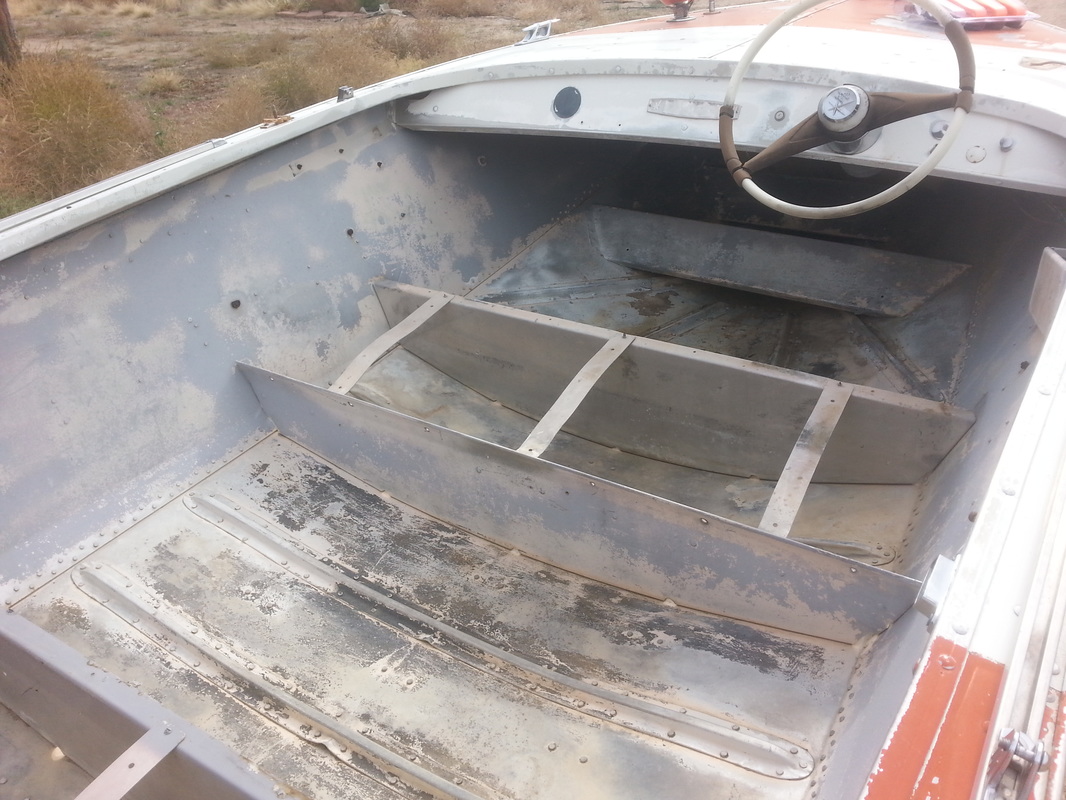
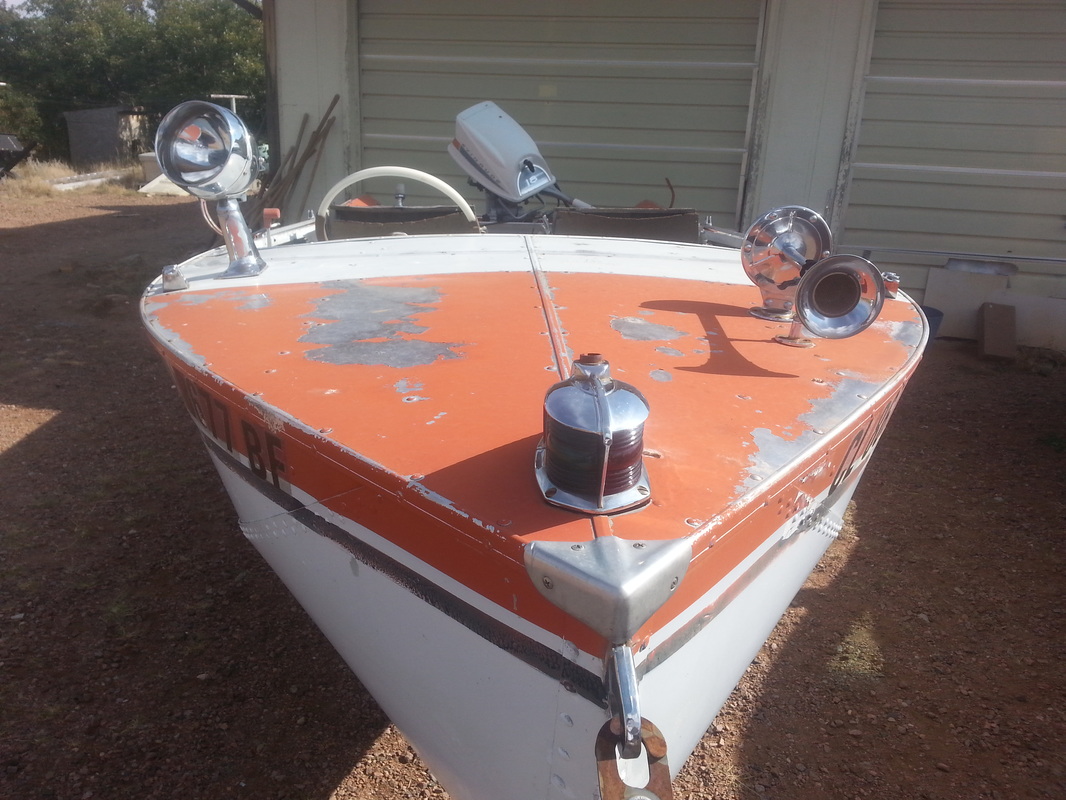
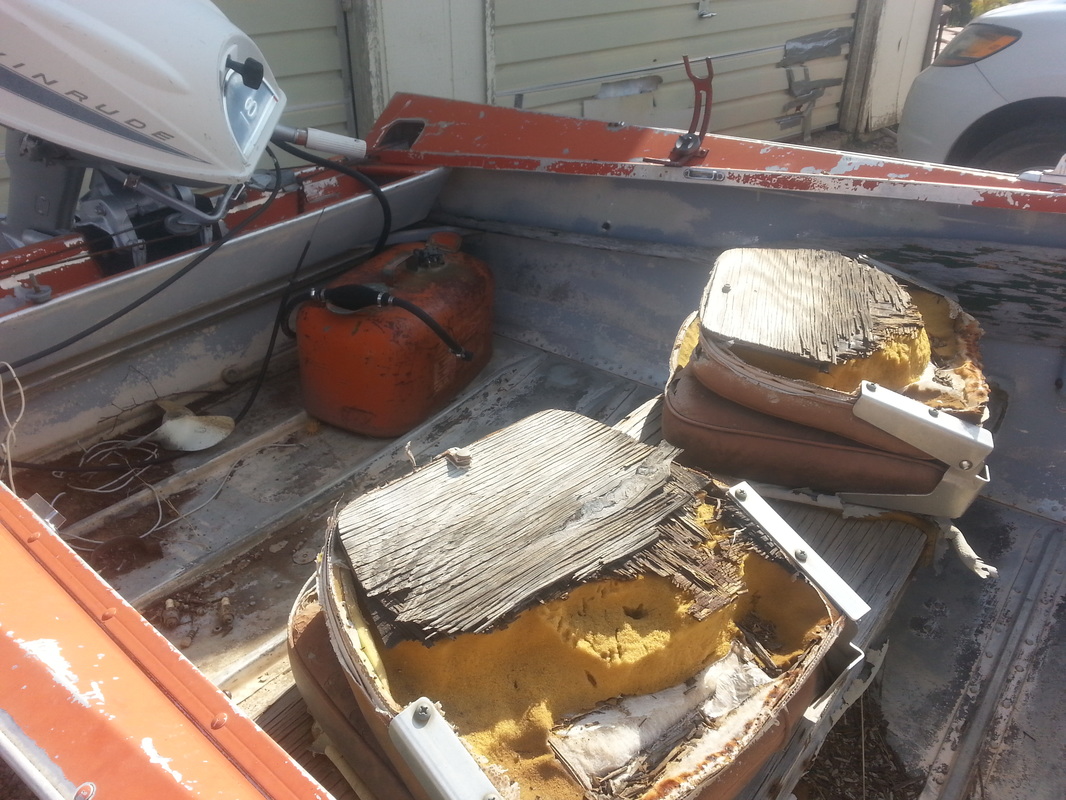
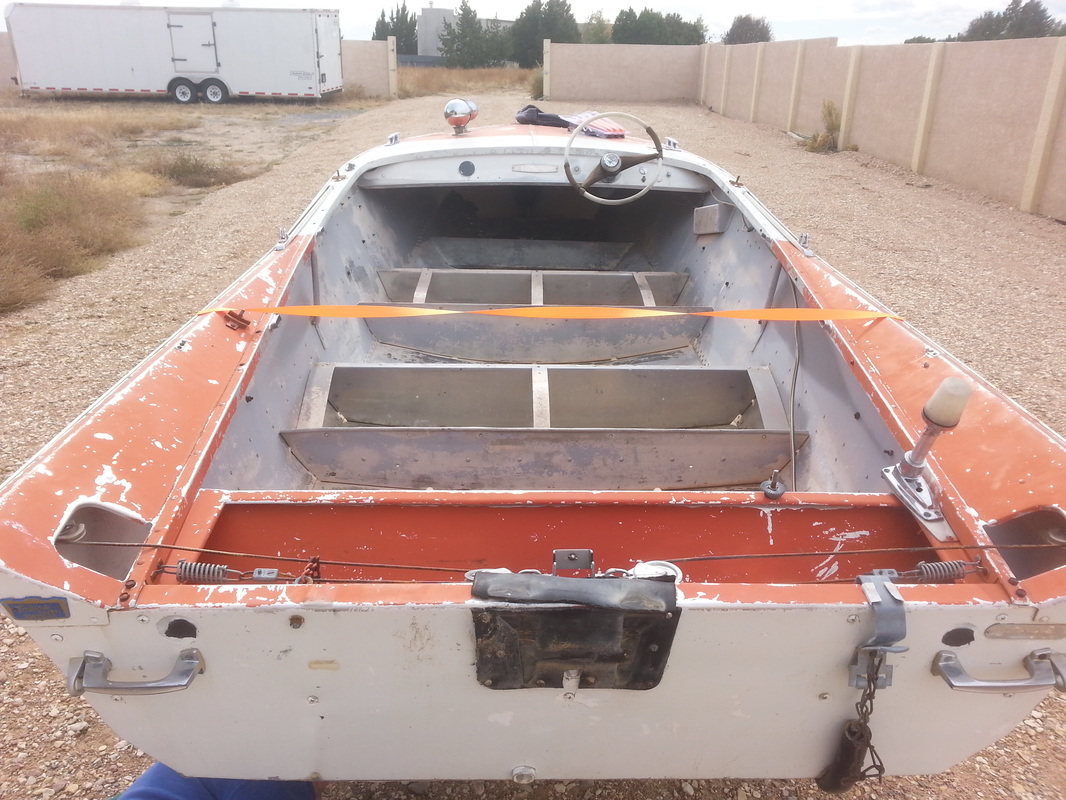
Lone Star Boat Manufacturing had humble beginnings; founded in Grand Prairie, Texas in 1945 immediately following WWII and initially producing aluminum boats in the 12-14 foot range. The company grew quickly and expanded into fiberglass manufacturing in the early 50s, running fiberglass and aluminum boat lines in parallel. In 1965, the company was acquired by Chrysler and became the Chrysler Boat Corporation, which continued production until 1979 when they closed the doors on their marine division. The original Lone Stars remain popular with collectors and enthusiasts today; with a large and active online community on Yahoo Groups (which, to my surprise, apparently still exist). They were a treasure trove of information and can be found here. The Malibu was at the heart of the Lone Star line in the late 50s and early 60s, when the 14-16 foot runabouts were the hottest market. These small runabouts provided a lot of fun on the water for a family of 4 at a very reasonable price ($525 in 1958, which is just over $4000 in today’s dollars). The Malibu stood apart from other aluminum boats of the time with its stylish design that was more akin to its fiberglass rivals, even including small tail fins. In the 60s, the public began to demand larger vessels and the Malibu was dropped from the production line in 1963. I purchased this classic boat from my aunt a while ago, without any knowledge of its history; just knowing it as the cool aluminum boat with fins that was sitting by her house. They had bought it in 1985, but only used it a couple times that year. Unfortunately, that winter a nasty windstorm ripped the cover off the boat and, in the process, shattered the acrylic windshield. That is where it sat for the next 30-years, which helped give it its current “patina.” I traded her a few hundred dollars’ worth of window air conditioners for the boat, since I thought I could use another project (in related news I’m looking for someone that could add some holes to my skull). Prior to hauling it out here from Colorado, I did complete a few minor items on the trailer (like installing new lights, replacing the 30-year old tires, and replacing the wheel bearings) to make it road worthy. I also removed some excess weight in the form of the rotten seats, various rat’s nests, a few hornet nests, and the 18-HP Evinrude Fastwin; I knew I was going to be repowering the boat to get a little more speed and didn’t see much use to hauling the Fastwin across the country.
My plan is to do a full restoration and repower it with a little larger engine…on a budget. I don’t want to sink much more than $1-2,000 into it when all is said and done…and if I do my wife might make me live in the boat. Once I get it done, it will likely find its way down to Lake Powell to act as a tender to the Serenity.
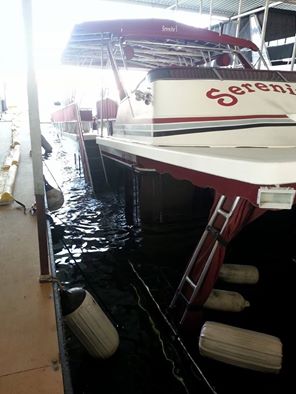
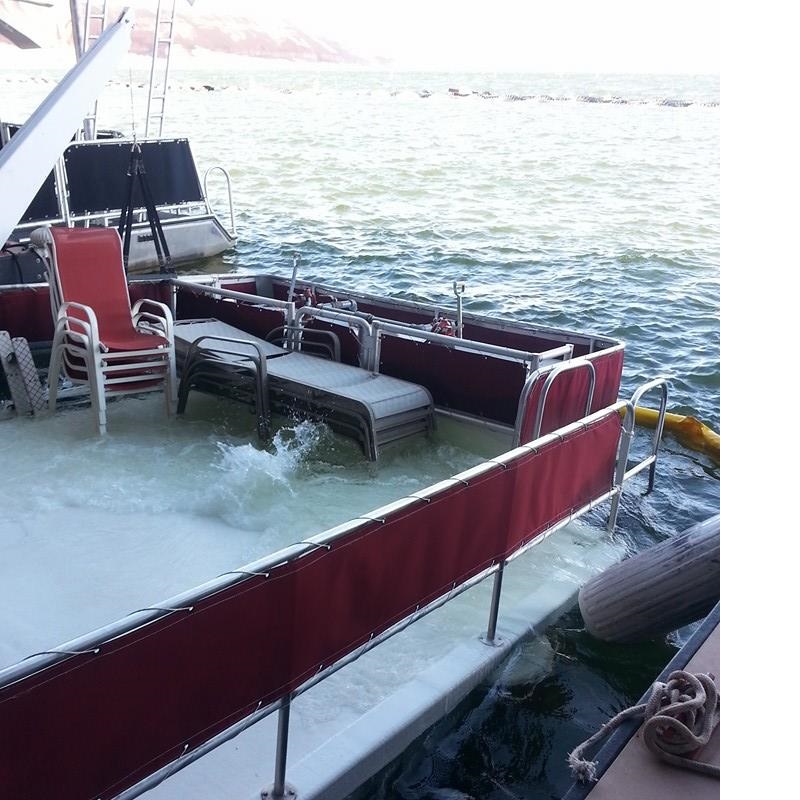
Look forward to more updates as things progress. Until then, here’s wishing you fair winds and following seas. I think most good stories start out “on a dark and stormy night” and this is where the story of the Serenity, at least in her current form, begins. It was indeed a dark and stormy night on the evening of 10-October-2014; a foul wind blew out of the Northeast, bringing with it destruction and roiling the waters of Bullfrog Bay into a tempest. Serenity sat in her moorings at G-dock in Halls Crossing Marina, her name in stark contrast to the conditions around her. The waves quickly overwhelmed the wave break and soon were crashing into and over the sterns of the houseboats in those unprotected end slips. All shipped water over their transoms, but Serenity was crippled by two inoperative bilge pumps and rapidly succumbed to the weight of water in her bilges, sinking right there in her slip. The storm and her sinking were chronicled here on Wayne’s Words Message Board, in this thread.
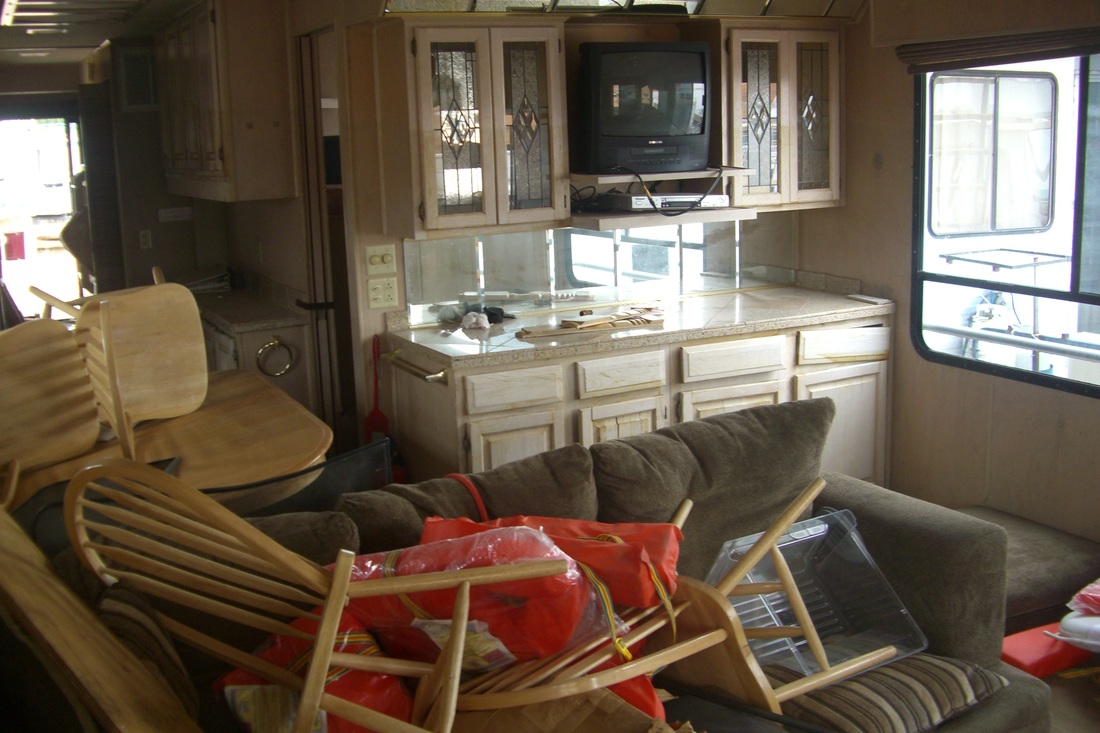
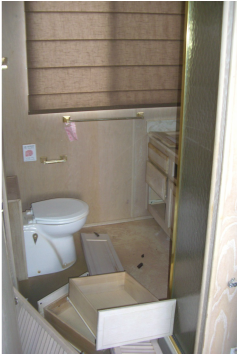
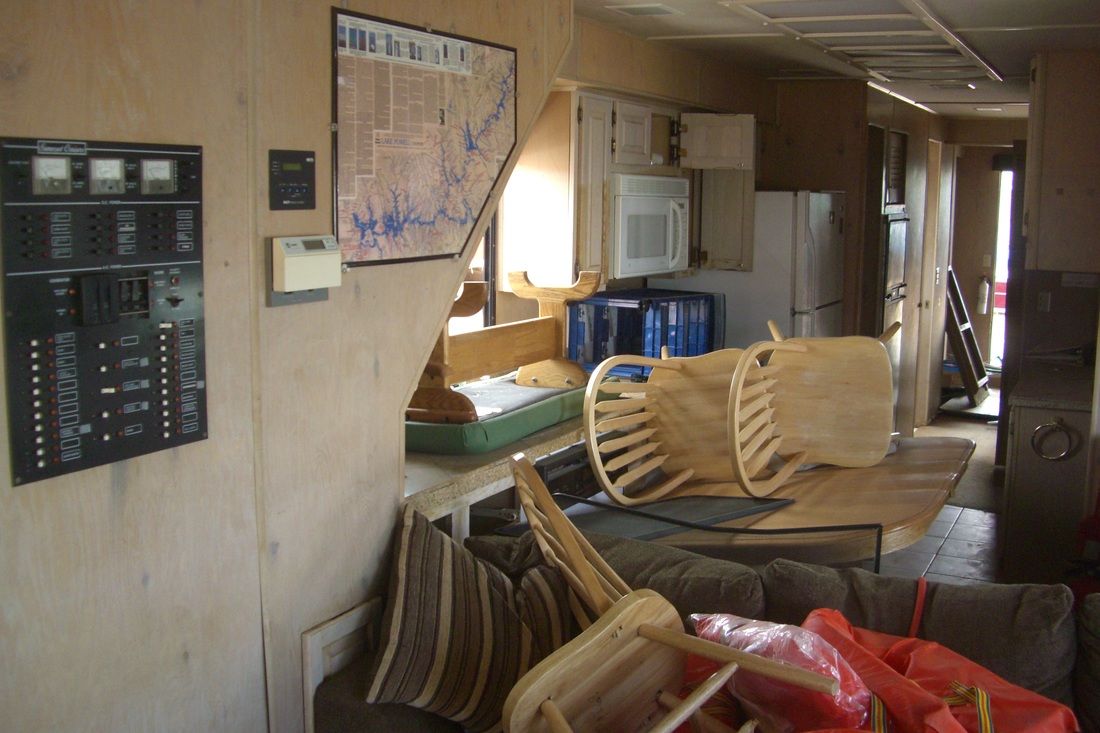
The Serenity was refloated and hauled into dry storage at Bullfrog just a couple days afterwards. While I am not privy to the details, the insurance company declared Serenity a total loss and settled with the ownership group, taking possession of the vessel in her current state. Enter our hero (that’s me), who several months later was innocently looking to purchase a share in a multi-ownership houseboat in either Bullfrog or Halls. With the recent birth of my son, I was looking to get back into boating so that I could share some of the great experiences from my childhood with him, and, in my book, there’s no better place for boating than Lake Powell. I had been looking at boats for a month and had about a dozen likely candidates that fit my criteria, so I took my dad and we headed down to Bullfrog to look them over. One of the boats happened to be stored in Bullfrog Dry Storage and, while we were looking at her, the gentleman managing the storage yard suggested we take a look at this boat that the insurance company was looking to sell after a failed attempt at moving it to Las Vegas for a refit and sale. I love boats, and I love looking at boats, so of course I took him up on the offer to look over Serenity, never really considering that buying her was an option. He said that he thought the insurance company was looking for about $11,000. I figured that was probably a starting figure and that they would auction the vessel off for between $20- and $30-thousand, not really something that I would call a great deal. She was in pretty bad shape, as you can see from the photos, but you could tell that it was a good solid boat that could be refit. I had always dreamed of buying an old houseboat and refitting her into my ideal houseboat with all the bells and whistles, but my dreams had always started out slightly more modestly looking at 40- to 50-ft steel pontoon boats, not a fancy aluminum mono-hull.
He gave us the contact information for the person handling the sale for the insurance company and we headed back home with our short list of boats that I was considering buying a share on. On the way, my dad and I discussed the Serenity and started working out rough guestimates on how much it would cost to refit her in a worst case scenario (spoiler: we were low). I told my wife about it and, to my surprise, she said we should buy it. In the meantime, my dad had contacted the insurance company representative and she had sent over the Serenity’s last survey prior to sinking, the insurance claim report, and the estimate for refitting (well north of $100,000, which didn’t seem reasonable). So, now I found myself considering purchasing Serenity and I realized that I didn’t really spend too much time looking her over (didn’t check to see if the engines were seized or really look too hard at any of the systems) and I took no pictures. I was still hesitant to commit to refitting a vessel down in Bullfrog, but my dad talked me into making an offer to the insurance company that we couldn’t get hurt on. We called and he asked if they would accept low-ball offers, the representative laughed and asked how low-ball the offer was…$5000, we offered $5000; I was sure that they would decline the offer on the spot, but she said she would check and get back to us tomorrow. Now I figured they would counter our offer the next day or outright reject it. Nope, the next day she called back and said you’ve got a deal. I sent her a cashier’s check for $5000 and she sent me the signed title (actually a bill of sale, the previous Missouri Title, and an affidavit stating that Colorado doesn’t require a title for boats). I found myself the proud new owner of Serenity…now what? Well this is where the real fun began and I will chronicle that in several parts, because there’s just too much fun (or is it phun) to fit into just one blog post. Rest assured that there were many points when I found myself wanting to scream “Serenity Now!”  Until next time, here’s wishing you fair winds and following seas.
|
AuthorBrent Pounds has over a decade of experience in the maritime industry and has been involved in recreations boating since he was a child. See the About section for more detailed information. Archives
October 2016
Categories
All
|


 RSS Feed