|
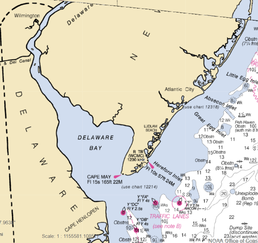
Have you ever wondered how hydrographers create accurate depictions of the coastline on their nautical charts? In modern surveys we utilized photogrammetry (aerial photographs) of the coastline or, more recently, LIDAR (Light Detection and Ranging) to produce shoreline on nautical charts, but how did the sailors making those nautical charts from the 1600s to the early 1900s do it? In the earliest days of exploration charts were often made by estimation. Using the ship’s log, which would include important observations and the ship’s navigation information, one could approximate the shape of the coastline for the purposes of creating a nautical chart. This was inexact at best and resulted in some crude approximations of the actual coastline, as can be seen below in a chart from the 16th century. 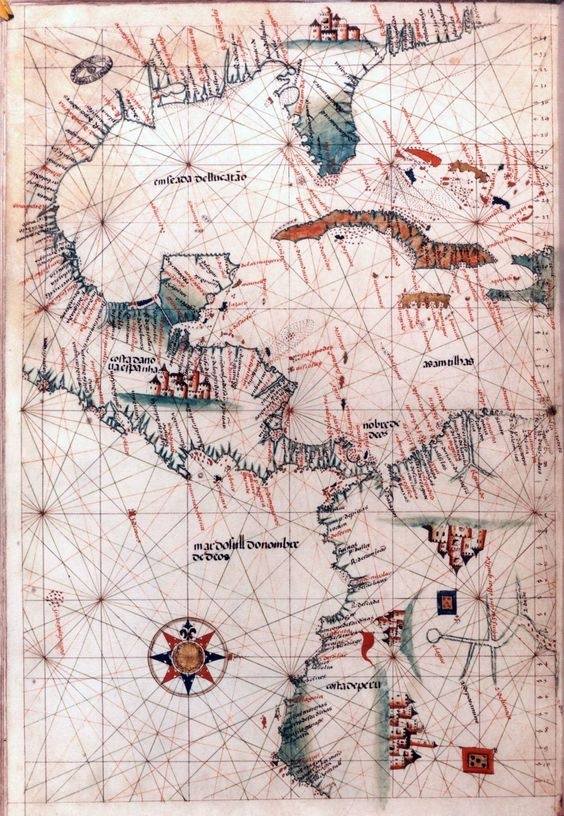 As you move into the 17th century, there were some purposeful hydrographic surveys that were conducted to chart coastline accurately. The British Navy began a detailed survey of their coast in the 1680s and produced some very accurate shorelines. The image below is of Delaware Bay and was produced in 1630s, which is pretty accurate compared to a contemporary chart of the same area.
So how did they do it? The answer is Plane Table Mapping. Plane table mapping utilizes a table affixed to the top of a tripod on which to plot positions and a telescopic alidade to get bearings to the features you’re trying to position. 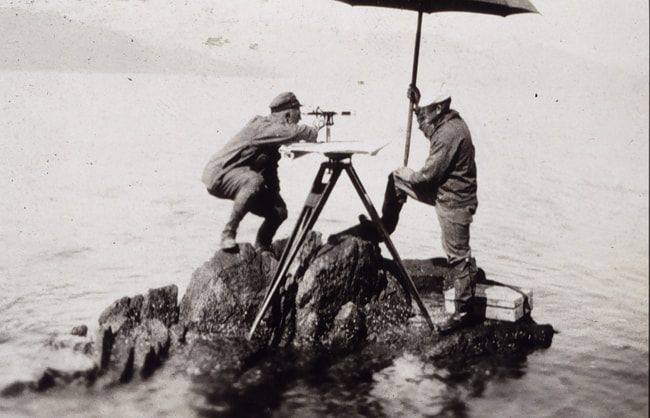 The image above is from the NOAA archives and shows a US Coast and Geodetic Survey team utilizing a plane table to chart the coastline in Alaska. At its most basic, plane table mapping is simply triangulation. From a known location, you can shoot the angle/bearing to a prominent feature, then you can either measure the distance to that feature or you can shoot another angle to that feature from another known location. Either way (with a line of position and a range or two lines of position), you fix that feature in relation to known locations. By fixing several points along the shoreline, you can then generate the overall shape of that shoreline. The simple example below shows the mapping of a courtyard by taking bearings from two known points a set distance apart (the baseline).  There is a great article on the history of the plane table at the link below:
Plane Table Mapping I think it’s really quite fascinating, but maybe that’s just me. Until next time, here’s wishing you fair winds and following seas.
3 Comments
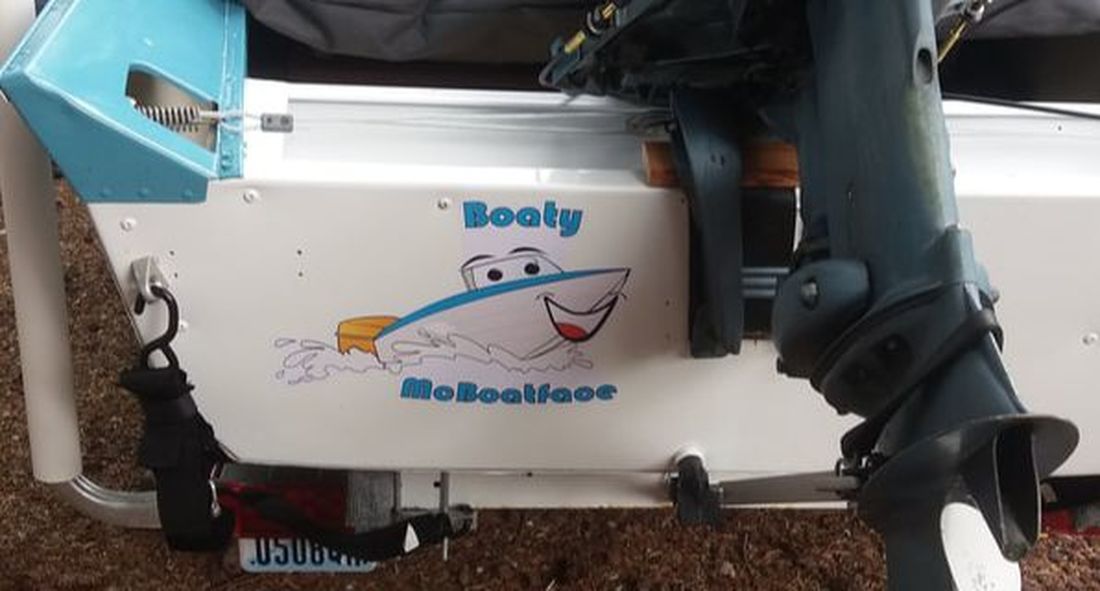
After finishing the Lone Star Malibu, the only thing left to do was to outfit the boat. It’s a tough balancing act to have everything you need on the boat, but at the same time fit it into limited space and weight allowances. This is magnified on Boaty given the tight storage in the 14-ft hull. The first stop is to check the equipment carriage requirements for your vessel. The US Coast Guard has requirements based on both the size of your vessel and where you will be operating that vessel. You can find the Coast Guard requirement on a variety of websites, but they are what I would consider the barest of essentials and most states will have additional requirements for safety equipment. For that reason, I would start looking at the equipment requirements for the state in which you will be operating the vessel, which will by default include the USCG requirements. One of the best safety equipment check lists I’ve seen is the one available from the Utah Department of Natural Resources (DNR), which I have reproduced below (click on the image to go to their website). My boats have generally be registered in Colorado or Washington, but spending as much time at Lake Powell as I have I’ve become very familiar with their carriage requirements. I think Utah DNR does a great job of clearly communicating the required equipment, which I can't say for Colorado or Washington.  As you can see from that chart, my 14-ft open runabout with an outboard engine, is required to have the following equipment:
There are other required items outlined in this chart, like registration, insurance, navigation lights, etc., but I wouldn’t really consider those equipment. Also, you can see that while my open vessel with no enclosed fuel storage or engine compartment does not require a fire extinguisher (see Note C in the chart), it is recommended; as are a Type IV throw-able PFD and a sound producing device (e.g. horn or whistle). Obviously, as long as it is realistic to store them aboard, I would carry all of these and, in line with the USCG’s motto of Semper Paratus (Always Ready), I generally carry quite a bit more. 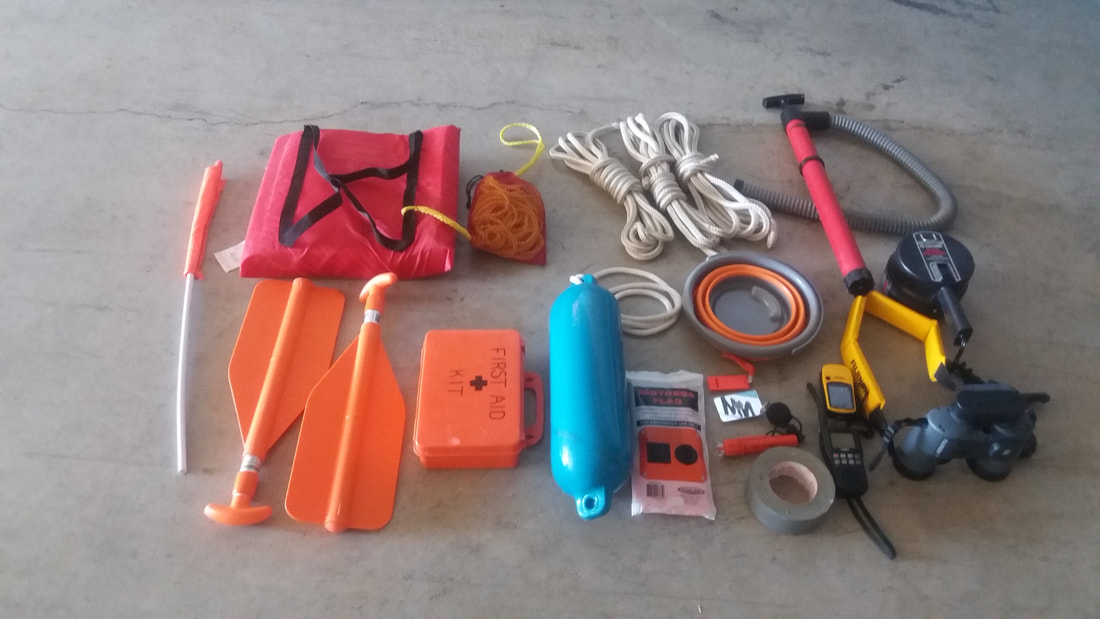 For those that don’t want to read an exhaustive description and justification for everything, here is the abbreviated list.
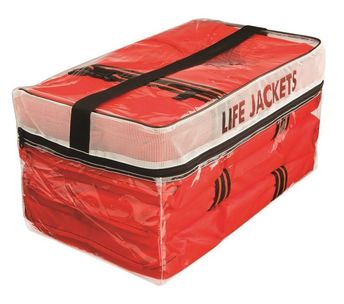
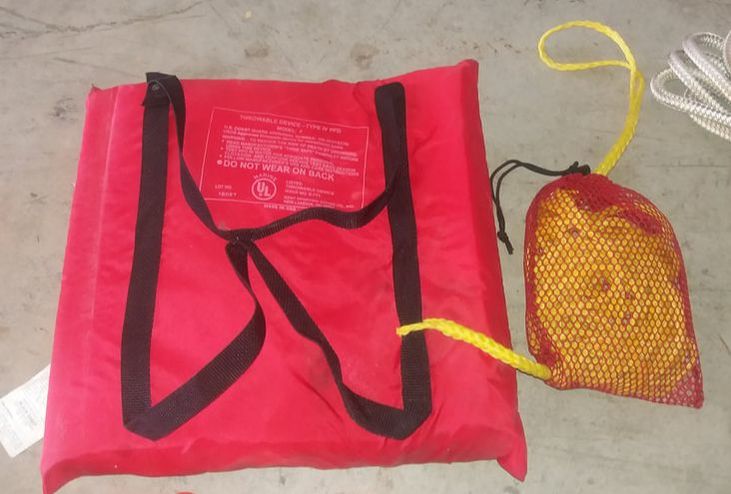
For those wanting to get into the nitty gritty, you're in luck. I purchased a 4-pack of type II PFDs with a storage bag on Amazon for about $40. I will normally have other life vests aboard, but having this package of four stowed under the nose ensures I’m always in compliance and that we will definitely have enough if worse comes to worse. I also opt for the “strongly recommended” Type IV throw-able PFD, which in my case is a red float cushion that I have rigged with a life line. You can purchase a life line in a throw-able bag, but I opted to make my own using polypropylene line and a cheap mesh bag.
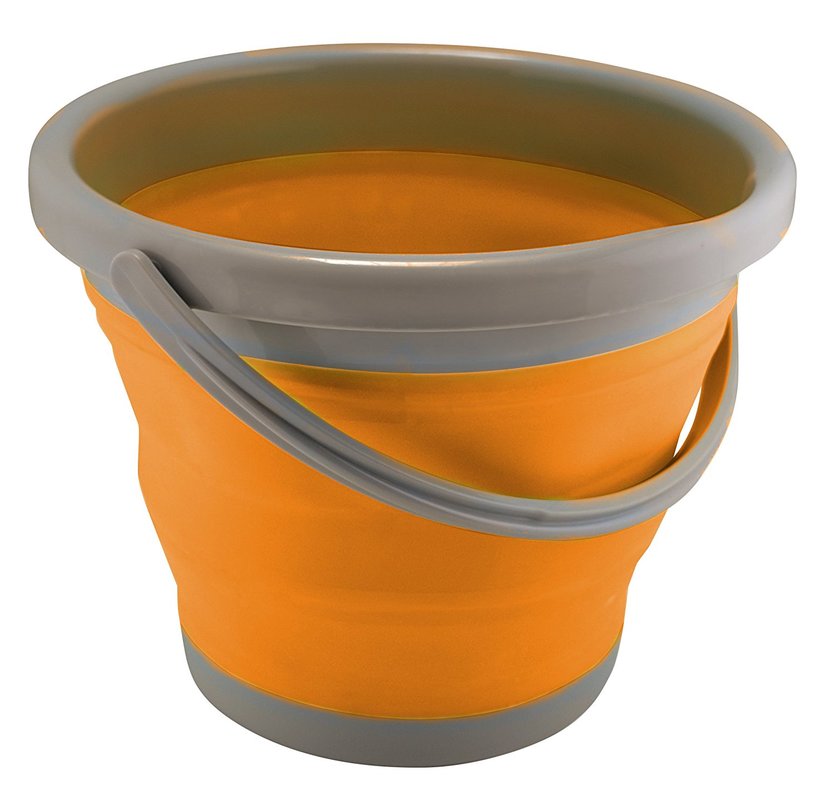
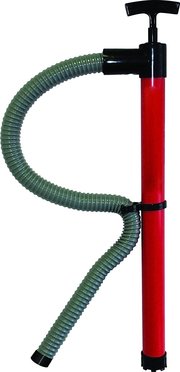
With respect to the bailing device, I have two. A collapsible bucket, which is a great option for an effective bailing device that takes up the minimal amount of room, and a manual bilge pump, which is a lot more effective, though slightly more difficult to stow.
As for auxiliary propulsion, I have two collapsible paddles, which again take up a minimal amount of room, but provide a very realistic alternative propulsion method for a vessel this small.  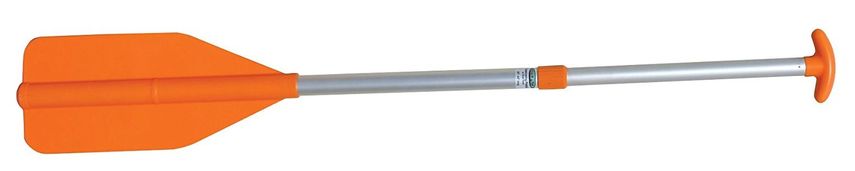 On the houseboat I went all out with medical supplies, including c-collar and full basic EMT bag, but on a small runabout like Boaty I have to reel it in a bit. I opted for a well-stocked off the shelf boating first aid kit that I bought for my first boat, which will do in a pinch. I'm sure they don't sell that one any longer, but there are no shortage of reasonably priced options on Amazon. While Boaty does have a horn, I rebuilt it with spare parts from a Harbor Freight horn and I don’t know how much I trust it to be my sound making device. As a result, I carry a rechargeable air horn that can be filled with compressed air and a whistle. 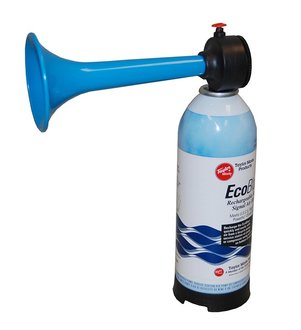 A vessel this small operating on inland and protected waters, is not required to carry any emergency signaling devices. However, if I really need help I don’t want to have to rely on waving my arms up and down at my sides to attract attention. I included a distress flag (a black square over a circle on an orange background), a signal mirror, and a small battery operated strobe light. I also have a spot light that could be used for signaling at night and can be invaluable if you find yourself unexpectedly navigating on a moonless night and needing to pick out unlit buoys…not that I’ve ever done this. As pointed out in my post about VHF radios, I wouldn’t leave the dock without one, and Boaty is no exception. I carry a small handheld VHF, which may not be the most reliable, but will do the job in a pinch. 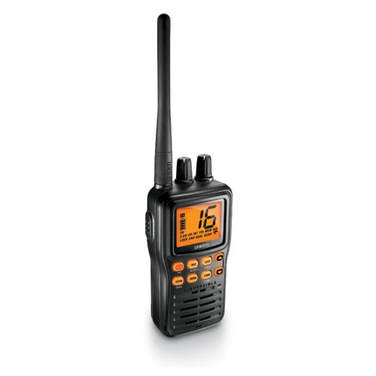 A nice little handheld GPS is also nice to have; I threw a Garmin eTrex that I used to use for Geocaching into my boat bag. Most phones will probably do just fine for GPS navigation and there are also plenty of great apps that will turn them into quasi chart-plotters, but more often than not, I find my phone without signal at most lakes I frequent (which can inexplicably make GPS apps not work) and thought the added GPS unit wouldn’t be a bad idea…beside, what else am I going to do with it? A pair of good quality binoculars goes with me on almost every boating journey as well. After spending a few years standing a bridge watch, scrutinizing every navigation marker and passing vessel with my binoculars has become second nature. After years of using Fujinon on the bridge, I purchased a more consumer grade version (Fujinon Marinier WPC-XL) for myself, which I’ve been happy with. The important thing in choosing binoculars for the marine environment is the optics, which should be about 7 x 50. The objective diameter (50) means they have good performance in low light conditions, producing a sharp, bright image, and the 7 time magnification is ideal as they are easy to hold steady on a moving platform, like a boat. I wear glasses and the generous eye relief of these binoculars allows me to use them without difficulty while wearing my glasses, which is something to consider if you are likewise visually challenged. This model includes a compass, which is a nice feature for approximating the bearing to objects you are viewing. 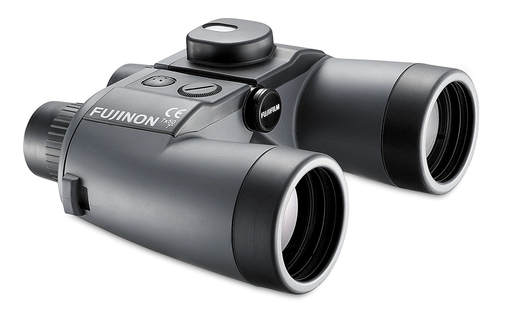 The rest is pretty much just general boating gear; mooring lines for tying off to the dock, fenders for same, an anchor and line for…well, anchoring, and a skier down flag for…hmm, now that I think of it I don’t think Boaty has quite enough oomph to pull a skier, but maybe a tube…very slowly….yeah, I could probably take that out.
The final item on my list is a tool kit, but that is a whole post in and of itself. Until next time, here’s wishing you fair winds and following seas. If you’ve read the About the Author Section, then you know that I claim to be a hydrographer, but I’ve recently had a few exchanges that led me to realize that not too many people know what hydrography is; someone was asking about hydrography as it pertains to hydrology (a hydrograph is a graph showing the rate of flow (discharge) versus time past a specific point in a river, or other channel or conduit carrying flow), and I wanted to make it clear that hydrographers are people too. I thought I might take a few blog posts to explain the origins of hydrography and its importance to the safety of navigation on the water. Hydrography is a field of study involving the determination of water depth and other physical oceanographic properties (tide, currents, waves, etc.), for the purposes of navigation. Essentially, modern hydrographers use sonar (multi-beam and side-scan) to determine water depth and produce nautical charts for navigation.  The earliest hydrographers used sounding poles to measure the water depth (as seen above, there are hieroglyphs from ancient Egypt that depict this practice), and until WWII the primary method for conducting a hydrographic survey was lead line (a lead weight on the end of a length of line to measure water depth) and wire drag (a wire dragged between two vessels at a set depth to clear an area to that depth or snag obstructions for further investigation and least depth determination). In the 1940s echosounders, or single-beam sonars, came into wide use for survey work. Not until fairly recently, 1990s, have full bottom insonfication methods become the standard for a hydrographic survey. Multi-beam and Side Scan Sonar are now the standard methods used to conduct a hydrographic survey. Once data is collected and processed by hydrographers, it is passed on to cartographers who compose the actual charts. Hydrography predates Oceanography, and that field of study is actually an outgrowth of hydrography. Oceanography as a field is now commonly thought to include Hydrography as a specialized field dealing with physical oceanography information as it pertains to safe navigation. 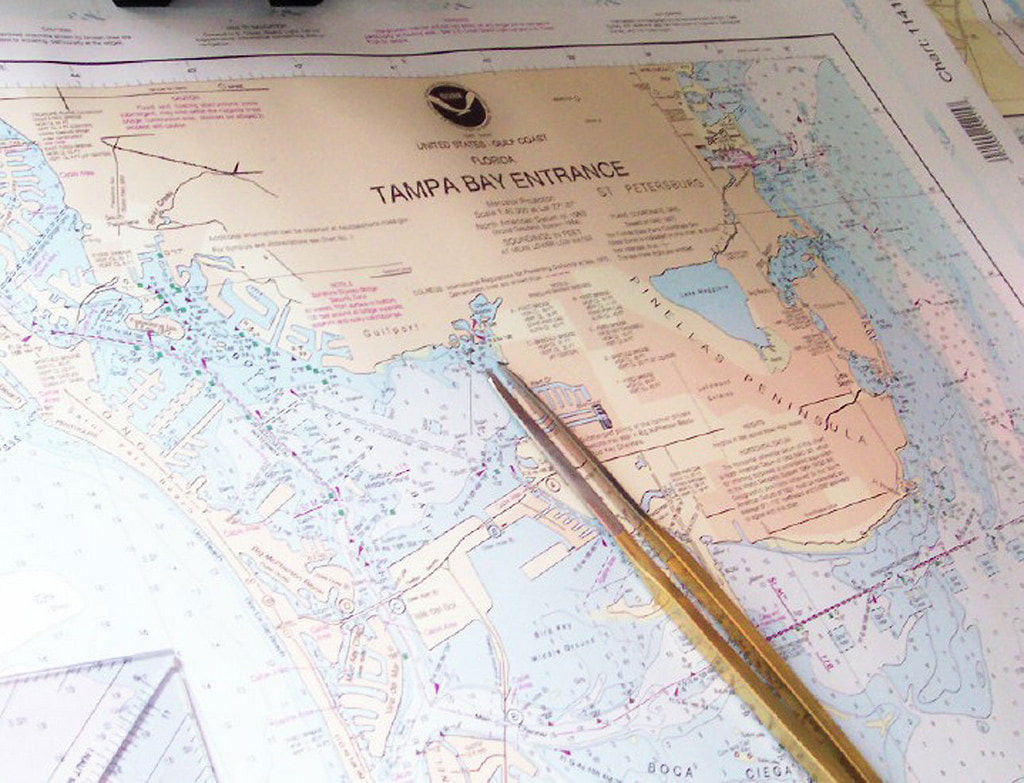 In the US, NOAA’s Office of Coast Survey has been conducting hydrographic survey work and producing nautical charts for US waters since 1807 (The Survey of the Coast was the US’s first scientific agency). Other countries have similar offices that are responsible for producing nautical charts in their territorial waters (United Kingdom Hydrographic Office is one of the oldest; established in 1795). Member hydrographic offices are governed by the International Hydrographic Organization that sets international standards. The National Society of Professional Surveyors in the US, offers a certification in Hydrography in conjunction with The Hydrographic Society of America (THSOA), which is why I could call myself a certified hydrographer, though that certification has now lapsed.
 That’s a short thumb-nail sketch of hydrography as a field of study and in future installments I will go into detail about how it is conducted and what that might mean to the safety of your navigation; hopefully that will be of interest. Until next time, here’s wishing you fair winds and following seas.
It was the summer before my senior year of college and I had convinced my parents to take a July trip to Powell, kind of as a last hurrah before I moved away and began my career. There were about 10 of us, including a couple of my friends from college. We had found an idyllic beaching spot for our 46-ft rental boat; a well-protected little cove off of Halls Bay, just south of where the cut to Bullfrog would have been at higher water levels, with a nice sandy beach, steep hills on three sides, and closed off from the main bay so that there wasn’t a large fetch anywhere to be found. It was hard to imagine a better, more secure beach and after digging in our two anchors, the last thing I was concerned about was getting blown off the beach. Fast forward a few nights, to a crystal clear, calm night on Powell with no sign of trouble in the air. As normal, we were all camped out on the upper deck of the houseboat watching the stars as we drifted off to sleep. The evening had been perfectly calm, but in minutes our tranquil night turned in to pandemonium as what I would describe as a williwaw swept down off the steep hillside on our port bow. I didn’t have a anemometer, and even if I had I wouldn’t have been looking at it, but I venture a guess at 40-mph winds buffeting the houseboat and quickly shoving the bow off the beach. The bow began quickly drifting down wind to starboard, pulling the starboard anchor line sideways and dislodging that anchor. All this happened before anyone was able to get off the top deck and down to the controls. Luckily, the port anchor held strong, leaving the houseboat steam downwind from the aft port cleat that was secured to that one anchor. Eventually, we were able to get the engines fired up and, pivoting off that port anchor point, align the houseboat around perpendicular to the beach again to drive it back onto the shore; holding it in place until the wind subsided about 20-minutes later. It never fails, no matter how securely anchored I think the boat is or how protected the beach, the wind will come up and works its magic…usually at the worst possible time, when everyone is trying to get some sleep. When you’re caught in this situation, reacting correctly can be the difference from a major headache and total catastrophe. Last September there was a significant wind event across the lake that caused huge amounts of damage, included flipping a large houseboat onto its side down on the southern end of the lake. 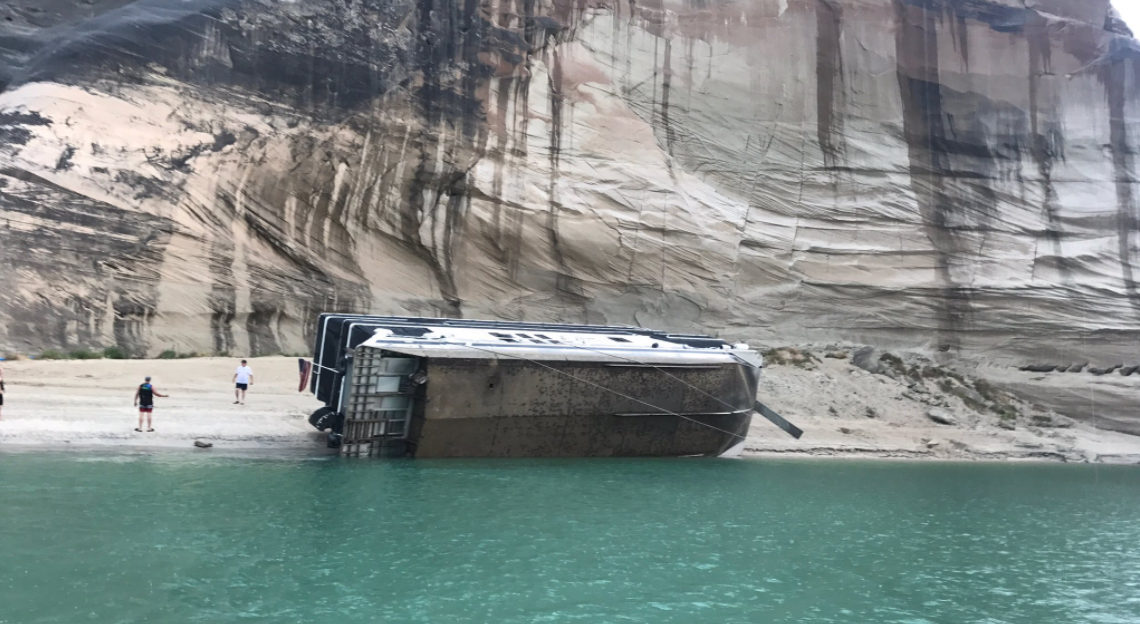 Safely anchoring the houseboat is extremely important for your safety, the safety of the boat, and your piece of mind during a particularly bad storm. Winds on Lake Powell can exceed 50-mph and you should be prepared to deal with these conditions, which often arise in the middle of the night. By selecting the best available beach, properly preparing your anchors, and being ready to react to high wind conditions, you will be able to ride out the storm. The flat side of the houseboat acts much like a sail and wind force on the houseboat can be enormous. Heavy winds can dislodge even well set anchors and you must be vigilant in keeping the boat secure and being ready to respond to high winds. The wind force exerted on the houseboat can be calculated with the equation below. The Drag Coefficient for a flat plate is 1.17, the approximate area of the side of the houseboat is 1,000-ft2, and the density of dry air is approximately 0.074887-lbs(mass)/ft3. To complete the calculation, you must divide the result by 32.174 (gravitational acceleration) to convert pounds mass into pounds of force. The table below is provided as a quick reference. 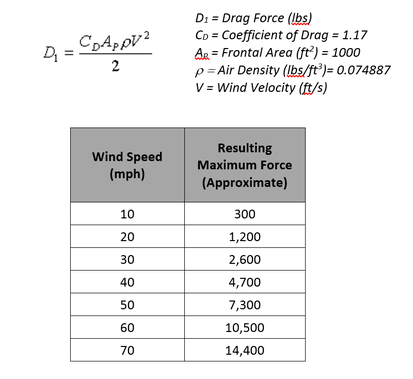 As you can see from the table above, you’re dealing with huge forces here. Site Selection Selecting the location of beaching the houseboat is critical and is one of the largest factors in how secure the boat will be during your week. Ideally, you should select a site with the following characteristics, but likely you will have to make some trade-offs.
Prior to leaving the dock with the houseboat, I like to identify one or more areas for out anchor site and then dispatch a scouting boat to go recon those areas and locate a suitable anchoring site. Ideally, this boat will be equipped with VHF radios for communications and a handheld GPS to provide an exact position of the site. Generally, I send a minimum of 4 people in the scout boat so that they can act as your anchor party and prepare the beach prior to the houseboat’s arrival. The scout boat crew will need to evaluate the beach and plan for the anchoring of the houseboat Site Preparation Once the prefect anchor site is identified the work begins. Hopefully, the anchor party will be able to have the beach ready by the time the houseboat gets there (so I don’t have to do as much work). This includes doing all of the following:
Anchoring The scout boat crew should have identified any possible obstructions or dangers prior to the houseboats arrival, but you should always post a lookout on the bow of the boat to watch for potential dangers in the water as you approach the anchor site. Houseboat should not be towing any small craft when beaching; send all small craft ahead to the beach and secure them out of the way from anchoring operations. Maneuver into the beach as perpendicularly to the shoreline as possible, driving into the beach at clutch ahead or slower, by taking the engines in and out of gear to keep a bare steerageway. Once the hull of the houseboat glides up onto the beach, increase your throttle to drive the hull up onto the beach and hold it there until anchoring is complete. With the houseboat now beached and all the preparations completed, anchoring should go smoothly. On Serenity and houseboats over 50-ft long, a minimum of two anchor points should be used on each side of the houseboat; smaller boats can get by with only one anchor on each side, but more anchoring points never hurt. Regardless of what anchors are used, they should be positioned so that the anchor lines are at approximately 45-deg angle to the boat. Anchor line length should be minimized; in the case of nylon lines, the more line you have the more it will stretch. Other new synthetic fibers, like Vectran or Spectra, have virtually no stretch and will behave similarly to steel cable, which is great, but I’ve found that they don’t hold up in the UV exposure they see in Powell. 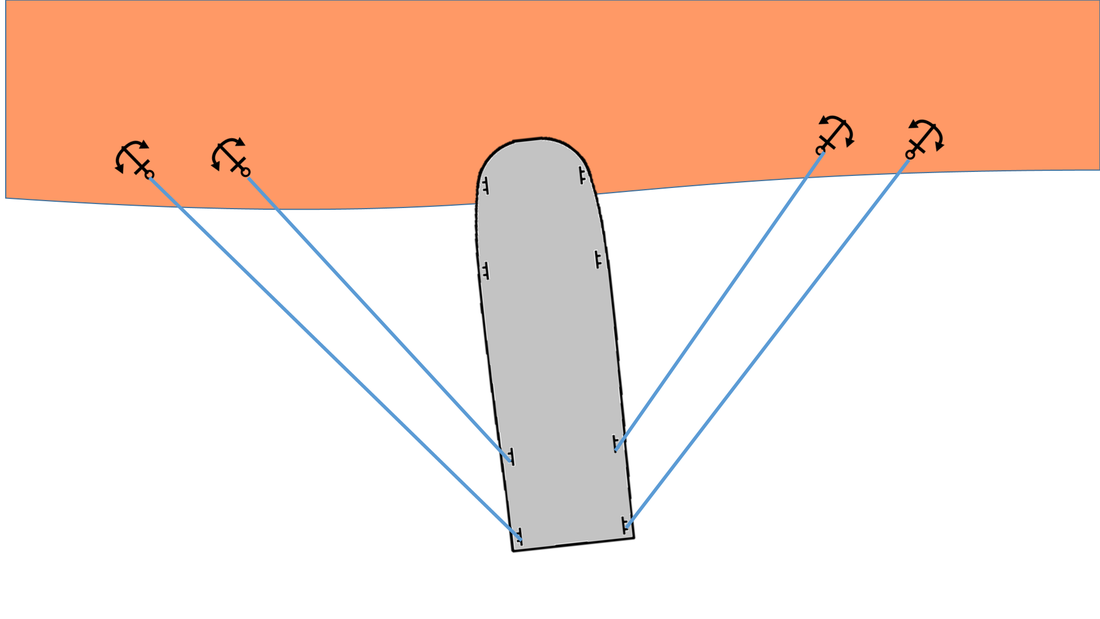 Setting Your Anchors Danforth anchors are the primary means for anchoring on sandy beaches. If properly set, the Danforth anchor will provide an exceptionally sturdy anchoring point. The anchor should be set in at least 2-ft of sand. If the sand is shallower than 2-ft over rock ledge underneath, as a strain is taken on the anchor the flukes will dig down and hit the rock surface. The rock will prevent the anchor from digging further and, as more load is put on the anchor, it will cause the flukes to flatten out and cause the anchor to lose hold on the beach. 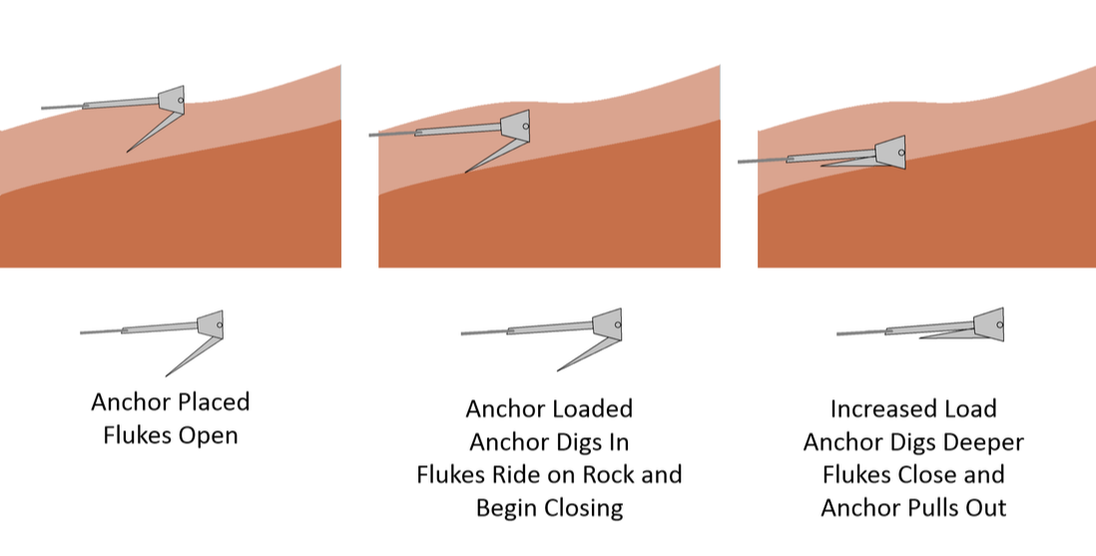 The anchor should be placed in wet, well packed sand near the water. Wet sand is much more stable and provides considerably more holding power for the anchor than dry loose sand. In order to set a Danforth anchor you can either fully burry the anchor, but there is an easier way. You’ll still need to dig a hole, but there is no need to completely bury the anchor; you can set it using power from the houseboat.
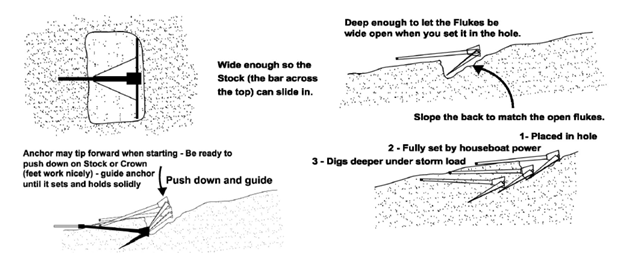 Drive anchors are essentially large stakes that are driven into the ground using a sledge hammer. They are not as solid an anchor as a properly installed Danforth Anchor, but if used correctly can be an effective anchoring system. They can be useful in situations where the sand is less than 2-ft deep, but at least 1.5-ft deep. Drive anchors should always be set in multiples, at least 2-3 in a line with the anchor line. Angle the Drive Anchors at between 20- to 30-deg away from the houseboat and back tie the first drive anchor to the next, and so on. Once all drive anchors have been driven and back tied, you may tighten up the anchor lines and secure. 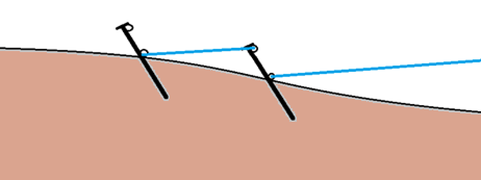 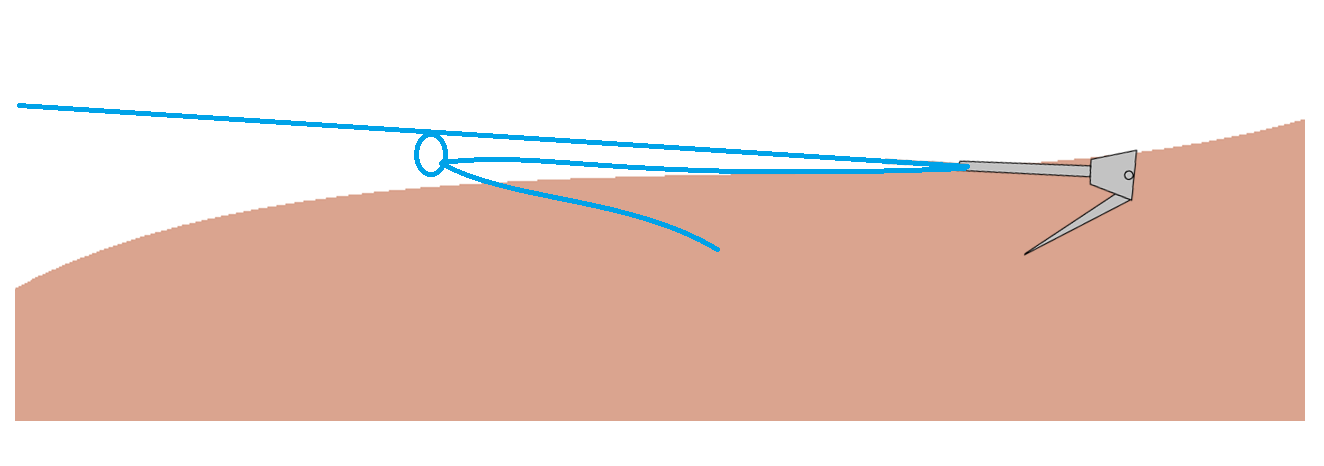 Large boulders or rock outcroppings can be the most effective anchors; just be sure that they feature you are tying off to is substantial enough to hold the houseboat in a strong wind. In this case, you simply loop a nylon lifting strap around the feature and connect it to itself with a shackle, to which you can then connect the anchor line. Once all anchors lines are attached you may tighten up the anchor lines and secure. Once you have your anchoring points secured, it’s time to tighten up the anchor lines and secure. There are a few approaches that you can take in taking the slack out of your anchor lines.
Water Level Changes Depending on the time of year the lake level will either be rising or falling and you must keep track of the stage of the lake level to ensure the houseboat doesn’t become permanently grounded or float free. Be sure to check with the marina prior to getting underway to see what the lake level has been doing; they should be able to give you a pretty good idea of whether the lake is rising or falling and how fast. In May and June the lake can be rising by as much as 1-foot per day. If the lake level is rising, you will need to drive the houseboat onto the beach and tighten up your anchor lines. If the anchors are buried near the water level, which is good practice, you may have to move them up the beach as well. If the lake level is falling, you will need to back the houseboat off the beach and let out your anchor lines. Failure to back the boat off with a falling lake level could result in sinking the stern of the houseboat if the boat is beached on a sufficiently steep slope, which is good practice. As the lake level drops, the buoyant force of the hull will no longer be supporting the boat, but it will instead be resting on the seafloor. If the angle of the beach is steep enough, such that the boat lying on the bottom would have the stern submerged, then the stern will submerge as there is not enough buoyant force to keep it afloat. 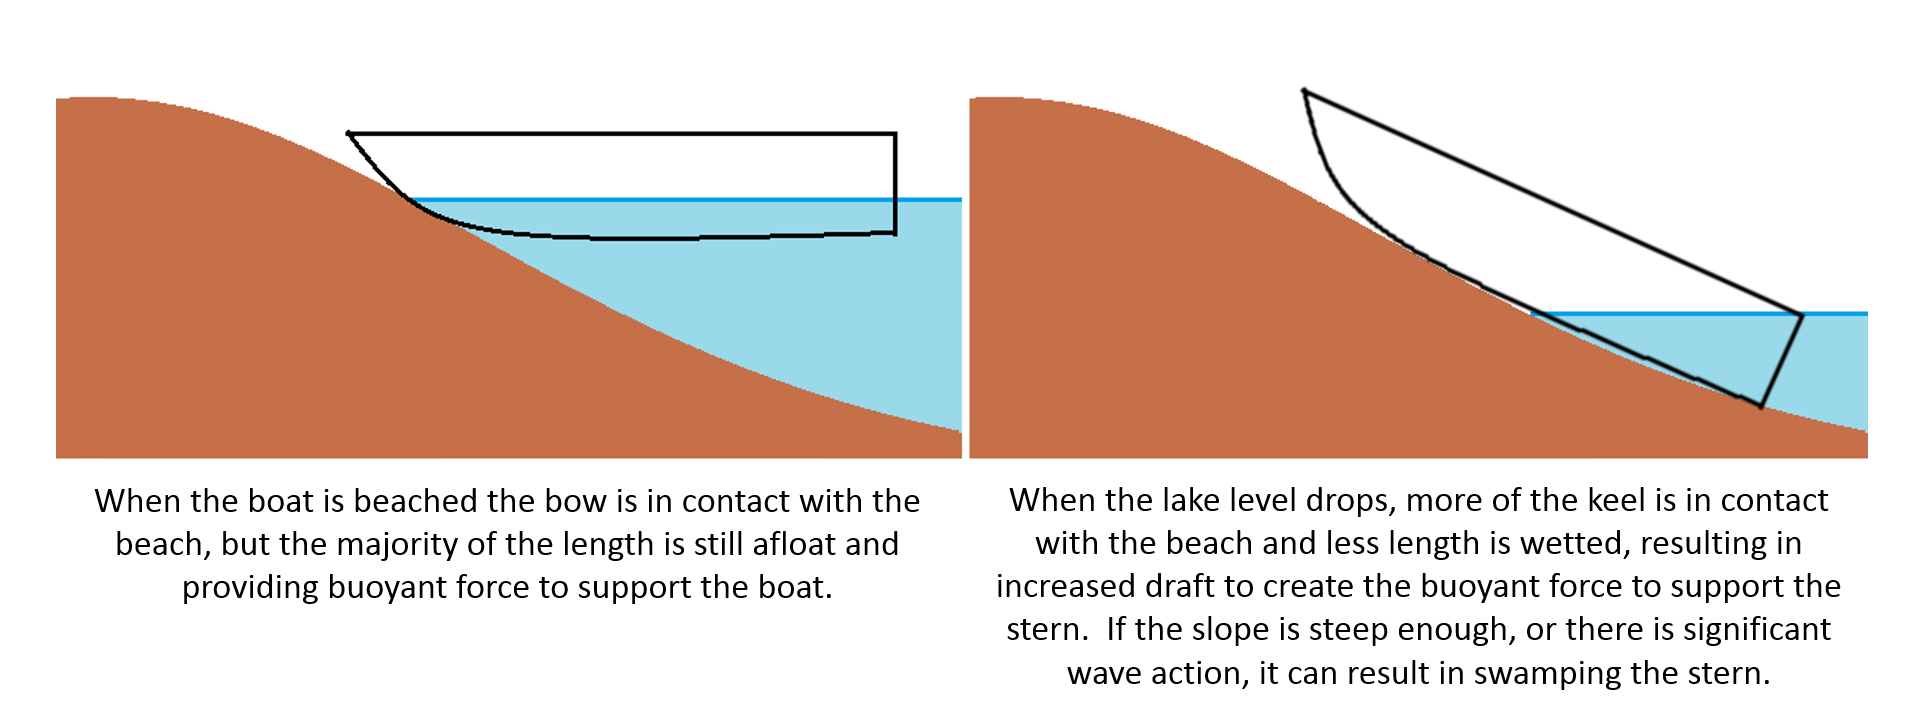 Regardless of what the lake level is doing, you should check your anchor lines every morning and evening to see if they are slack or taught; and then make the necessary adjustments to keep the houseboat properly beached.
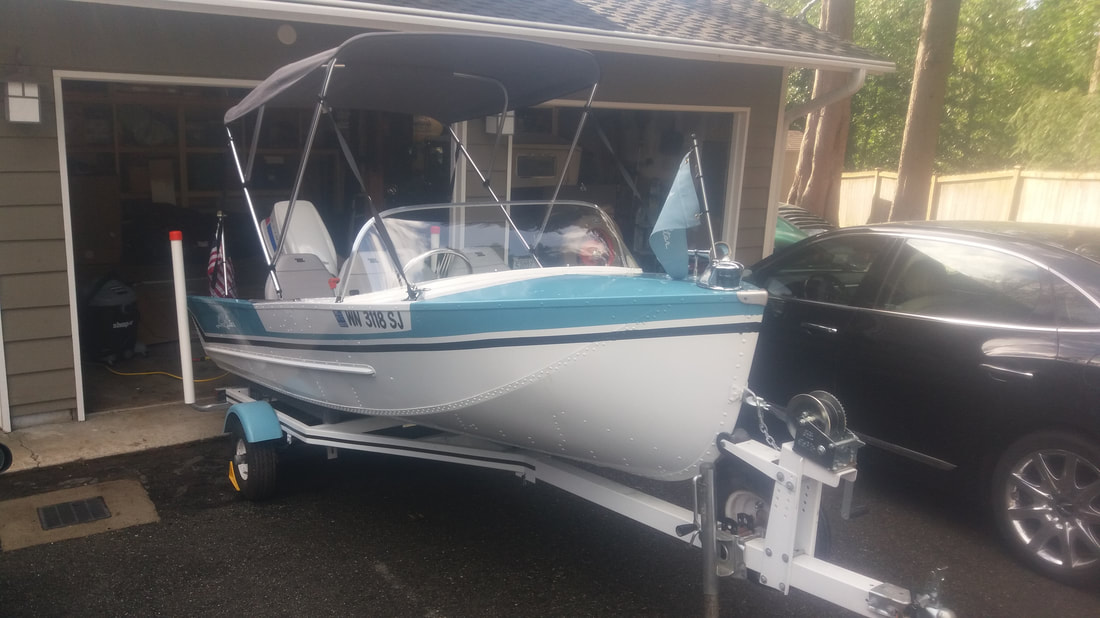
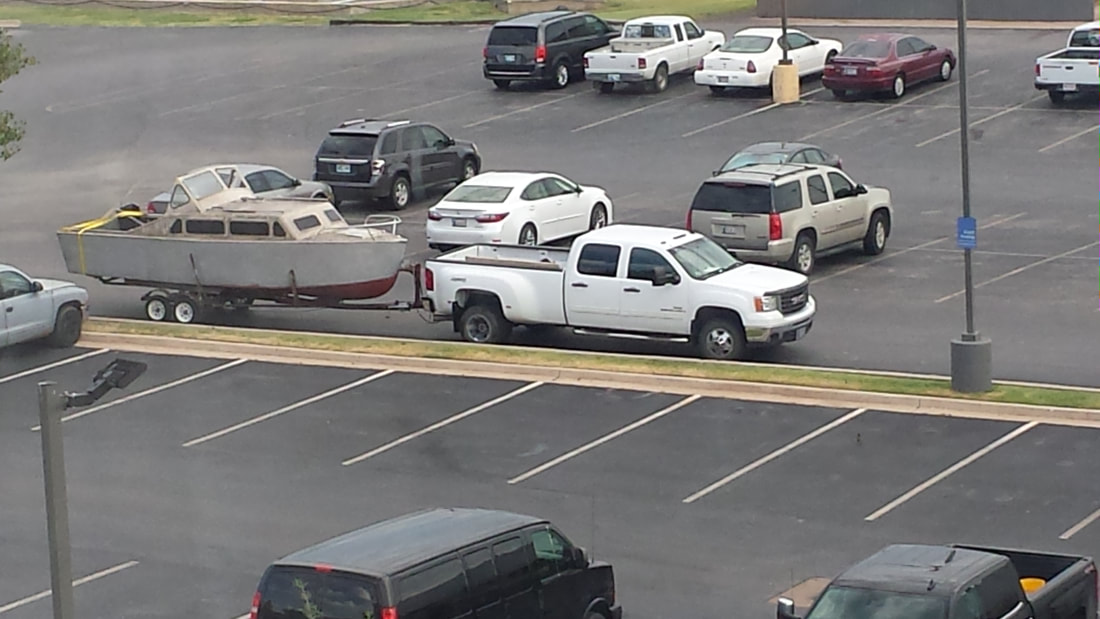
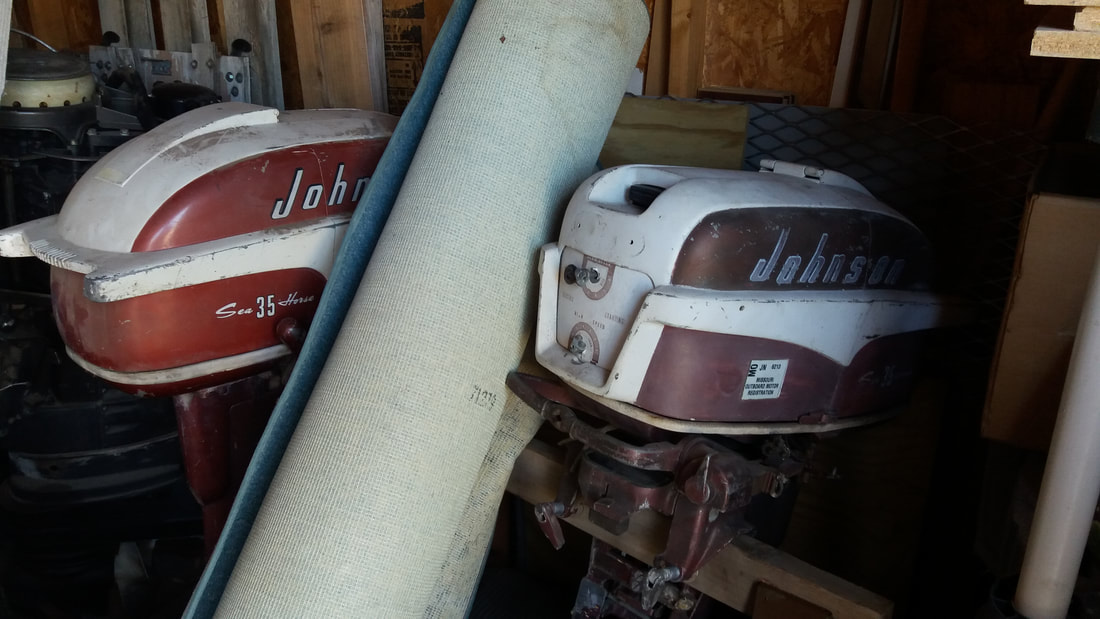
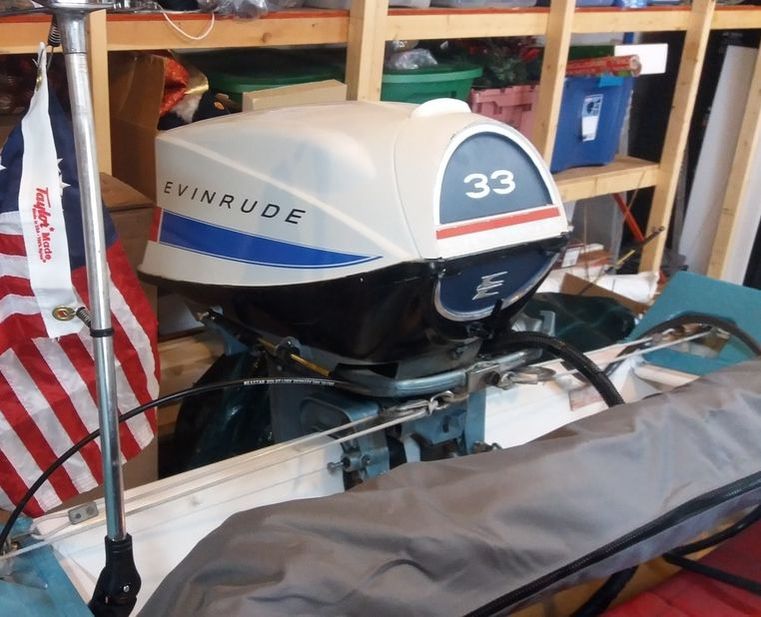
So, what happens with the wind comes up? Even with well-set anchors, an extreme wind event can still pose a danger to the security of the houseboat and you must be prepared to deal with a worst case scenario; being blown off the beach. If the wind comes up and you are noticing heavy strain on your anchor lines you should start main engines and maneuver to reduce the load on your lines. Turn the helm away from wind in order to push the stern into the wind and take strain off the anchor lines. Power forward onto beach and increase throttle until tension on the windward anchor lines begins to slack. Balance the throttles to maintain line tension: if the lee side anchor lines begin to go slack, you apply more power; if the windward side anchor lines begin to go slack, you reduce power. You just have to continue playing this game until the wind dies down. Until next time, here’s wishing you fair winds and following seas. As the old C.W. McCall song goes, “I was thumbing through the want ads in the Shelby County Tribune, when a classified advertisement caught my eye. It said take immediate delivery of a ‘57 Chevrolet half ton pick-up truck…” Well, if you substitute Craig’s List for the tribune and a ’56 Lone Star Cruise Master for a ’57 Chevy, you’ve got a pretty good indication of what happened to me. About a year ago, I came across a Cruise Master while aimlessly searching Craig’s List for trouble. It was in Wichita, KS and included a 115-hp Mercury “tower of power” for the princely sum of $700. I’d never really considered buying a Cruise Master before, but after some consideration I discovered that I had to have one.  Unfortunately for me, after I had come to this conclusion, I gave the seller a call only to find that it had been sold the day before. Never the less, I now had a quest and I was on the search for a Cruise Master to take up some room in my yard, bust my knuckles on, and cuss at. I set up a search warning on eBay and for the next several months did regular searches on my favorite Craig’s List conglomerater, SearchTempest.com. I found a few possibilities, but they were either too far away or too dearly priced. Eventually my efforts paid off and I found a nice Cruise Master in Oklahoma city. After a little haggling, I was the proud new owner of a 1956 Lone Star Cruise Master with two motor mounts, one for a single engine and one for double engines, and three outboards (two matching 35-hp Johnsons and one 75-hp Evinrude). It was a prime candidate for my next project.
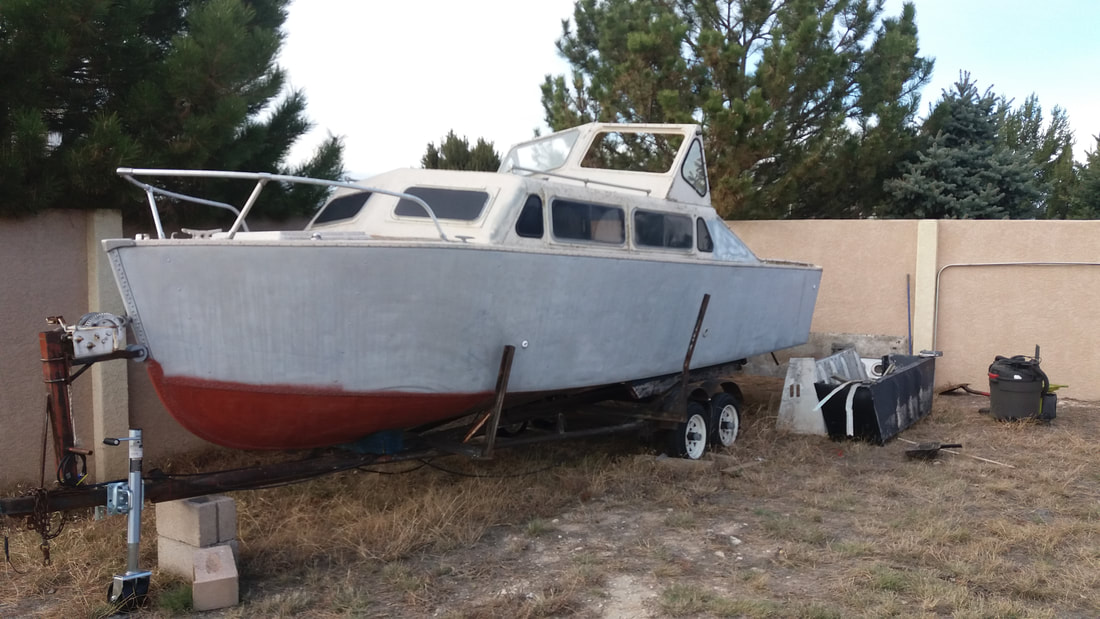
The previous owner had started work on her, but had moved on to other projects and needed to clear up some space. He had already removed the old transom and replaced the aluminum sheeting on the transom. He worked in aircraft maintenance and his work looked exceptional, thought he may have gone a little overboard with the rivets on the join to the new sheet.
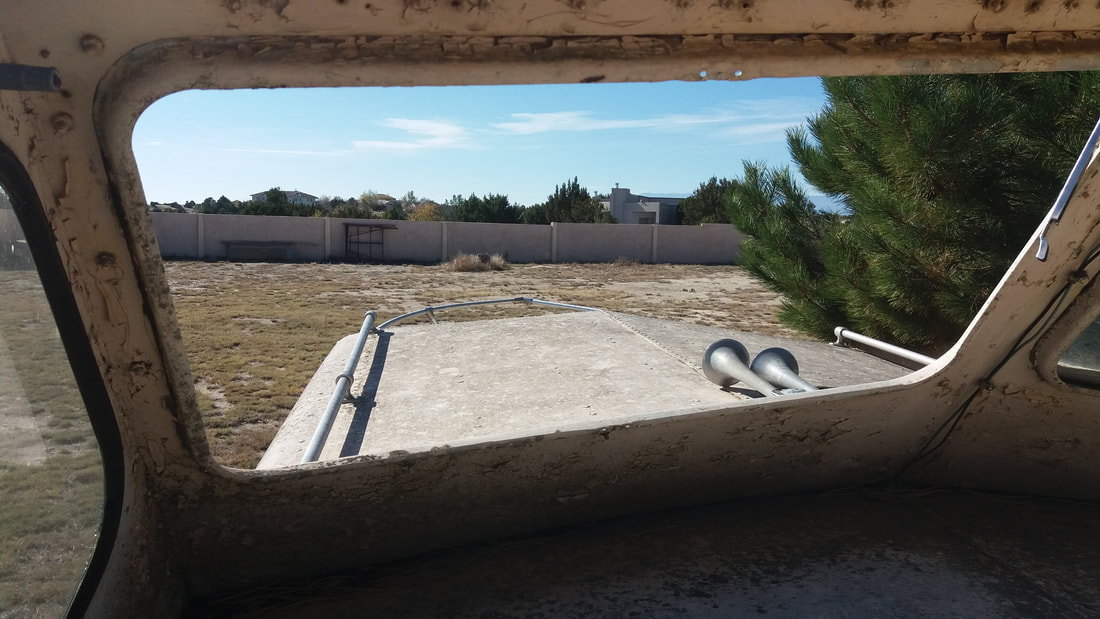
The Cruise Master was billed as “the Queen of the Lone Star Fleet” when it was rolled out in 1954 and represented a big departure from their smaller fishing boats. Targeting buyers looking for a large weekend cruiser for relaxing on the water, it was a 21-ft long cabin cruiser that provided a lot of space and amenities. 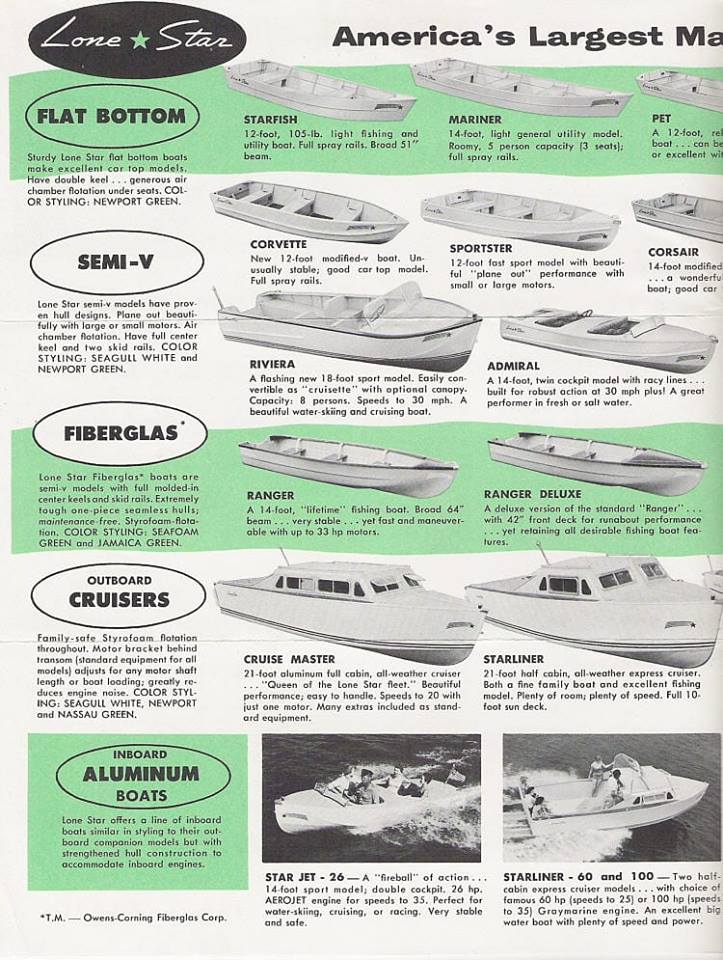 The Cruise Master remained the flagship of the Lone Star Fleet until they discontinued the model in 1961. An inboard version was offered in 1955 and ’56, but the majority of the Cruise Masters, like mine, were powered with outboards that were hung on brackets that placed them about 2-ft to the rear of the transom. They boasted standard features like built in berths, a head compartment, built in cabinets, hinged cabin windows with screens, and navigation lights. There were also several options available, including the flying bridge windshield and a head that pulls water from the lake and, as was apparently legal in the 1950s, discharges its waste right back into the lake. My new project had both of those options, but the head had been removed at some point (the stand pipes still remain).
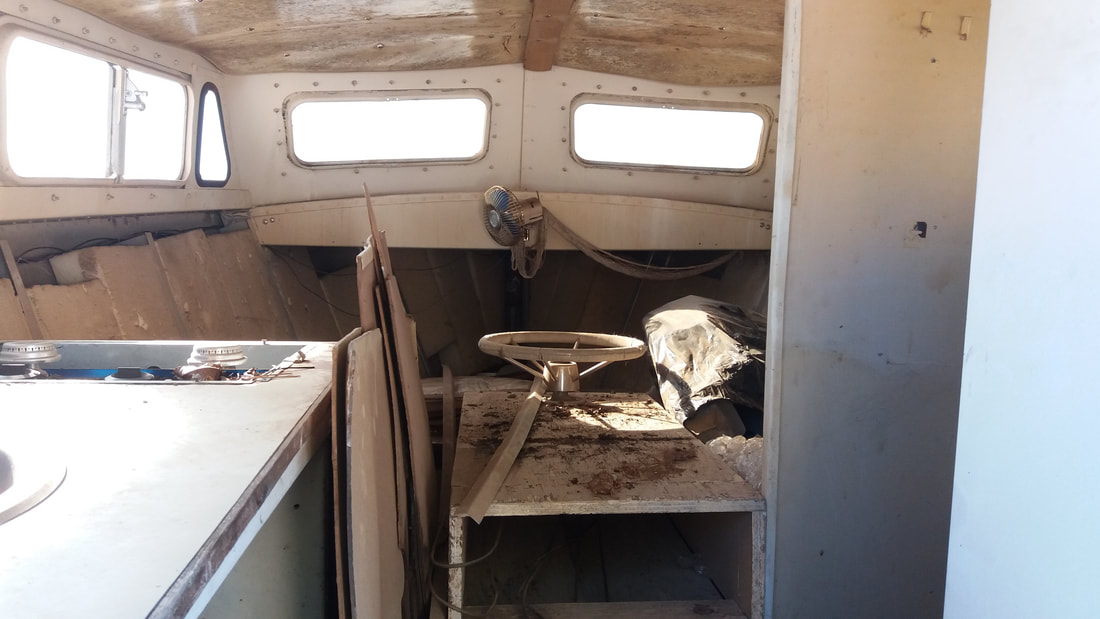
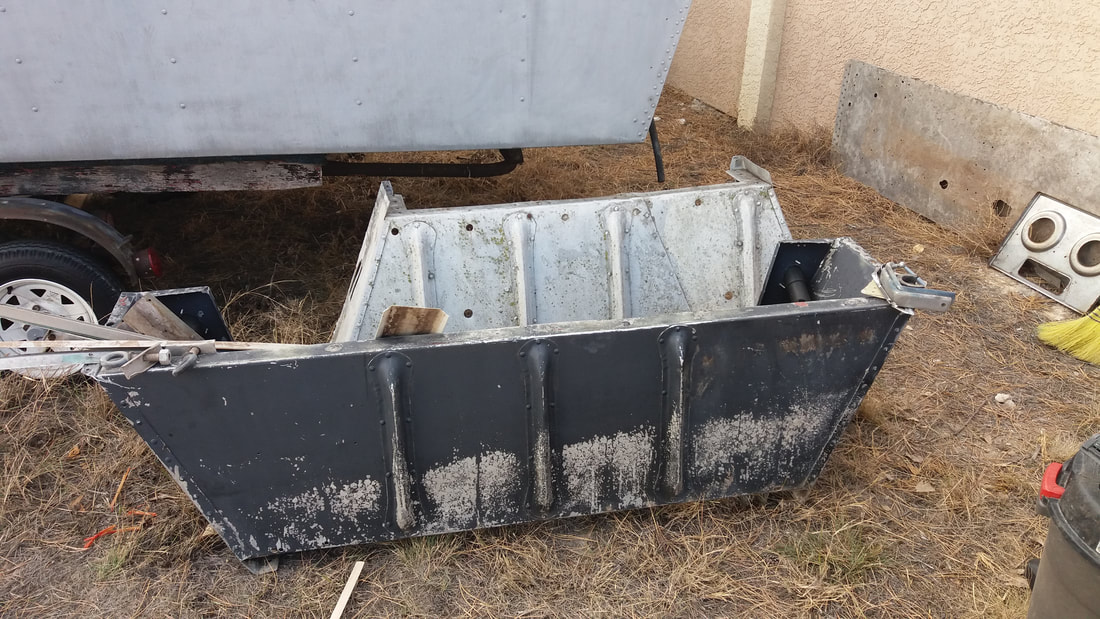
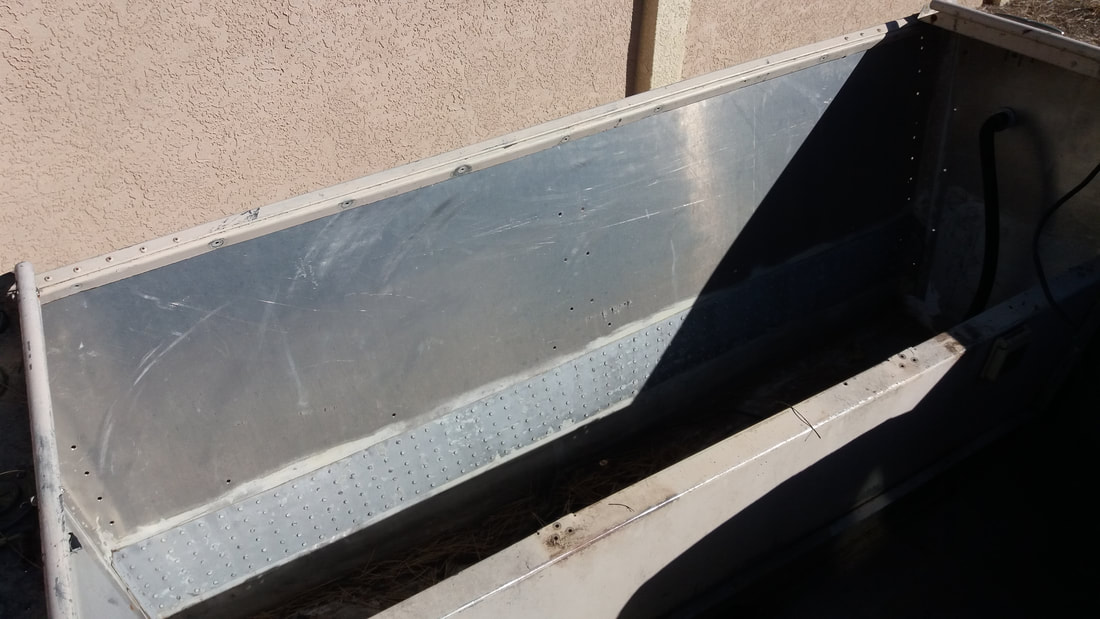
I can picture her already in the stately “Newport Green” over “Seagull White” paint scheme with a mahogany interior and teak and holly flooring, cruising out to the San Juan Islands with my wife and son. It will hopefully be the perfect weekend cruiser to do a couple nights in some beautiful location, but it’s a long way from that point and I’ve got a lot of cussing and knuckle busting to do before then. Work on this project will be slower, since the boat is currently located in my parents back yard in Colorado. Thus far I have only managed to clear everything out and do a quick inventory. The hull appears to be reasonably sound, but someone has liberally coated several seams with silicone, which is going to be a super awesome to get off, and there is one rib in the bow that was cut through to expand storage, which I will need to beef up structurally. The hull was media blasted to bare aluminum and the bottom primed, though I think the primer is suspect and I might end up removing it; the deck and super structure still have a nice layer of flaking paint and I have purchased a sand blaster attachment for my pressure washer that I hope will make quick, easy work of getting everything down to bare aluminum and ready for paint. There are countless other projects to keep me occupied for the next year (or more), but that will all have to wait for later. Until next time, here’s wishing you fair winds and following seas. A while back I was asked on Quora, what my craziest boating experience was, and that got me thinking about my many adventures on the water. We once asked the Chief Mate on our training ship what the coolest thing he saw at sea was; he considered it for a few minutes before replying, “I don’t know…but I will say that is the dumbest thing I have ever been asked.” That is not the usual response and asking an open ended question like that to a sailor is a good way to get your ear talked off; after all, what sailor worth his salt doesn’t have his share of sea stories? I have many that come to mind and find it difficult to pick the craziest (a lot of crazy things happen at sea). Getting kicked off a pier by an Alaska State Ferry and having to pivot the ship in a basin about 30-ft wider than our ship was long springs to mind; sailing into a hurricane force storm in the Gulf of Alaska is probably the closest I’ve come to dying; a close call or two transiting a narrows in Alaska would also probably fit. However, these all involve a 231-ft ship and you asked about boating. I have a good number of stories from my time recreational boating, but doing hydrography in Alaska provided more than ample opportunity to get into crazy situations in small boats (I was not involved in the photo, but that is one of our survey launches and our very unofficial motto was, “we hit the rocks, so you don’t have to”). 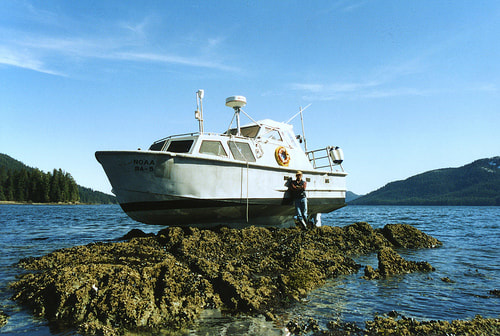 Never was there more likelihood of finding yourself in a predicament than when running shoreline verification. Essentially, we would wait until a negative tide window (when the tide was lower than charting datum of Mean Lower Low Water, or MLLW) and go out and run the 4-meter curve to verify the shoreline features (rocks, wrecks, reefs, ledges, etc.) that were acquired by photogrammetry or LIDAR. The coxswain would drive along the 4-m curve watching his fathometer and the hydrographer in charge would carefully verify all the features displayed on the computer screen and on the paper plot; annotating existing features, disproving erroneous features, and adding new features. I wasn’t aboard this boat, but they were disproving an offshore rock that they didn’t see by running a star pattern search over the position when they inadvertently proved the existence of the rock. The coxswain was probably running the star pattern a little faster than he should have and the boat came to an abrupt stop, ejecting the person that was serving as a bow lookout from the boat onto the rock, which was about 3-ft under the water surface. The coxswain immediately backed off the rock and the members of the boat crew (3 other people) began assessing the boat for damage; no one had noticed that the bow lookout had fallen off the boat until they heard him yelling “Man Overboard!” while standing on the rock. Luckily, no one was hurt, but he was very cold and wet. As for my personal experiences, I would have to say that it would have been getting high centered on a rock during shoreline verification. I was the Hydrographer in Charge (HIC for short) and I had three others in the boat, which was a 20-ft Monark aluminum hulled open workboat; a Survey technician and a coxswain in training driving under the tutelage of one of our more experienced coxswains. We were running shoreline outside of Sitka, AK and it was getting close to the end of the shoreline window (tide was rising to above MLLW). We had just finished going around Bamdoroshni Island and the coxswain pointed out an exposed rock offshore to the south. I checked the plot and sure enough it was there, previously charted and verified by photogrammetry. I checked it off and was about to say we had enough time to get around the next small island in the group when the coxswain asked me if we should verify that rock. I didn’t think it was really necessary, I was pretty sure it was charted correctly (the rock had a name, Tsaritsa Rock, and was marked with a buoy…people knew about it), but he asked if we could anyway for training purposed with the new coxswain. I didn’t see any harm in it and agreed. 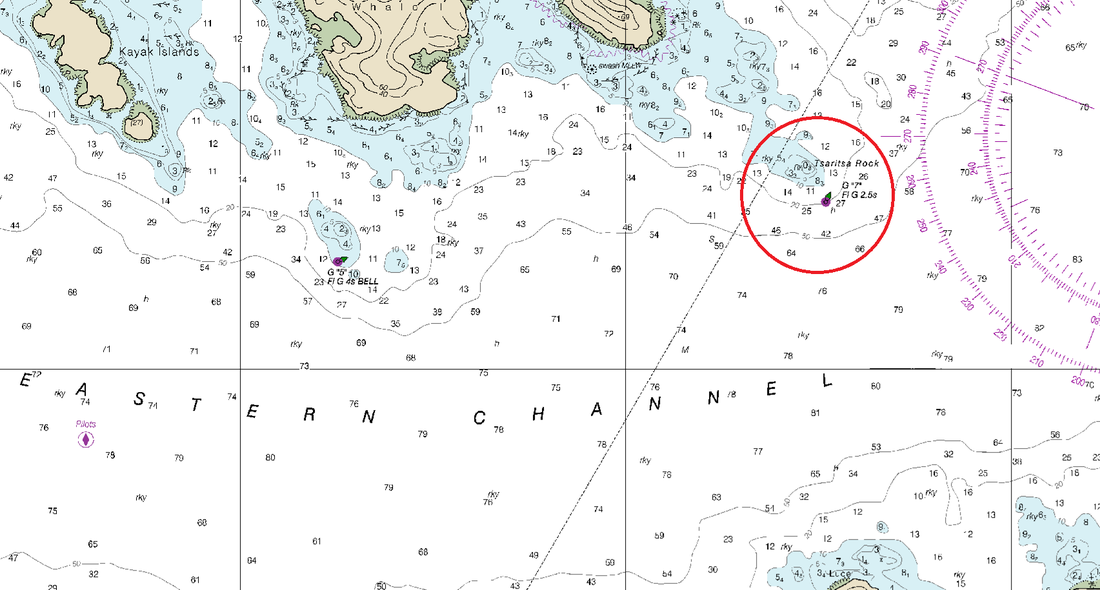 In order to verify a rock, or add a new rock, you need to get a Detached Position (DP) and the best way to do that is to put the bow as close to the feature as possible and then log a position on our survey computer. This was going to be a difficult feature to get a position on since it was fairly exposed to swell, but a pretty normal operation. So the coxswain talked the trainee through the approach and then let him take us in. I was watching the computer screen waiting for the coxswain to give me the signal that he was as close as he was comfortable getting so that I could mark the position. The next thing I knew, I felt a swell lifting us from the stern and surging us forward. It lifted us right up and set us down on top of the rock. The next few moments were crazy as the coxswain scrambled to take over from the trainee, who was panicked and had a look of utter shock on his face. We sat there for a few moments, high and dry on Tsaritsa Rock and I swear we teetered back and forth a bit, until the next swell came in, lifted us up off the rock, the trainee shoved the outboard into reverse, and we slid right back off the rock and into deep water. We all looked at each other like, “did that really just happen?”
It took a few minutes to check and make sure we weren’t taking on water and the engine and the propeller were undamaged. After figuring out everything was fine, we then debated whether we should radio the incident back to the ship or just keep it to ourselves. We really should have probably called the ship, but not wanting to get chewed out, we decided that we would just call it a very thorough rock verification. Tsaritsa Rock is charted as 0-fathoms 3-feet deep and I can attest to that accuracy. It’s that time of year again; the leaves are changing colors, the days are getting shorter, everything tastes like pumpkin spice, and, at least in my neck of the woods, the boating season has come to a close. That means it’s time to roll up my sleeves (then quickly realize that it’s too cold for short sleeves and roll them back down) and get to work on winterizing the Serenity for her long winter’s rest.  I pushed for a winter lay-up period and, luckily, the other owners on Serenity have agreed that it makes sense to pull the boat off the water for the cold winter months. Our winter lay-up begins in November (as you’re reading this I am probably down in Bullfrog doing exactly what I’ve written here) with relaunching done in March. The chief reasons I wanted this dry-docking are: (1) If the boat is not in use, there is a drastically reduced chance of damage sitting in dry storage as opposed to being on the water, (2) it gives the boat a chance to dry out and hopefully prevent major maintenance issues due to mussel growth, (3) it results in a reduced insurance cost and can offset some of our costs for slip rental, which can be prorated, and (4) it allows for out of water repairs to be completed prior to the beginning of the next season, like replacing impellers and changing the lower unit lube oil. If there is the option, I would almost always opt to store my vessel on the hard over the months that it isn’t being used. Prior to being put up for the long winter’s nap, there are several things you need to do in order to make sure everything is in good shape when you pull the boat out of mothballs next Spring. I’ve winterized my fair share of boats over the years; the houseboat includes a few extra systems, but shouldn’t take more than a few hours to get ready for storage with a couple knowledgeable people (no word yet on how long it will take me and my dad). I like to winterize as much as possible while we’re in the slip, prior to haul out; pretty much everything except the main engines can be finished up prior to driving over to the ramp to be loaded up. General Maintenance Throughout the season, things have a tendency to break and the end of the year is always a good time to catch up on all the minor issues that have gotten overlooked. Fixing the loose door latch, replacing burnt out light bulbs, changing a broken light fixture, replacing the tank level sender units, rebuilding a leaking steering pump, replacing broken trim, and fixing a loose connection block on the marine head; I build a punch list over the months and then spend a couple days making sure everything is knocked off that list or, when missing all the required components, they are listed and planned for repair prior to relauch. I also include items like removing the canvas cover on the upper awning, making sure the deck chairs and tables are secured by tying them to the railings, giving everything a good cleaning, and generally making sure that everything is stowed to prevent anything from blowing away or wandering off. If you spend this time making sure everything is ship shape, it will make next Spring a whole lot easier. Fuel System Serenity carries about 400-galons of fuel and the last thing you want to have to deal with is that much stale gas. While there has been varying advice from different authoritative sources over the years, they have come to consensus and now advise storing your fuel tanks full, or at least at the 90% maximum safe fill level. With modern fuels you face several issues that weren’t present prior to the elimination of lead and the introduction of ethanol; most notably is ethanol’s propensity to absorb water and reduced resistance to microbial growth. Water is public enemy number one, and keeping the tank as full as possible reduces surface area of the tank and the volume of air that could allow for condensation. Long story short, it’s best to store your tanks full to prevent condensation and keep the gas dry. 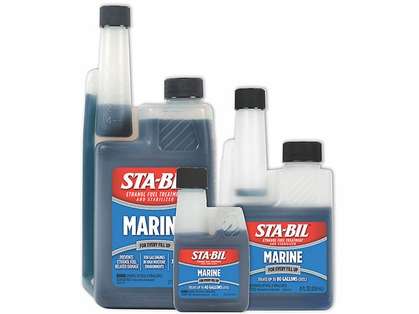 Adding a fuel stabilizer prior to the final fill up on all tanks is also advisable. A fuel stabilizer will add up to 24-months to the shelf life of your fuel. It reduces water absorption, increases lubricity, inhibits microbial growth, and boosts octane. I always try to add the stabilizer prior to the final fill up, so that the additive can be well mixed with the fuel, but realistically, the bumpy trailer ride to storage a few miles away will do a pretty good job of mixing it anyway. Potable Water Water is the greatest concern when winterizing in almost all the houseboat systems, so a logical place to start is the potable water system. Power of freezing water is impressive; just look at the cracks, potholes, and heaving in the roads throughout the Northeast to understand its immense destructive force. You want to get all the water off the boat and the potable water system is as good a place to start as any. Freezing water can burst pipes and rupture filter housings. Most of the damage I had to deal with in the plumbing system was caused by freezing. The Water Fixer filtration system had both filter housings burst, requiring replacement, and the stainless steel UV chamber had one end cap pushed off.  Winterizing the water system begins with emptying the water tanks; you can simply use the pressure system pump to run water through the faucets until the tanks are dry, but I prefer to utilize a portable pump to drain the tanks by connecting to the drain spigot on the tanks and run the water overboard. The water heater tank is emptied in a similar manner. You do have the option of opening the drains and letting the tanks dump into the bilge, subsequently pumping the water out with the bilge pump, but I prefer to keep my bilges dry. Once the tanks are empty, you can focus on blowing out the water lines. The easiest approach I’ve found is to purchase a $5.00 blowout adapter, like the one pictured below. This fitting allows you to attach your air compressor’s chuck to the water inlet to pressurize the system. It’s then just a matter of opening the hot and cold at each of the faucets to allow the water to be blown out of the lines. 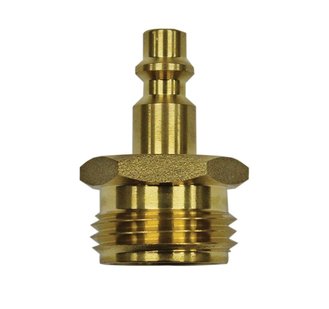 It’s important to remember to open the valve to the water tanks to be sure to blow out those lines as well. You also need to open and empty the filter housings, and disconnect the line to the pump and allow it to drain out. The drain P-traps also need to be blown out, which I do with a wet/dry-vac, but could also be done easily by removing the P-trap and dumping them out. On Serenity, we have no gray water tank, and all the sinks and shower discharge directly overboard, so I don’t have to worry about any odors or sewer gasses. However, if your system does drain into a holding tank, it’s a good idea to refill the P-trap with RV-antifreeze. 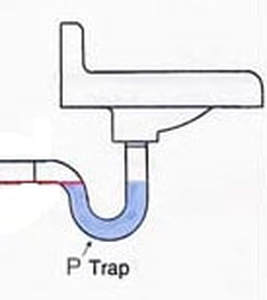 Black Water The black-water holding tanks need to be pumped out per our normal procedure, which includes back-flushing the tanks until the effluent is relatively clear and then priming the system with toilet chemicals and about 5-gallons of water. The seacocks for the toilets are then secured and I empty the filter housings. Then, leaving the filter housing loose, I run the pump to clear the lines of water, and try to blow the lines out with a wet/dry vac as best as I can. I will run the macerator pump to drain the blow and flushing lines, but usually that won't quite get all the water out of the bowl and I will have to suck it out with a wet/dry vac prior to filling the the bowl and macerator pump with RV antifreeze. 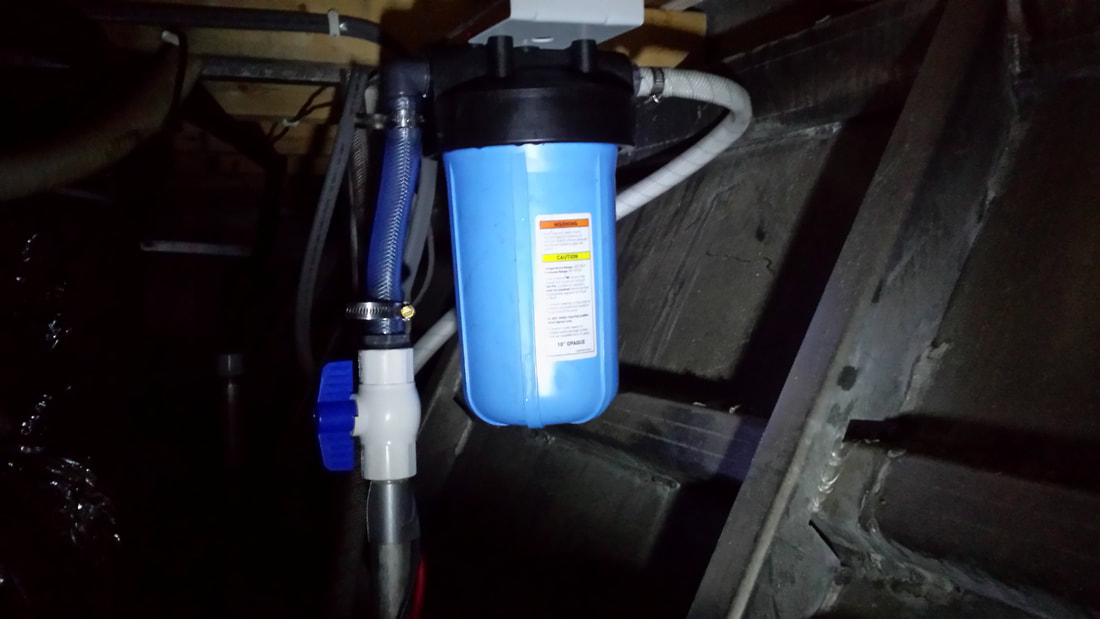 Electrical Even your electrical system needs a little attention prior to winter. The only things I really do are to ensure that the water levels on the flooded lead acid batteries (inverter and starting batteries) is at the correct level and then make sure the batteries are isolated so that an errant load doesn’t drain them flat over the winter. You need to use distilled water and a bulb syringe to fill the batteries up to the maximum fill level, which is illustrated below for the Trojan inverter batteries that were originally on the boat. 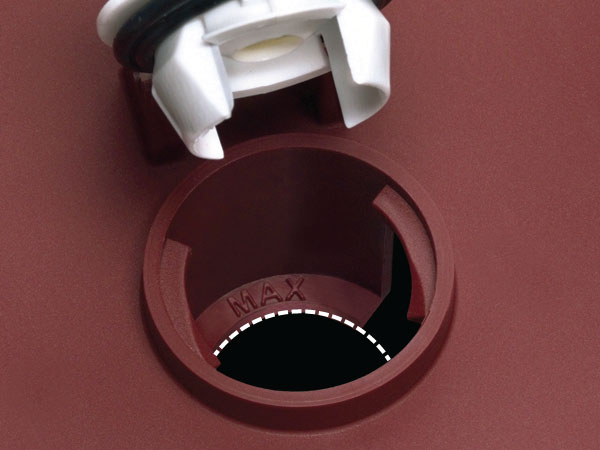 Many would advise pulling the batteries and storing them inside during those cold months. You might also put them on a trickle charger. I agree with this and take both of these steps on my small boats, but it’s not that simple with the houseboat. Serenity’s 12-batteries weigh a total of over 1100-lbs and would have to be hauled back to Colorado or Washington, since no heated indoor storage is available at the storage yard. For me that’s just not feasible, and I’ve never had any issues with the batteries just following the practice of isolating them to prevent discharge. Generator Now we’re getting to the nitty-gritty. The generator can easily be winterized while the houseboat is still in the water. Our Westerbeke has a closed cooling system with a heat exchange system that draws cooling water from the lake. The closed system is already filled with antifreeze, so you just have to worry about the raw water intake and wet exhaust. Now, the textbook method for winterizing the generator would be to pull the drain plugs in the exhaust manifold and on the heat exchanger, but I’ve found an easier approach. I close the seacock for the raw water intake, clean out and empty the sea strainer, and then disconnect the hose leading to the heat exchanger. I place the hose in a 5-gallon bucket filled with a few gallons of RV-antifreeze and then start the generator. It takes less than a minute of running to suck the bucket dry and start expelling the pink fluid over the side through the exhaust, thus displacing all of the water in the system with the biodegradable RV-antifreeze. When it looks like about 10-seconds worth of antifreeze left in the bucket, I have someone else start praying fogging oil into the carburetor, and then kill the generator. Then it’s just a matter of pulling the four spark plugs and fogging each of the cylinders, prior to replacing the plugs. Main Engines And finally, the main engines get their winterization only after moving over to the ramp for haul out. They will walk the houseboat onto the trailer and winch it into final position, so once you’re tied up at the dock by the ramp, you should be finished with the engines for the season. I like to get to the dock a little early so that we have time to do some of the winterizing prior to being hauled out. You can do this all after being hauled out, but if you want to run the engine on the hard, you will end up having to rent a run cart, if available, to ensure none of the cooling water ends up on the ground (even though under normal operation that water would be going right back into the lake…you’ll have to take that up with the EPA). Once we’re at the dock, I will shut off the fuel tanks and let the engines starve of fuel. Prior to them dying, I try to time it about right so that I can spray about 10-seconds of fogging oil into the carburetors on each of the engines; it’s easier if you do them one at a time. Once the engines have starved of fuel, you can fog each of the cylinders, but this can also be done after being hauled out. After the boat is blocked up, it’s time to finish up the winterization process. Aside from fogging the cylinders, that means draining the block and the exhaust manifold. I pull the plugs on both the manifold and the block and allow the water to drain into the bilge. I then remove the thermostat housing and use a wet/dry-vac to blowout the block and manifold. Once both drain holes are relatively dry, I shut down the wet/dry-vac and replace both plugs. I then pour RV-antifreeze into the thermostat housing port to fill the system. 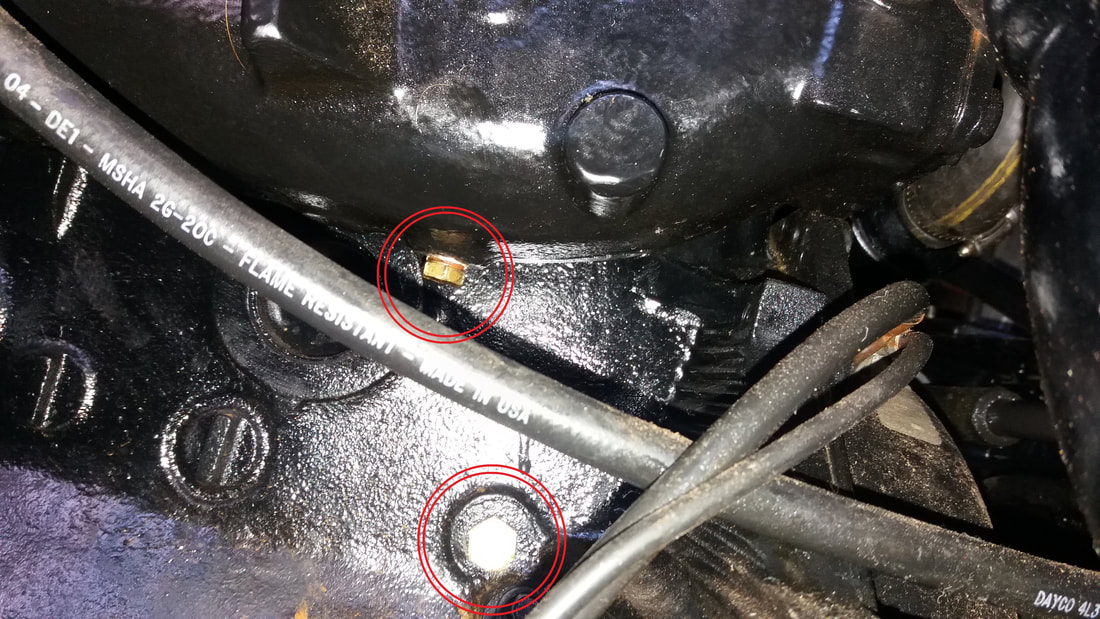 That would be the bare necessity for winterizing, but if there’s time I also like to replace the lower end lube oil and, while I’m at it, drop the lower end and replace the impellers. The impellers should last more than a year, but with the mussels in Lake Powell, I figure it’s better to be safe than sorry and open up the lower units to make sure everything is clear and put some new impellers in there. If an impeller should fail during the season, the only option is to haul the houseboat out again to work on it, which represents a $1000 obligation, so I figure the $30 for the impeller kits is well worth it.
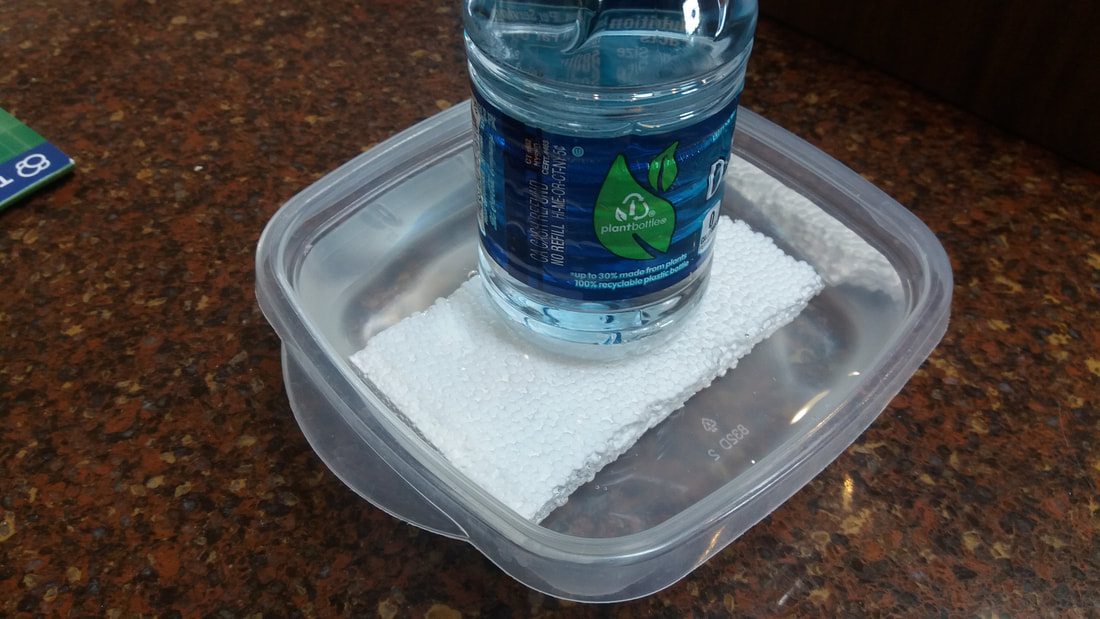
Even if you’re not dropping the lower unit, it’s good practice to replace the lower end lube oil prior to winter storage. If any water has made its way into the lower end, you don’t want it sitting in there all winter and potentially freezing. The Mercruisers have a reservoir for the lower end lube in the engine compartment, since there’s virtually no way for water to work its way up into those reservoirs, I don’t see a need to drain them and instead clamp off the hoses running down to the lower units. Then it’s just a matter of opening the drain and vent plugs on each of the lower units and allowing them to drain. I have been known to be a little impatient, and I will often use my compressor to blow the oil out from the upper vent hole in order to speed up the process. Once they’ve run dry, I’m free to drop the lower units and replace my impellers, but I won’t go into detail on that procedure in this post. Instead, assuming you aren’t replacing the impellers, you would just go ahead and refill the outdrives with lube oil, pumping it in from the bottom drain port until it comes out the upper vent port. Then you just have to remember to remove the clamps isolating the reserve reservoirs. With all this complete, it’s finally time to button everything up and head home. Until next time, here’s wishing you fair winds and following seas. As I mentioned in the previous post, there are virtually limitless options when it comes to foam. So, what foam should you use for flotation in your boat? It can be perplexing, but hopefully after reading this you’ll have a better idea about adding flotation to your boat. 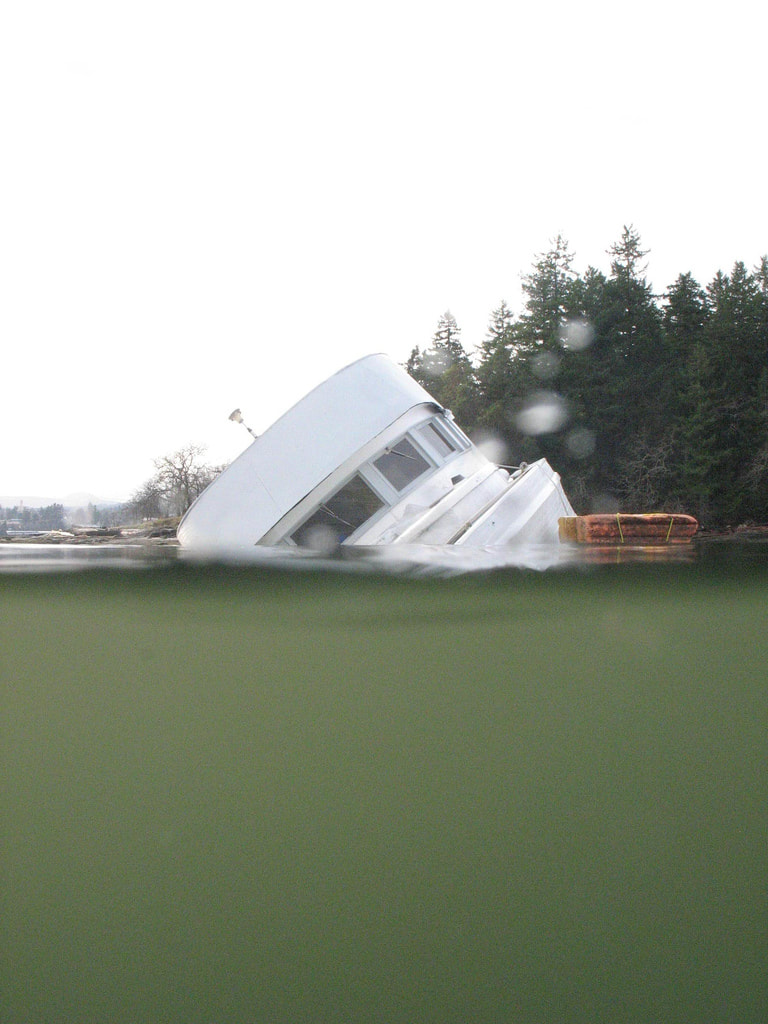 Should you even use foam at all? I’ve seen quite a few people (though definitely a minority) argue that foam floatation is just a hassle and, if you aren’t required to, you should just skip it. They argue that regardless of the foam you use, it’s going to absorb water, and it’s going to take up space. Floatation foam is designed to keep your boat at the surface with water up to the gunnels, but “they” would argue that the boat would still be a total loss having been submerged (clearly, judging from my boats, we have a different opinion of what constitutes a total loss). Obviously, I think “they” are wrong; not because the boat can be salvaged, but for safety. “They” will say they have a life jacket, so it’s no big deal, but as anyone that has done man overboard drills with a dummy knows, it’s a lot harder to spot a person floating in the water than you might think (even if their head is orange). It’s a lot easier to spot an overturned or partially submerged boat than it is to see a person. Aside from that, a partially submerged boat also provides shelter and a means to get yourself up and out of the water, which makes a substantial difference in survival time. So, the answer for me is, yes you need foam. The federal government agrees with me and per USCG requires all new boats under 20-ft to have integral floatation that will provide at upright and level floatation when fully filled with water. 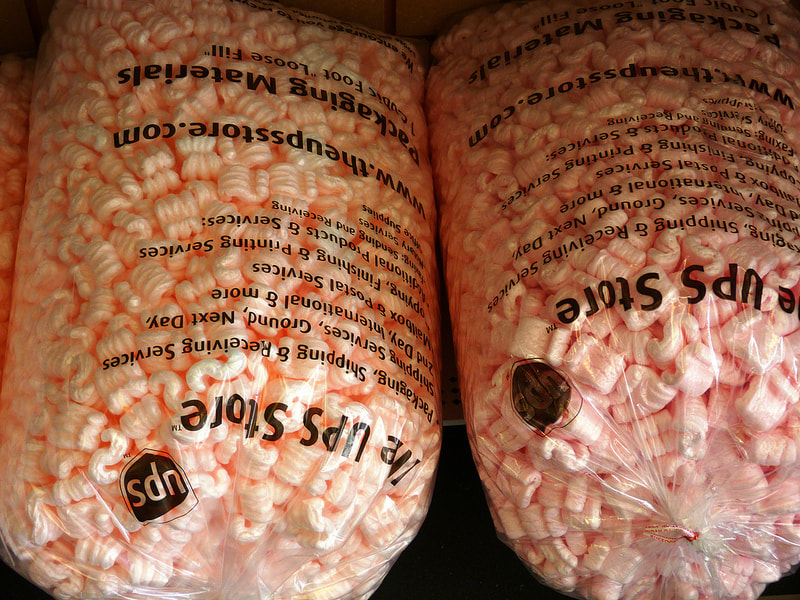 I’ve seen a few people argue for the use of sealed flotation compartments or just filling compartments with sealed bottles. They point to the fact that these flotation methods won’t get waterlogged like foam can, but the counter argument is that they aren’t as reliable as foam. Granted anything that will displace water in a large enough volume to float your boat will work for flotation. Foam provides a more resilient flotation, whereas a sealed compartment or 4 sealed milk jugs have a greater possibility of failure. Even if you damage a block of foam (break it in half, stab it with a knife, etc.), it will still provide significant buoyancy. Whereas, if you poke a hole into a sealed compartment filled with air, it will lose all its buoyancy, and poking a hole in one of the 4 milk jugs will result in losing a full 1/4 of your buoyancy. That is why I prefer foam, but I am not vehemently opposed to other methods. Now you just need to figure out what type and how much foam you need. Should you use polystyrene or polyethylene or liquid urethane foam or something else? There’s no shortage of choices and I’m not going to give you a definitive answer on which one is the best; they all have strengths and weaknesses. You need to look at their respective properties and see which one is going to fit your needs the best. The most common foams I’ve seen are the above listed polystyrene, polyethylene, or poured liquid urethane foam. Any of these should work fine, the most important thing is to use a closed-cell foam and ensure you have enough of it to float your boat and gear. Foam is made up of bubbles; in the case of closed-cell foam, those bubbles haven’t popped and thus won’t absorb moisture. Open-cell foam is like a sponge and will be useless in providing floatation for your boat. Now, to the point that any foam will eventually become waterlogged, that is largely due to improperly storing your boat or poor installation of the floatation foam in the first place. If you allow the foam to sit in water, it will eventually break down and absorb water (water is the universal solvent). In installation, you want to make sure that the foam is placed such that water can drain away from it and doesn’t become trapped (e.g. limber holes). When you store your boat, make sure the water has somewhere to go by pulling the bilge plug and raising the bow so that water will flow down and out the bilge. Even a closed cell foam has voids between the cells and will absorb some water. As an experiment I took a piece of packaging Styrofoam (polystyrene) and submerged it for a week to see how much water would be absorbed over time. The 3-in by 1.5-in by 0.5-in piece of foam initially weighed about 1.8-grams. I placed it into a tub of water and placed a water bottle on top of it to keep it submerged. The table below shows the time that the foam had been in the water and the weight at the time.
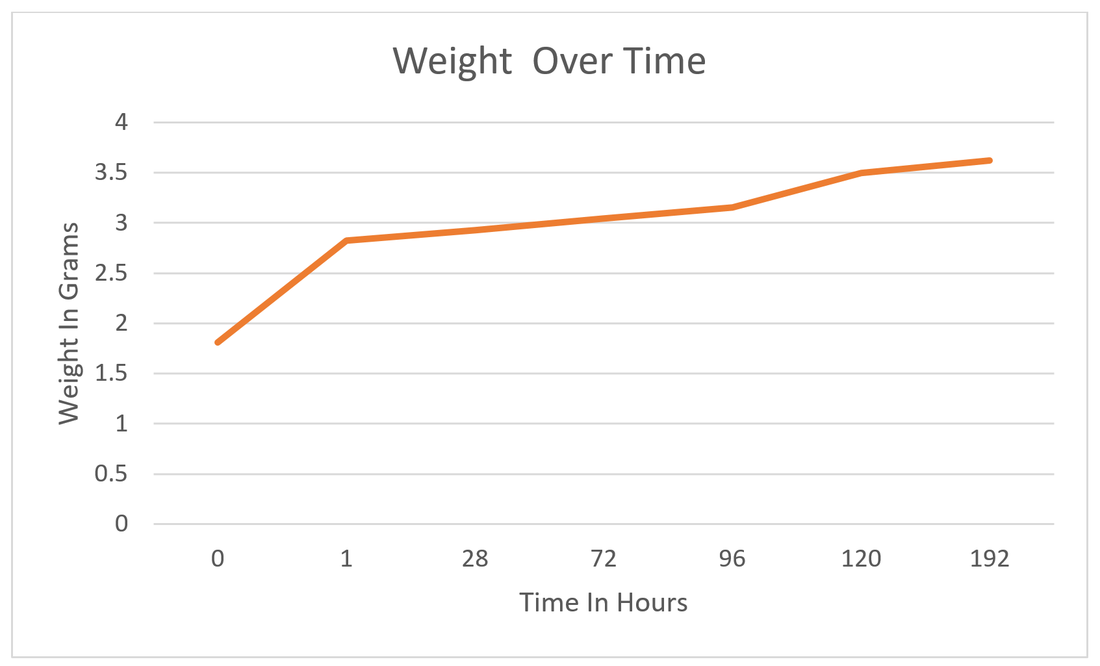 After an initial rapid weight gain, which is a result of water making its way into the rather large voids within the foam, the weight changed more gradually as the water worked its way deeper into the smaller voids. After a week of soaking it had doubled in weight, gaining an additional 1.8-grams of water, which is about half a teaspoon. Removing it from the water and letting it dry for 24-hours returned it to the starting weight of 1.8-grams and a subsequent dunking provided similar results. So, the longer you let it sit in water, the more water will be absorbed and the more difficult it will be to fully dry out. This is more of a concern in cold climates, with freezing temperatures in the winter. Any trapped water will freeze and rupture the closed-cells of the foam. It then thaws and is absorbed into those now open-cells only to refreeze and do more damage to the foam. As this freeze thaw cycle continues the foam breaks down and will eventually become saturated with water. Keep it dry when you’re not using it (i.e. your boat sank) and it should be fine. Now, we just have to calculate how much foam you need to float your boat. The first step here is to figure out how much weight you need to float. You can do this three different ways (more really, but these are the most realistic):
Once you have this total weight, it’s a relatively simple matter to calculate the volume of foam you need to float it all. You can use the formulas from the USCG boat builder’s handbook (http://uscgboating.org/regulations/assets/builders-handbook/FLOTATION.pdf) to determine the amount of flotation needed.  Fb is the volume of flotation needed for the boat hull, Kh and Kd are conversion factors for the materials used for hull and superstructure (0.33 for aluminum), Wh is the weight of the hull, Wd is the weight of other structural components, We is the weight of any equipment or gear, and B is the buoyancy of one cubic foot of the foam being used. Most flotation foam has its density represented as the weight of a cubic foot of the foam. Usually, flotation foam is 2-lb foam; so a cubic foot of foam would weigh just 2-lbs and displaces a cubic foot of water, which weighs about 62-lbs. Thus that foam provides 60-lbs of flotation, which is your value for B in these equations. In the Lone Star’s case, I got approximately 1.667-cuft of foam for the boat and associated gear.  Fp is the volume of flotation required for propulsion equipment and G is the weight of the engine, battery, and associated equipment. With an engine and battery weight of nearly 200-lbs on the Lone Star, I got a value of 2.5-cuft.  Fc is the flotation required for the personnel capacity and C is the maximum weight capacity. With a planned capacity of 4 people at 150-lbs each (I wish, but my wife offsets my extra cushioning), I ended up with a value of 2.5-cuft.
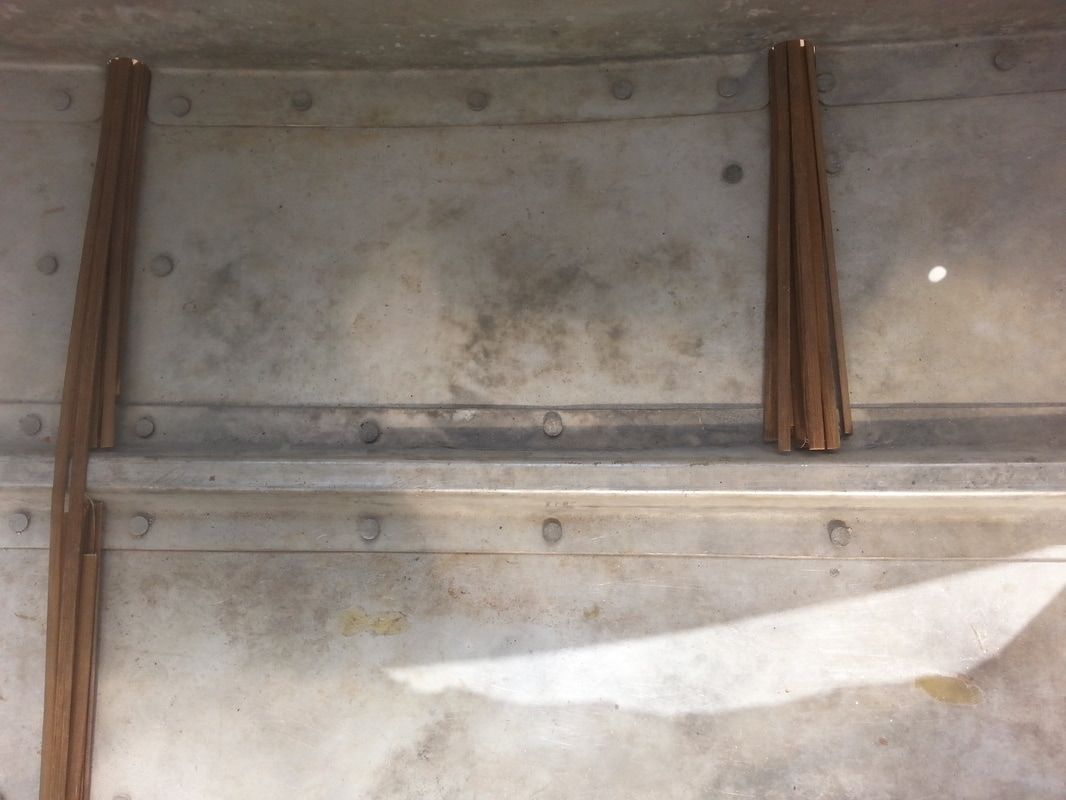
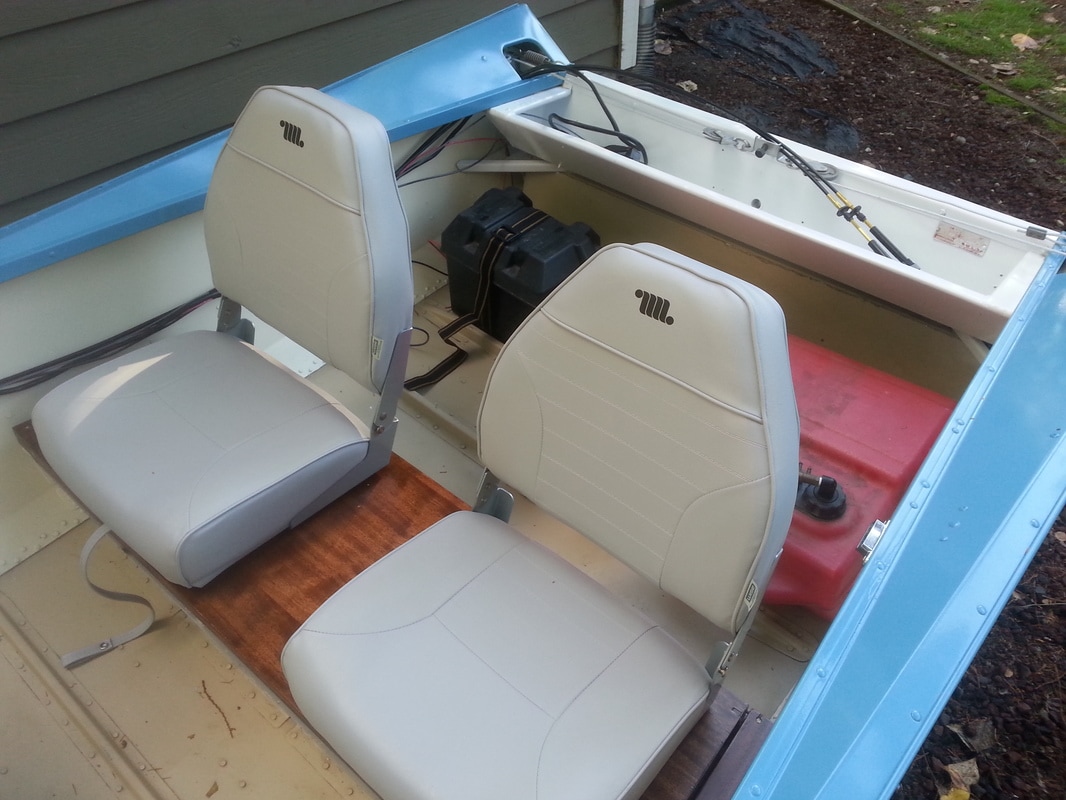
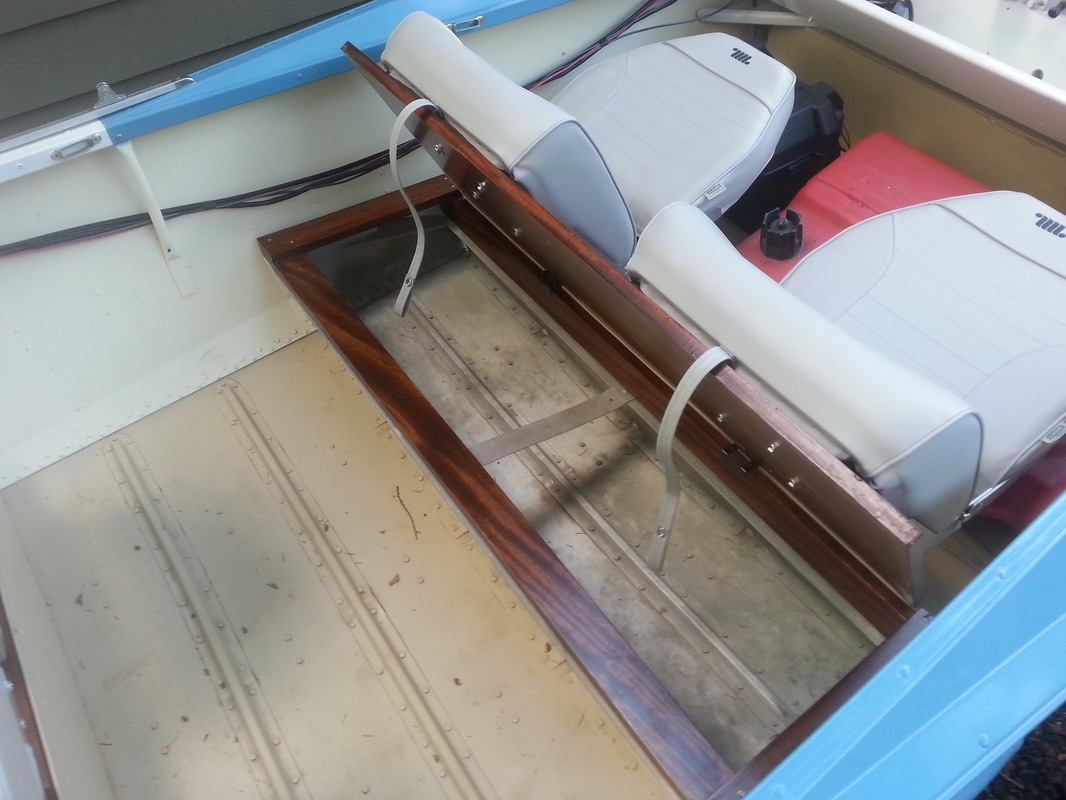
Once you have these values you simply add them all together to get the total required flotation requirement (in my case 6.667-cuft). In total, I actually have almost 8-cuft of foam packed in the Lone Star between the bow, the benches, and the transom. The trick really is figuring out where to put it. Now I just hope that I never need it. Until next time, here’s wishing you fair winds and following seas. When my uncle’s friend, Paul, showed up at his small private airfield in Eastern Colorado he was interested in a large box of parts on the ground in the hanger. My uncle’s cavalier response was that he had just rebuilt the upper end of the engine on his Cessna 175 and those were the left over parts he didn’t know what to do with. Paul didn’t find that particularly amusing as he was there to do my uncle’s Biannual Flight Review (BFR) and was about to go up in said aircraft. Truthfully, he had just replaced the cylinders and the box was old parts that he was discarding; he is one of the best mechanics I know and helped me and my dad rebuild my first engine (an old in-line 6-cylinder Mercury 115-HP outboard). Never the less, things always come apart a lot easier than they go back together and after finishing up the paint work I was ready to start piecing my boat shaped puzzle back together…hopefully without too many spare parts.  Prior to painting out the interior, I first tackled replacing the flotation foam. The polystyrene floatation that was concealed in the nose and the bench seats was in a sorry state with rodent nests and severe degradation from sitting out in the elements for nearly 50-years. So I cleaned it out and got to the business of replacing it. There are any number of different types of foam to choose from; polystyrene, polyethylene, polyurethane, polyisocyanurate, and polypropylene, just to name a few. Rather than going into detail on determining the right type or necessary amount to keep your vessel afloat in this post, I think I will ave that for another post. I ended up using a combination of poured polyurethane and some rigid polystyrene. The foam in the nose was held in with aluminum strips that were riveted in place; I just drilled out the rivets on one side, slid the old foam out, slid the replacement foam in and put in some new pop rivets. I wanted to remove the foam in the back bench and move it closer to the transom; given the weight of the outboard, I thought more flotation at the heaviest part of the boat would be a good idea. Also, I was hoping to use the back bench for storage. I was able to get a little over 1-cuft of foam glued under the transom well with polyurethane glue. I would have liked more, but I just couldn’t figure out a good arrangement to get more foam at the transom without major modification. I guess if it ever sinks, it's going to float down by the stern. 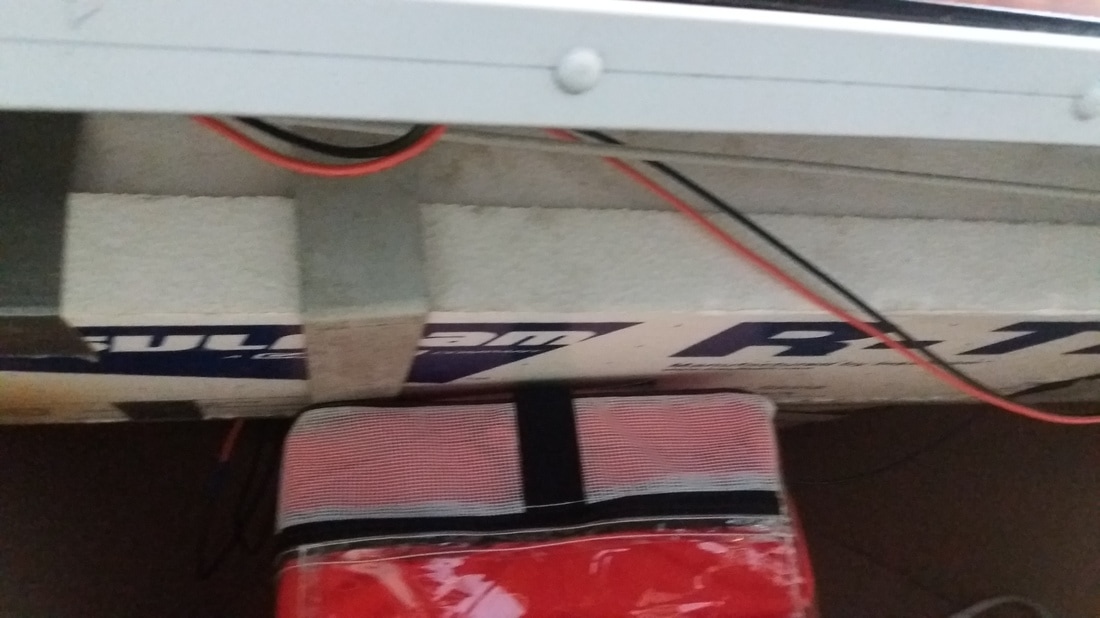 On the front bench, I decided to go with a poured liquid urethane foam. My first attempt didn’t turn out so well; I failed to read the product literature completely. The foam I have used in the past has a shelf life of 1-year prior to being opened, but the brand I purchased for this project, FGCI, only has a shelf life of 6-months and apparently they mean it. I purchased the foam about 8-months before trying to pour the bench full, since Amazon had a sale and I figured that I would use it before the end of the summer. Anyway, I poured a gallon, which should yield 4-cuft, enough to fill the front bench with a little overflow, but only got about 1-cuft of dense "foam." Luckily, I had lined the bench with plastic sheeting (disposable table cloth) to contain it and that made removal of the failed pour a snap (just pulled it out and put it in the trash). 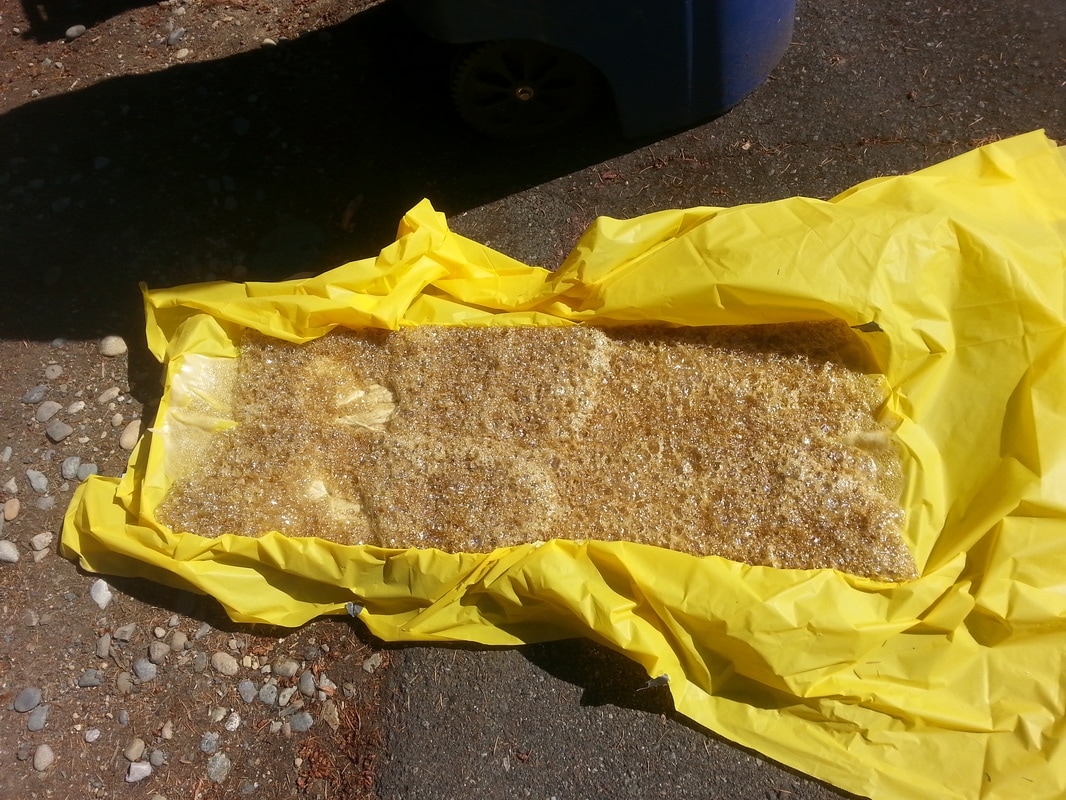 After reordering the liquid urethane foam, I made a second more successful attempt. I first laid some wood sticks in the bottom through the limber holes in the bench to keep them clear and allow water to flow to the back. I then laid in my plastic sheeting and poured the foam in two stages. The reason for breaking the pours up into two stages was firstly, to ensure I didn’t have a major overflow, and secondly, to prevent it from heating up too much. The expansion of the urethane foam is exothermic and, if you’re not careful and pour too large a quantity the excess heat will degrade the foam and yield a more dense foam than expected. When I was working at the Pacific Marine Environmental Laboratory on the TOA buoys we always poured in multiple stages. The buoys were just giant fiberglass donuts (the original mold was based off of an over inflated truck inner-tube) that were then filled with poured urethane foam. Initially they were doing this in one pour, but found that they were getting a lot of heat (so much that they worried about fire) and far denser foam than expected.
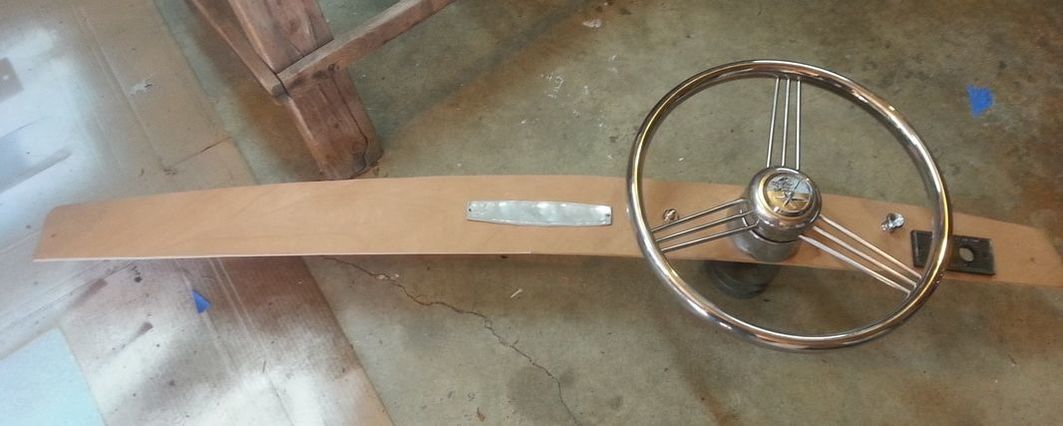
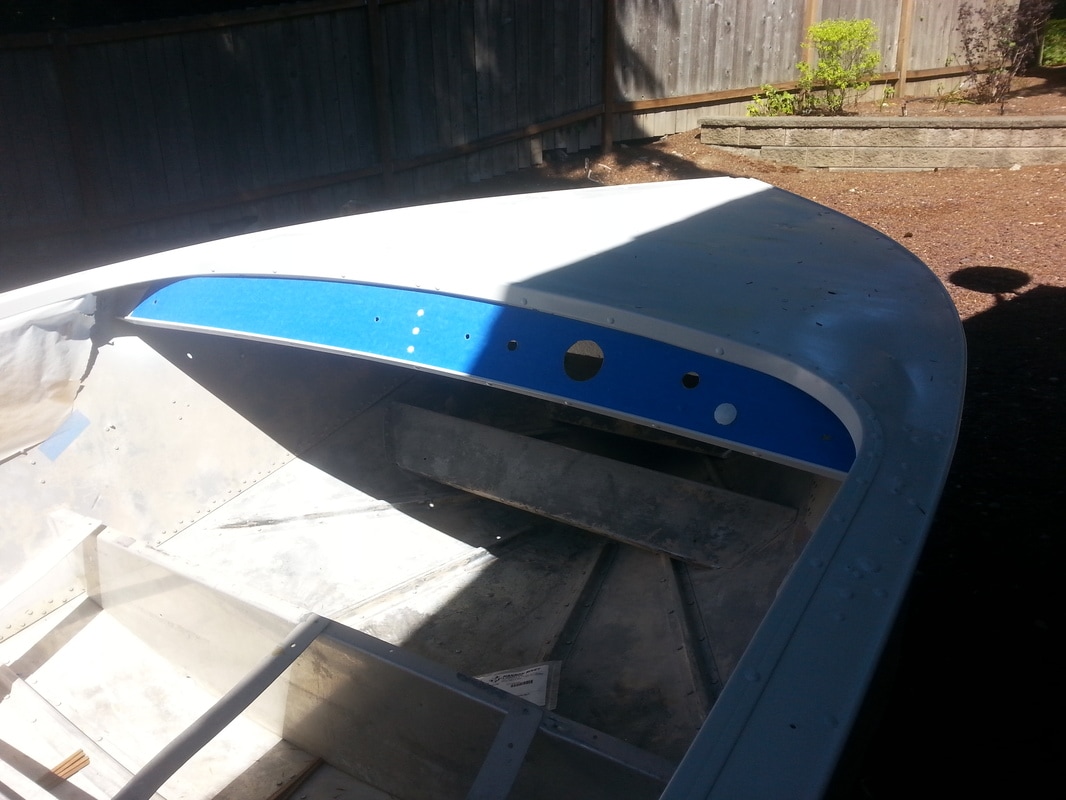
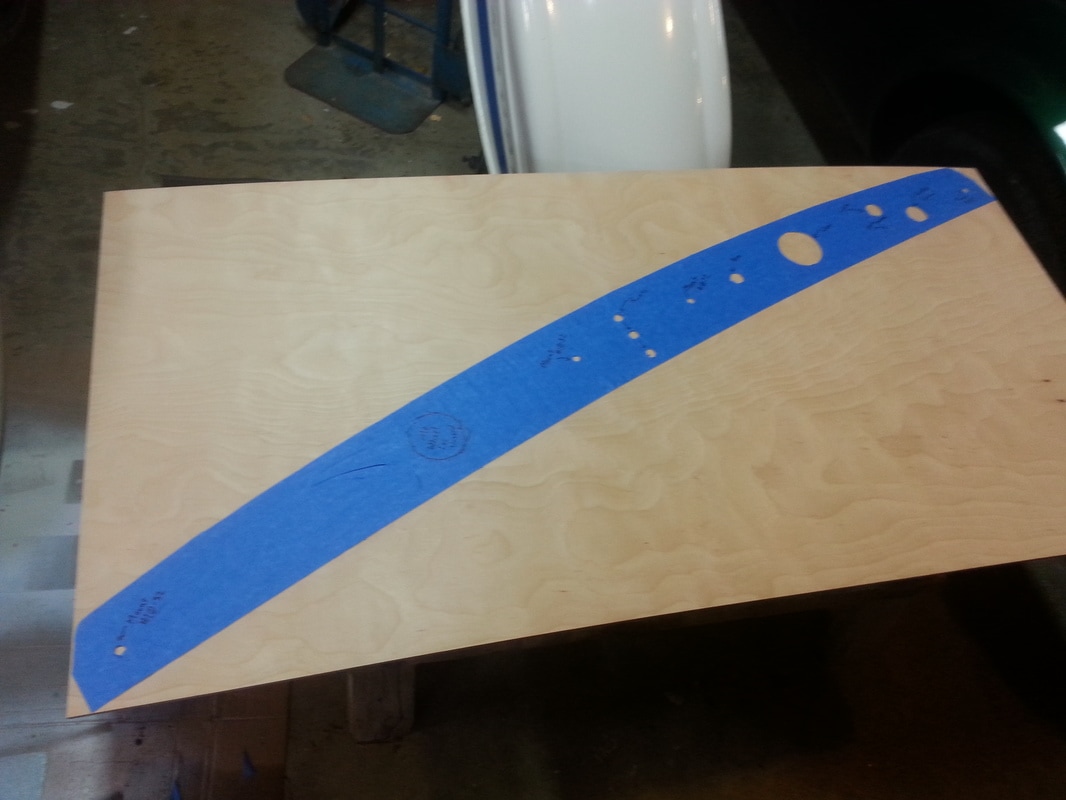
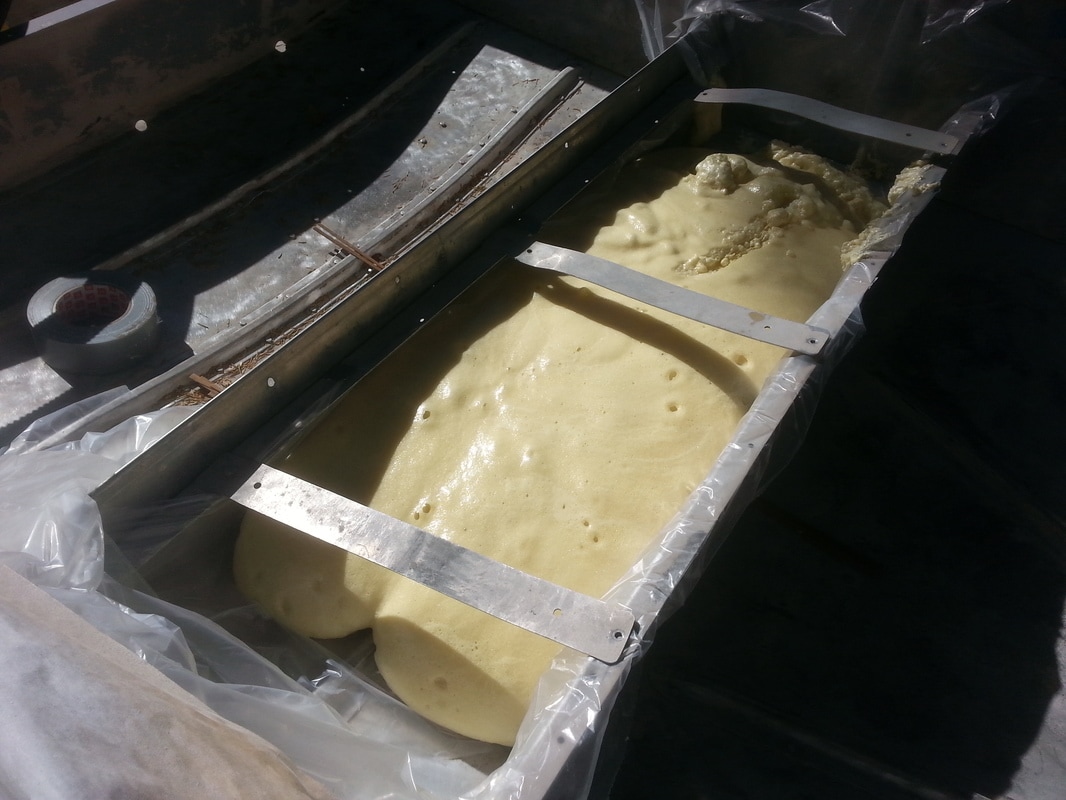 With such a small pour as this, it’s unlikely that there would have been a problem, but better safe than sorry. Even with the precautions, I may have gotten a little over zealous with the second pour, but nothing a serrated knife couldn't fix. 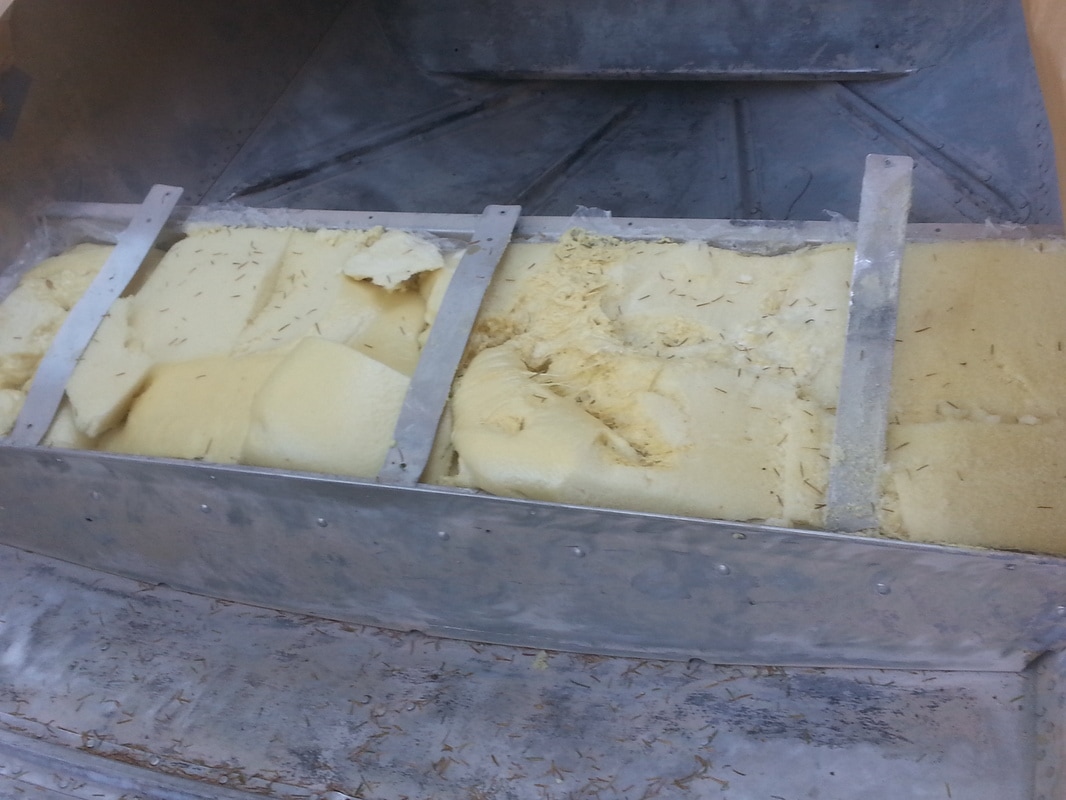 Once the floatation was in and I got the interior painted, I was able to show off my skills, or lack thereof, in carpentry. I debated adding wood to this aluminum boat; I'm not a huge fan of the maintenance that goes with bright work, but it seemed appropriate for this boat. The wood adds a lot of beauty to the boat and I don't think the dash board and bench tops will be too much of a maintenance headache; if they are, I can always remove and replace them with HDPE (high density polyethylene, commonly called Starboard) in the future. In order to make the dashboard, I created a tape template of the dash by laying up several layers of masking tape onto the dash and then just peeling it off. I then used my template to cut the 1/8-in thick mahogany plywood to size and transfer the necessary holes for switches, steering wheel, and mounting hardware. I planned to through bolt it in four spots for final mounting.
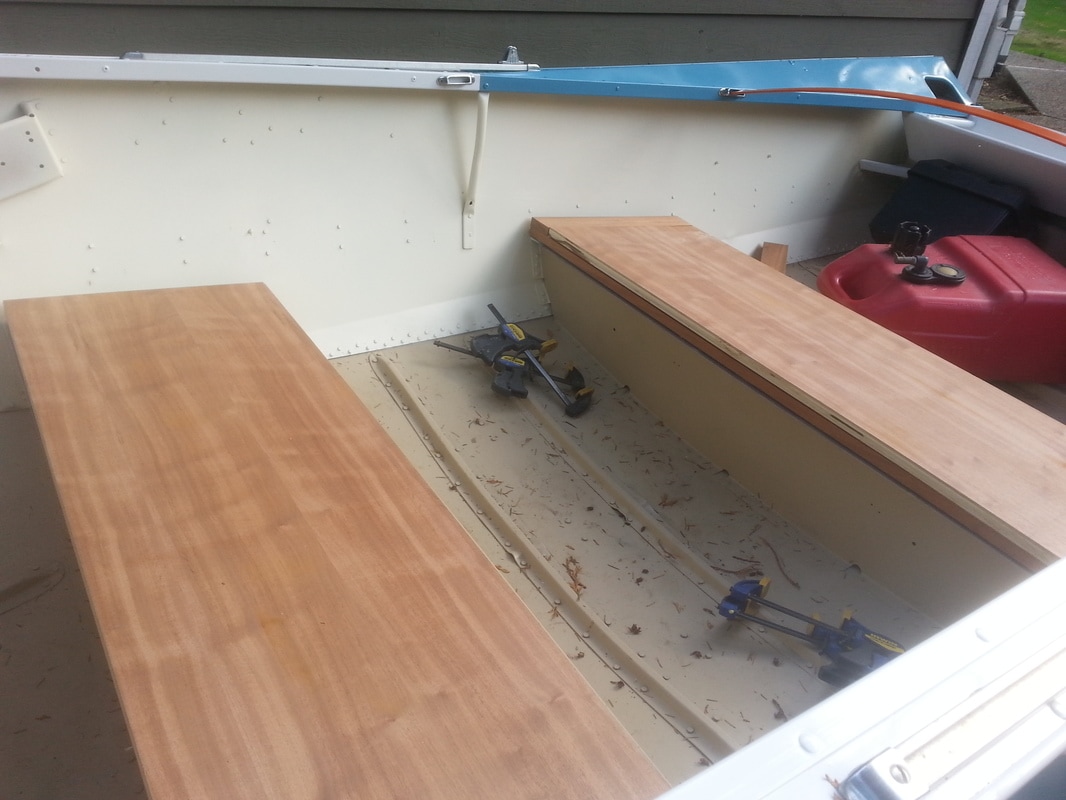
 I fabricated the seat bench tops, to which I attached standard marine folding seats, out of mahogany (both solid and ¾-in plywood). Fabrication was fairly straightforward, just measure once and cut three or four time…wait, that’s not the saying. That might have explained some of my snafus. In any case, I cut all my lumber to size and then faced the decision on how best to glue and screw them together. I was torn between doing it the easy way and having visible fasteners (i.e. screw heads) holding the bench tops together or going the extra mile and putting them together with hidden fasteners. It would be easy to clamp them and glue and screw them in place, but then the screws would be visible. Alternately, I could pull them out and fasten them together from underneath so that you can't see the screws, but keeping the geometry correct out of the boat so that they go back in without an issue would be a lot trickier. In the end I went with the easy way, but I bought brass screws and called them a nautical detail. On the plywood sections, which were the whole bench-top in front and the opening lid on the back bench, I needed to cover up the end grains of the plywood. I purchased some iron on mahogany veneer and went to work wrapping all the edges. It was pretty easy, just cut to length, iron in place, and then trim off the excess with the trim tool that I purchased along with the veneer.
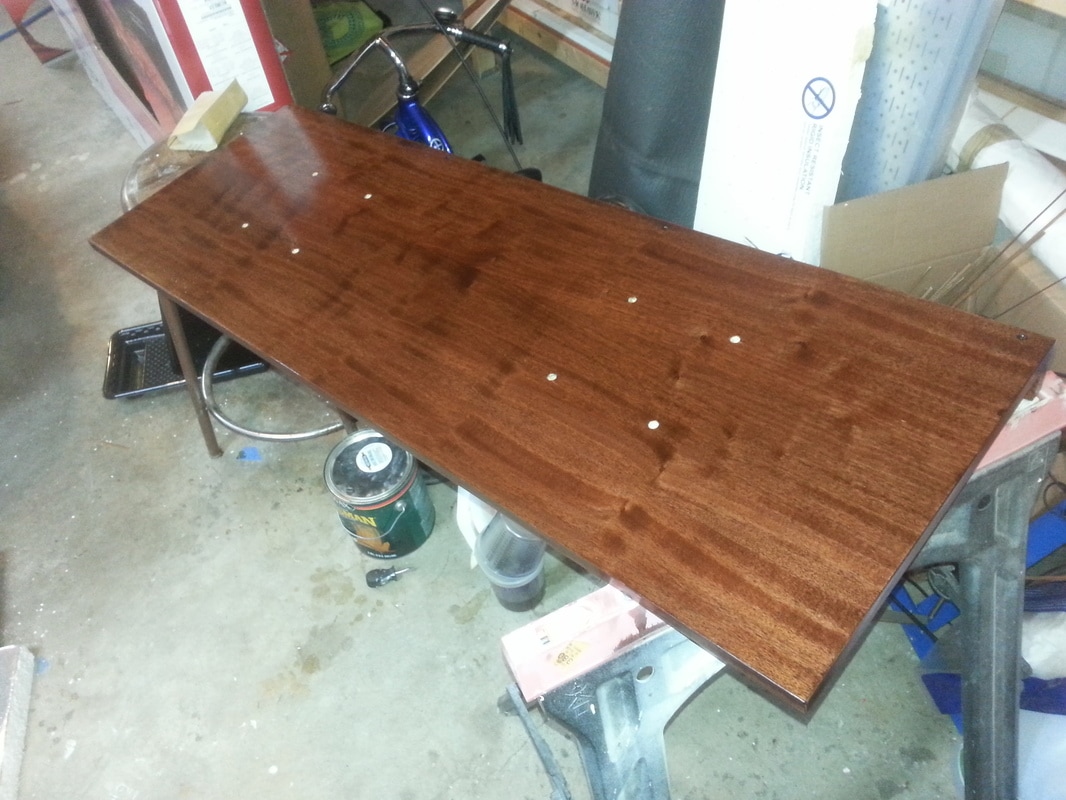
Once the fabrication was done, it was time to move on to staining and varnishing. I used all Minwax products, since they are readily available from the local big box store. I seem to be fond of saying this, but I am not an expert and that is especially true of painting and finishing. Most of what I know I learned from the internet and reading the literature with the products I bought, though I do have some experience in this area that I can contribute. Staining is relatively simple. I went with Minwax Mahogany stain to give the mahogany a richer color. The staining process went something like this.
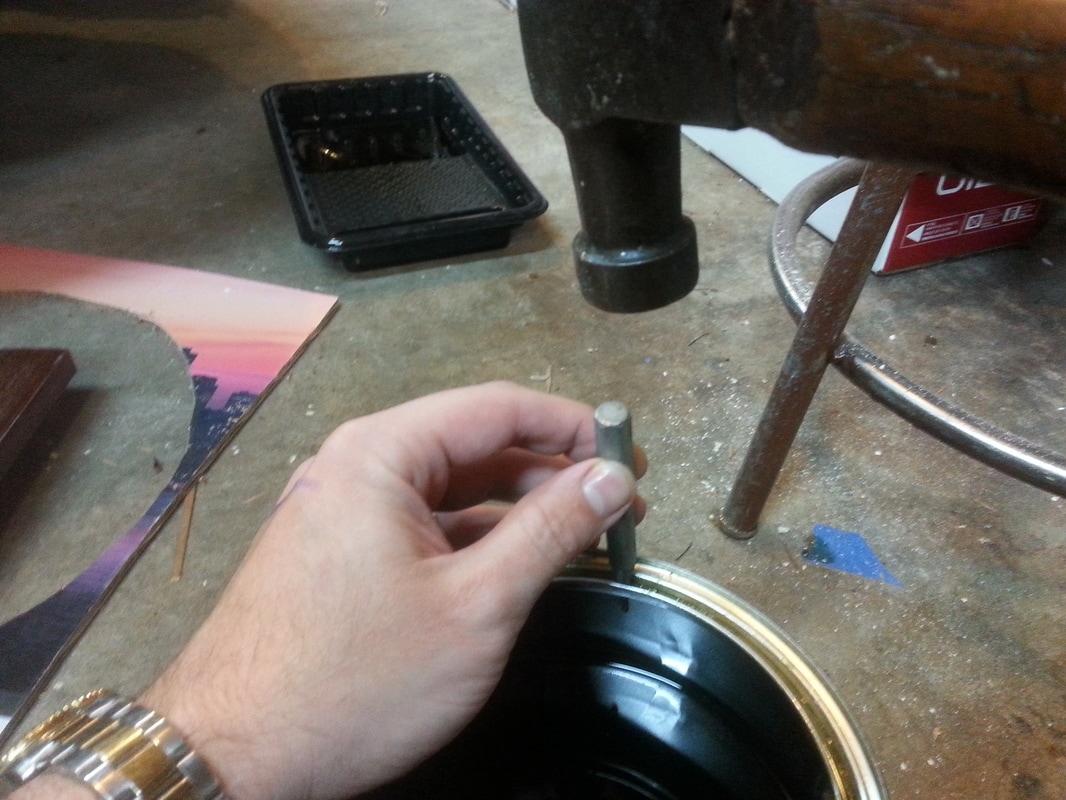
Once I had everything stained, I had to wait the prescribed dry time before moving on to varnish. In this case, the prescribed time wasn’t long enough since it was an unseasonably cold day and extremely rainy (I know, who would have expected that in the Northwest). I had to wait about double the dry time until the stain was dry, which can be tested by wiping the surface with a clean cloth and getting little to no color transfer. Once that was done, I got to move on to varnishing. Varnishing the seat tops and dash were a very slow process with all the rain and cold; as mentioned above, recommended dry times aren't so accurate when it's this cold and wet. I doubled them and still ran into soft varnish when I went to sand the first time. I used Minwax Helmsman Spar Varnish and the can recommends three coats with 4-hour dry time in between, but I went overboard and went with 5-6 coats total with a full 24-hours in between coats. My varnishing process went something like this:
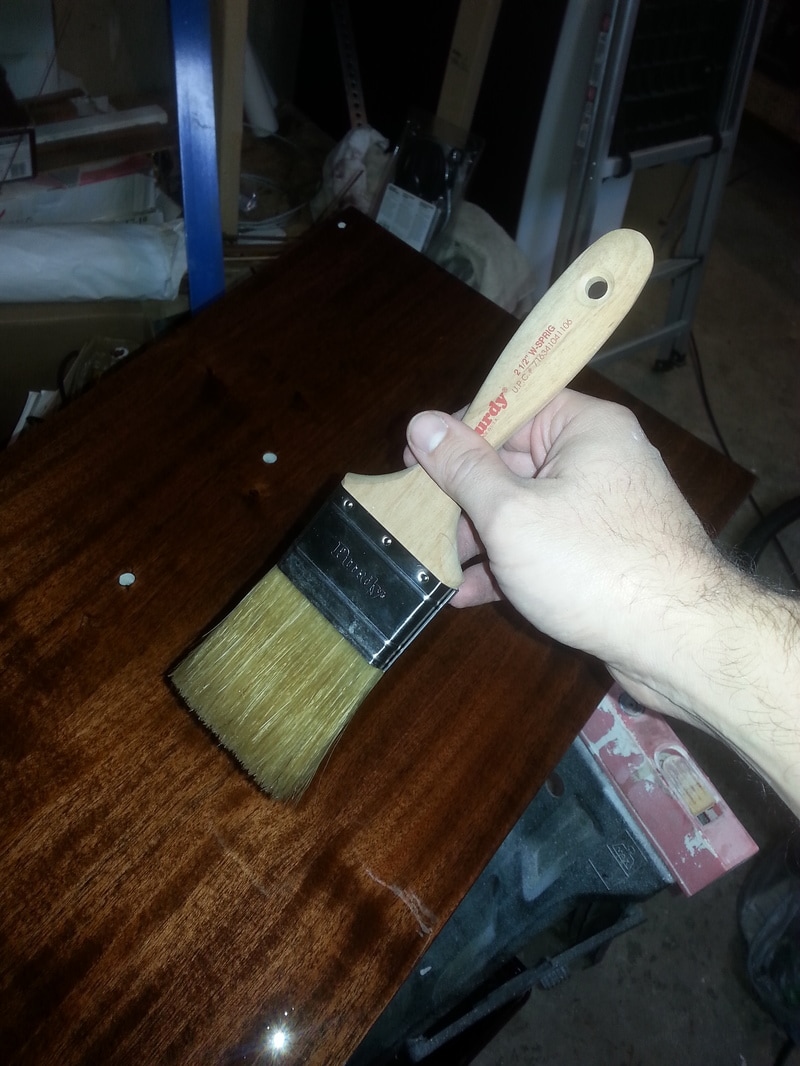
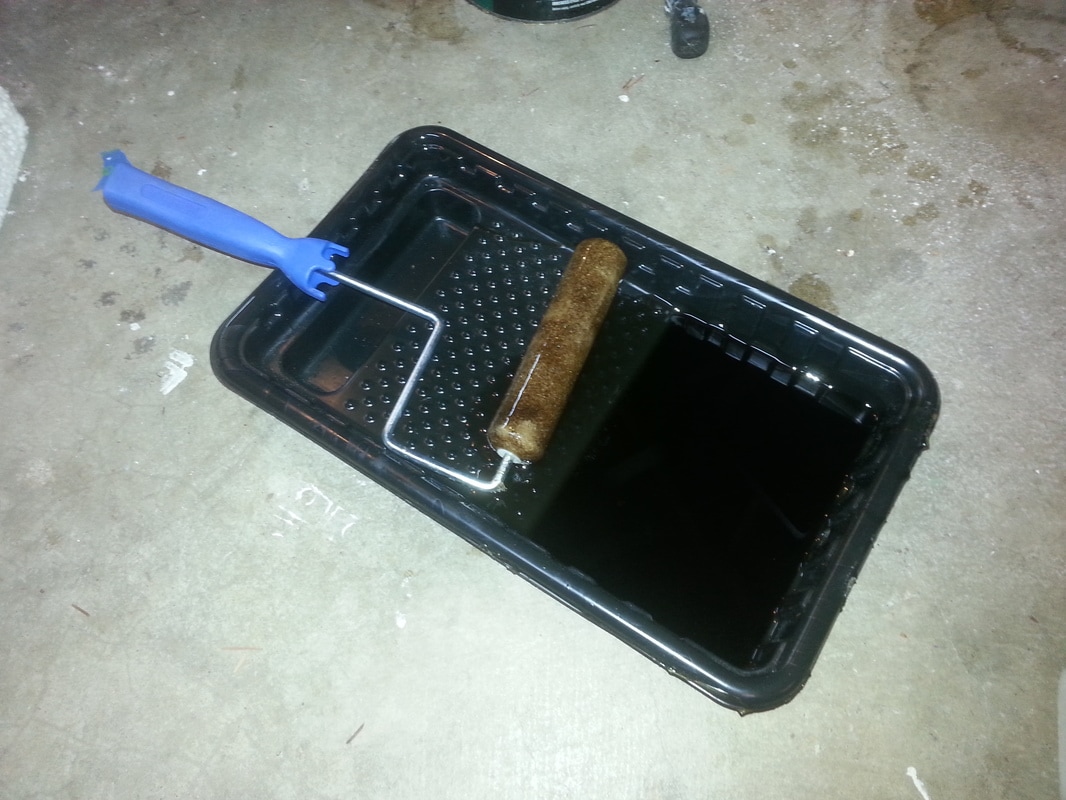
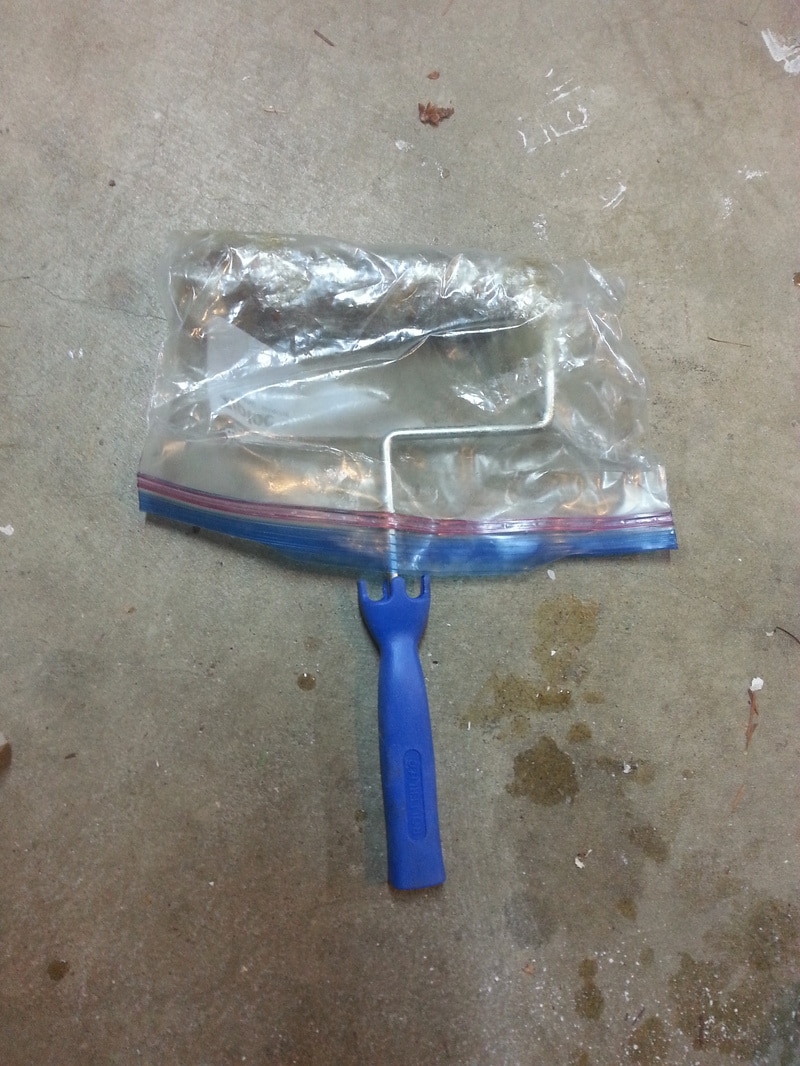
I did manage to pick up a few cool tricks and tips along the way. Firstly, after mixing your varnish (never shake) it's a good idea to pass it through a filter to make sure there aren't any particulates in the mixture that will show up as flaws once you've laid down the coat; paint strainers are fairly cheap and readily available. Secondly, in order to prevent varnish from sitting in the rim of your can and sealing the lid on, you can punch a few holes in the bottom of the rim to allow the varnish to drain back into the bucket (I can't believe it took me this long in life to learn that). Third, as I mentioned above, it's better to apply your varnish with a foam roller in order to get a more even coat, which you can then tip with a good quality badger hair brush to get to lay down smooth. Forth, this is for all the skinflints out there like me, in order to reused your foam roller from coat to coat you can wrap it in a plastic bag getting all the air out you can and sealing it as well as possible.
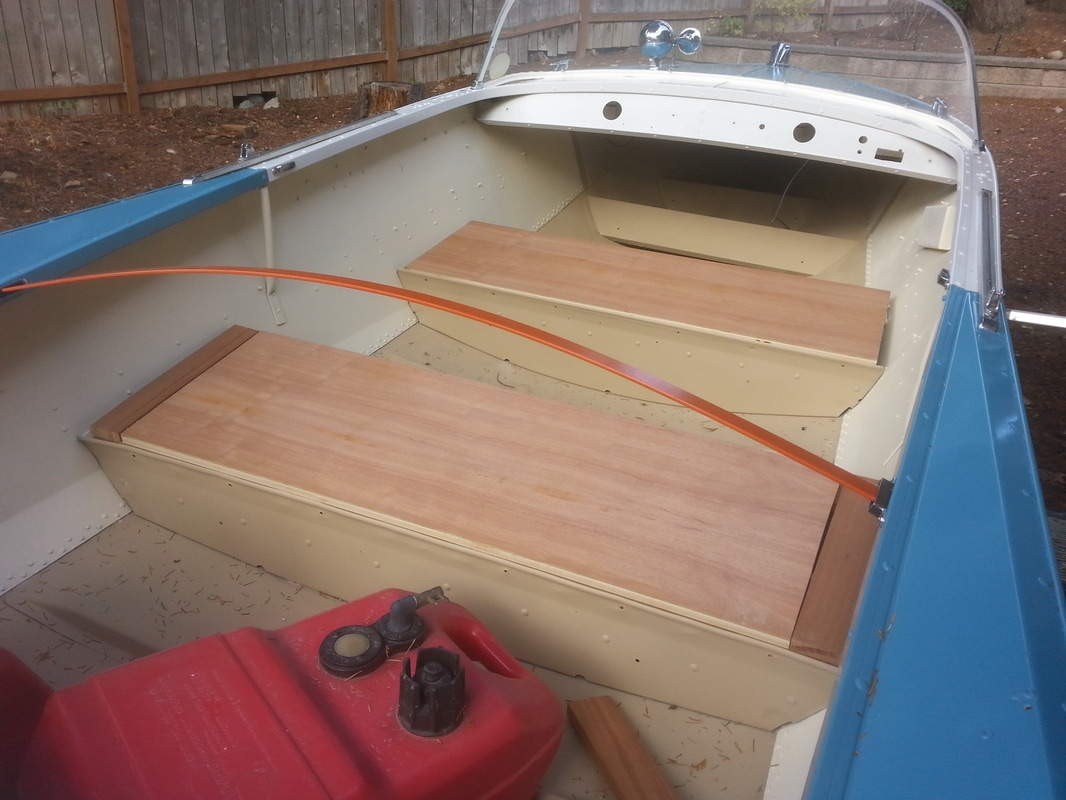
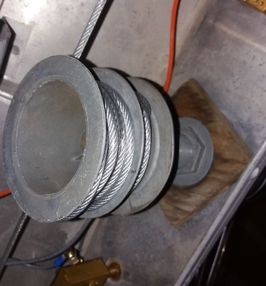
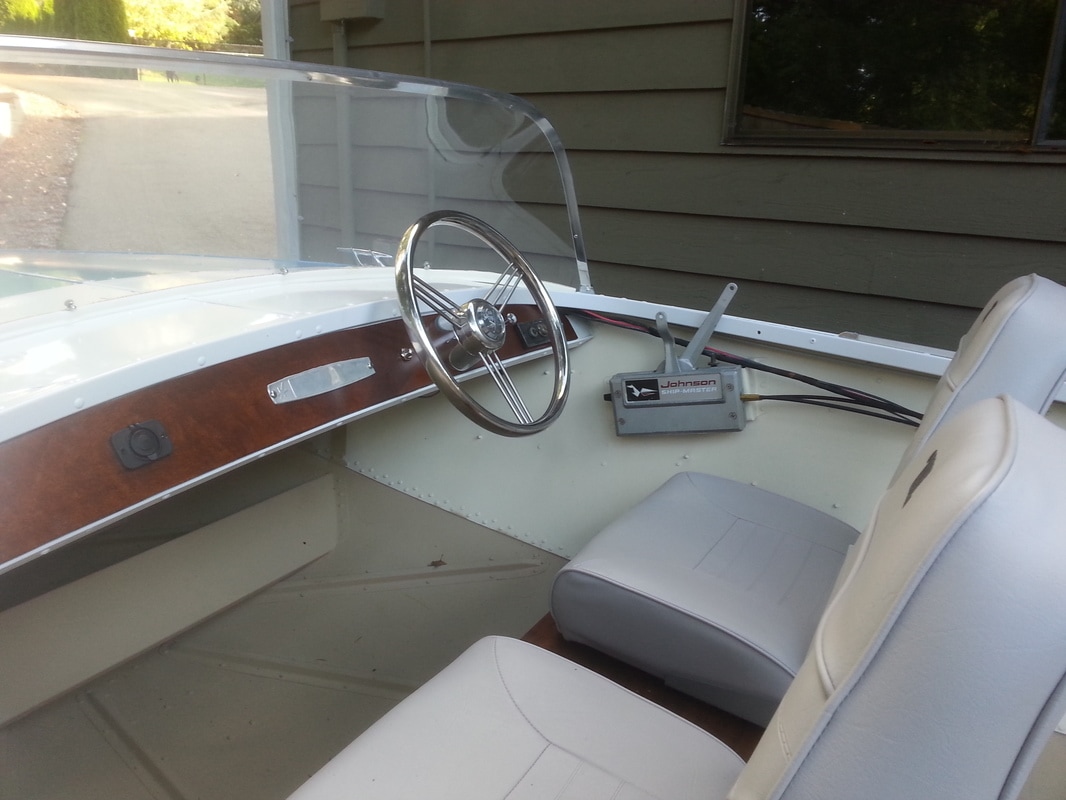
Keeping your varnished bright work looking good is not a once and done kind of thing; you will have to maintain it every year, which is why I was slightly dubious about putting it on this otherwise low maintenance boat. At the beginning of every season, starting with this one, I will have to apply another coat of varnish. That will mean removing the wood, rubbing it down with a fine grit sandpaper, and rolling and tipping it. If you don’t keep on top of this and the finish starts to go, it’s already too late and the only solution is to strip it down to bare wood and start from scratch…we’ll see how long I can keep that up. Once the varnishing was done, it was time to really start assembling the boat, which is where I really start to have fun as I see the finished project start to take shape. I made sure that all my hardware was stainless steel (except for the “decorative” brass screws I used to build the benchtops). The fold down seats were through bolted to the bench tops and then the bench tops were screwed down to mount on the bench supports. The dashboard was mounted with four screws; two dedicated mounting screws on the outside and the two mounting screws for the name plate. Regrettably, the dash nameplate was sun bleached to bare aluminum when I got it, but a contact over at the Lone Star Yahoo Group was nice enough to provide me with an image of his dash plate that was in slightly better condition. I’m looking to get the lettering reproduced as a decal, but haven’t yet found someone that can do it. I installed the switches and a 12-V power outlet, but that will be covered in another post. I then moved on to the steering wheel. 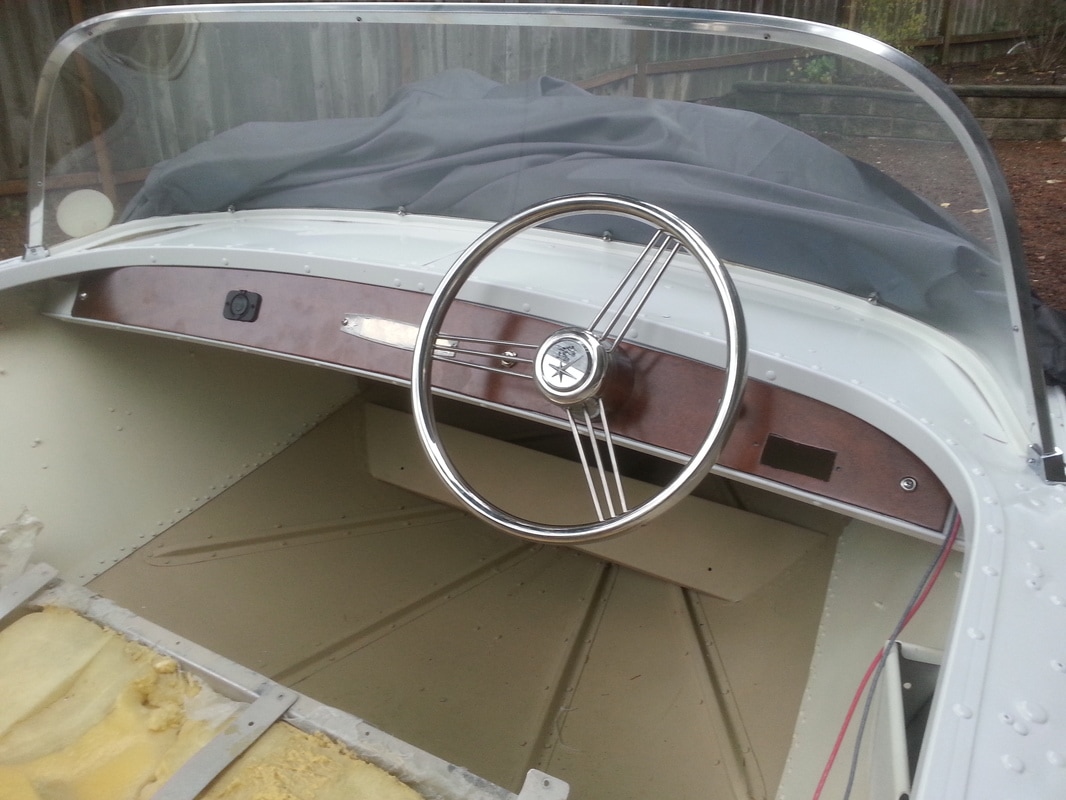 I would have liked to have used the original steering wheel and planned to restore it, but it was too far gone. I purchased a new chrome steering wheel and mounted it to the old steering shaft for the pulley steering system. I also managed to salvage the Lone Star center cover and attach it to the new wheel. I replaced the cable and re-rove it to get my steering system set up. If you’re not familiar with a cable and pulley steering system, I think it’s best described in one of my famous paint diagrams. 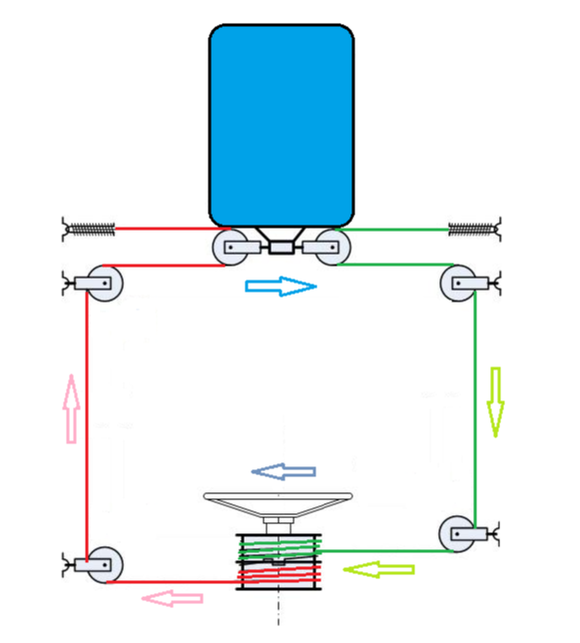
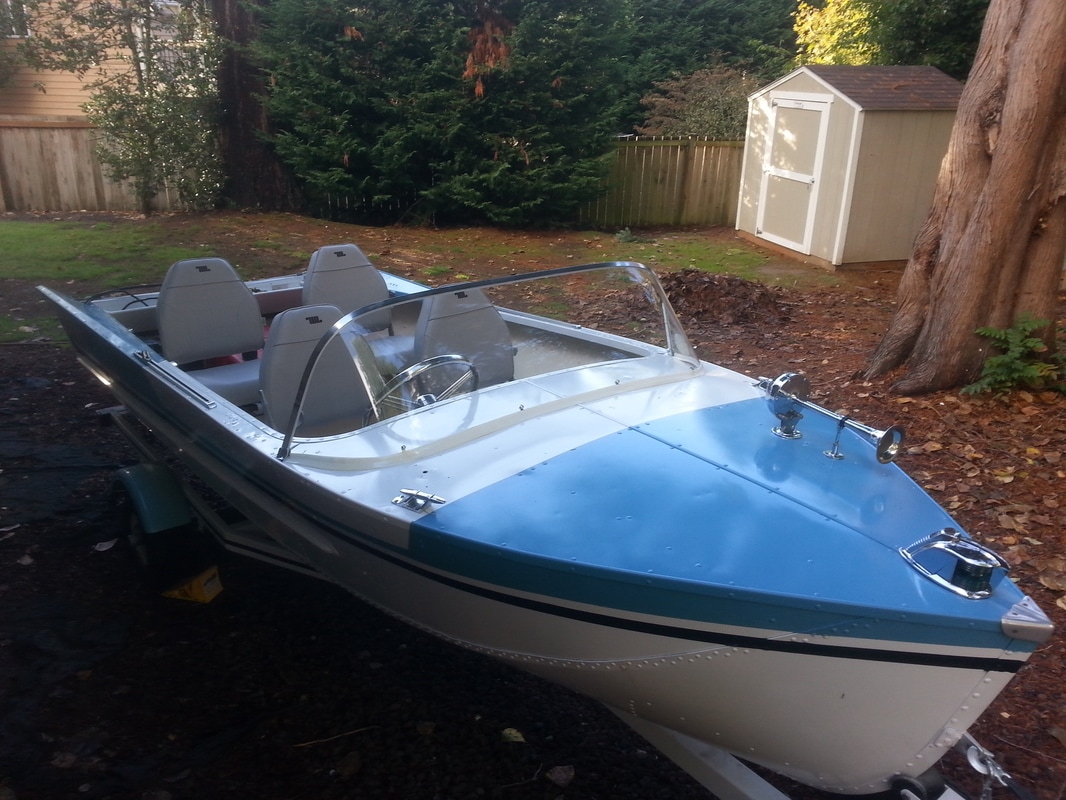
Turning the wheel to the right will rotate the drum of cable, which releases cable on the starboard side and tightens the cable on the port side. That moves the front connection point of the engine to the left, thus pushing your stern to the left and turning you to the right. I just had to mount the engine and install the control box with new control cables to have a fully operational boat. The chrome pieces were all in reasonably good condition and, aside from reworking some of the electronics, I just had to remember where they all went. My wife bought me a new old stock Taylormade acrylic windshield that fit just about perfectly. And with the addition of a few vinyl decals and the registration number, I had something that could pass for a boat.
  I wouldn’t call this a true restoration, but it is fairly period correct and met my desires for a cool runabout that would turn a few heads for a very reasonable amount of money. While it’s close to "finished," I've learned that as long as I have a boat, I will always have a project or two that still needs doing.
Until next time, here’s wishing you fair winds and following seas. Everyone is always asking me what books I would recommend they have on hand for the perfect nautical reference library…well, that’s not strictly true. No one has ever actually asked me that question, but I think they should. So I’m going to go ahead and answer it. It’s my blog and I’ll do what I want!  Obviously you aren’t going to stick a stack of books in a storage compartment on your bass boat (though that would be pretty cool), but on a houseboat or other large vessel you have the space to keep some useful references aboard. I installed a bookshelf in the main salon on Serenity with this reference library in mind. If you don’t have a houseboat of your own, you can always build your reference library at home; I have both. Even the saltiest among us needs a little refresher once and a while, but what references are the most helpful when you’re out on your houseboat? 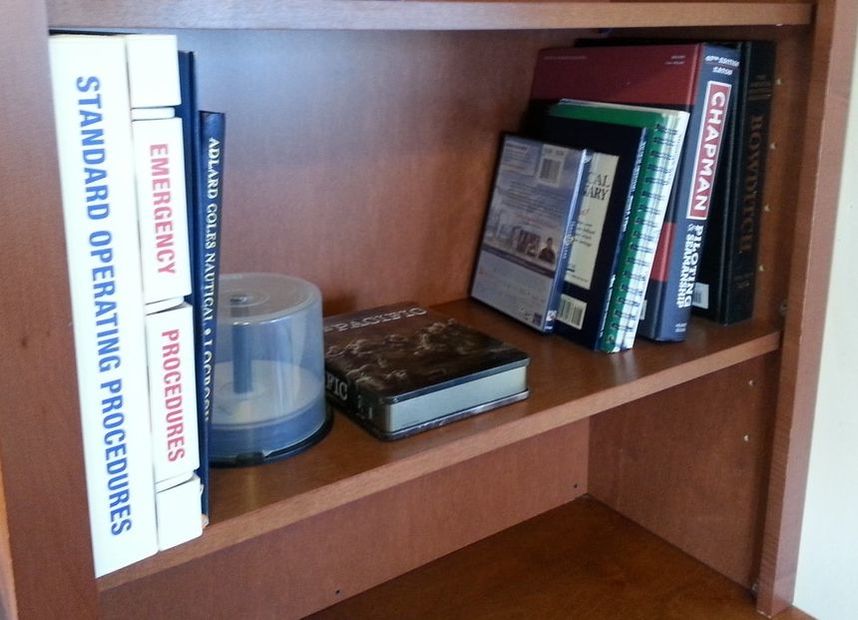  Since top ten lists seem to be so popular and I want to be popular too, below you will find my top ten recommendations for inclusion in your houseboat’s Reference Library.
Seriously, there are tons of other books and references that could be useful, but I think the above six are the real foundation of a good maritime reference library. I’d be curious to know what your suggestions are for inclusion in a maritime reference library (not really, but it seems polite to ask); so go ahead and post your recommendations in the comment section. Maybe we can get this up to a top ten list yet. Oh, oh, oh, I know…it’s a seminal six list…nope still not as good as a top ten, maybe it’s the “t’s” that make them so cool… Oh well. Until next time, here’s wishing you fair winds and following seas. |
AuthorBrent Pounds has over a decade of experience in the maritime industry and has been involved in recreations boating since he was a child. See the About section for more detailed information. Archives
October 2016
Categories
All
|


 RSS Feed